Showing posts with label chocolate. Show all posts

Monday, September 8, 2014

Almond ChocolateTart

Since I was visiting the Old Port, my daughter asked me to buy this dessert for her. However when I went to the bakery, I was told it was out of season. So, I thought I could get out of it that easy. I said to my daughter, "Sorry Sweetie but they didn't have any until this Fall." Well, my daughter than suggested for me to make it. Reluctantly, I told her I would. It is very good. To me, I love anything with chocolate and nuts. It is a very rich dessert.
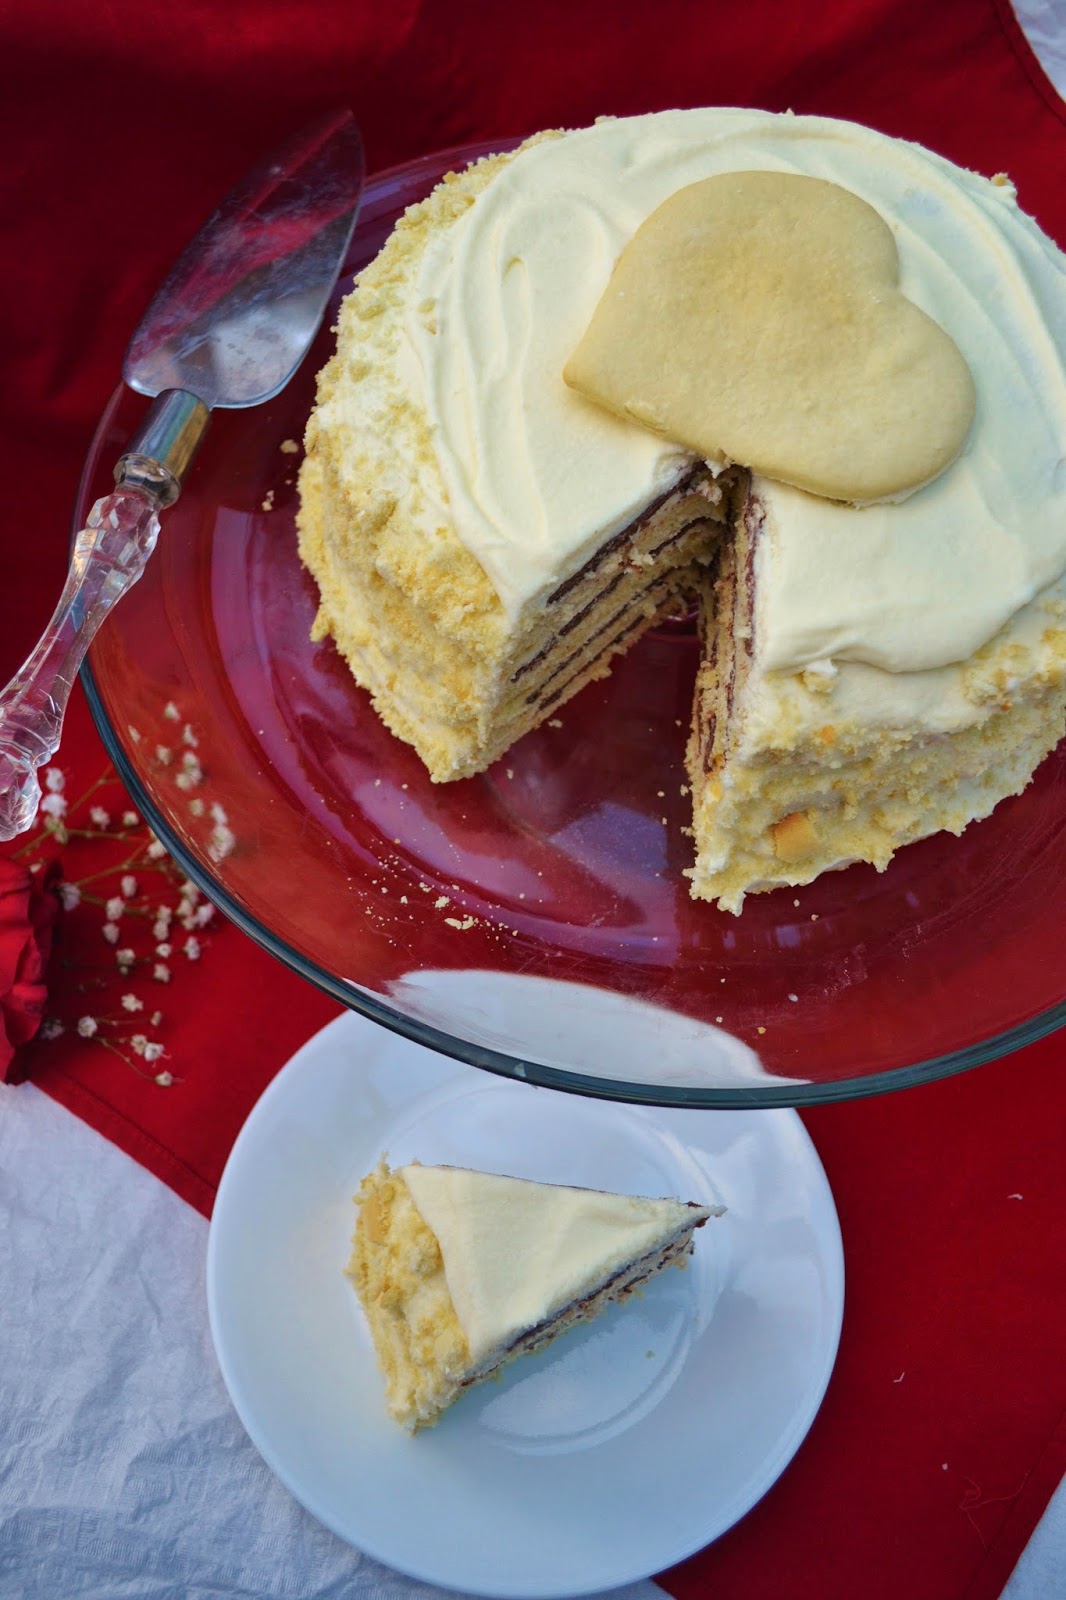
Almond Chocolate Tart
One 9 inch tart shell
1/2 cup sugar
1/3 cup milk
4 Tbsp unsalted butter
1/4 tsp vanilla extract
1/8 tsp salt
1 1/2 cups almonds, toasted and finely chopped
1 egg, beaten
2/3 cups bittersweet chocolate, finely chopped
3 Tbsp half and half
garnish: toasted almonds

Directions: 
  1. In a small saucepan, combine the sugar, milk, butter, vanilla, and salt. 
  2. Bring the mixture to a boil over medium heat. 
  3. Remove the saucepan from the heat and stir in the chopped toasted almonds.
  4. Stir to combine and set aside to cool.
  5. Add the egg and mix well.
  6. In a tart pan, line with the tart shell.
  7. Pour the almond mixture evenly into the tart shell. 
  8. Bake the tart for 20 minutes. Rotate the tart.
  9. Bake the tart for another 15 minutes or until golden brown. 
  10. Remove from the oven and allow to cool completely.
  11. Add the chopped chocolate into a small heatproof bowl. Set aside.
  12. In a small saucepan, heat the half and half to a boil. 
  13. Pour the heated half and half over the chopped chocolate. Stir until smooth.
  14. Pour the ganache evenly over the almond tart.
  15. Garnish with the additional toasted almonds.
Recipe adapted from the Standard Baking Co. Pastries Cookbook.

One year ago............................I made Corn Salsa.
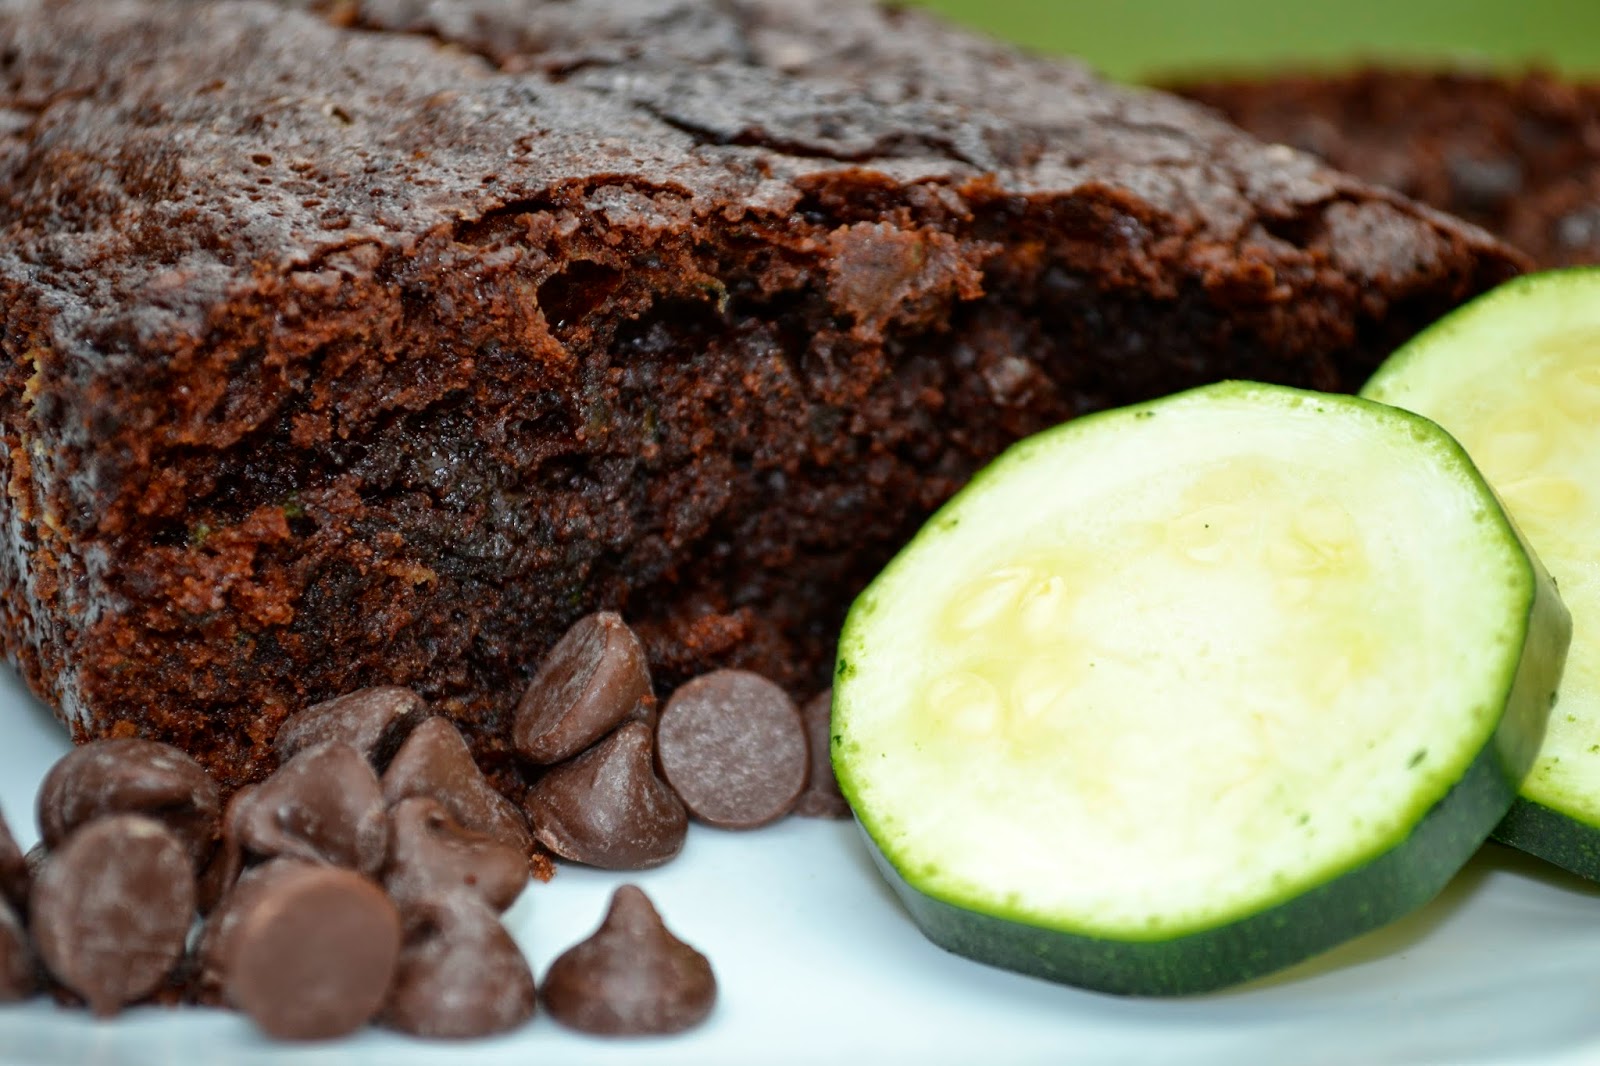
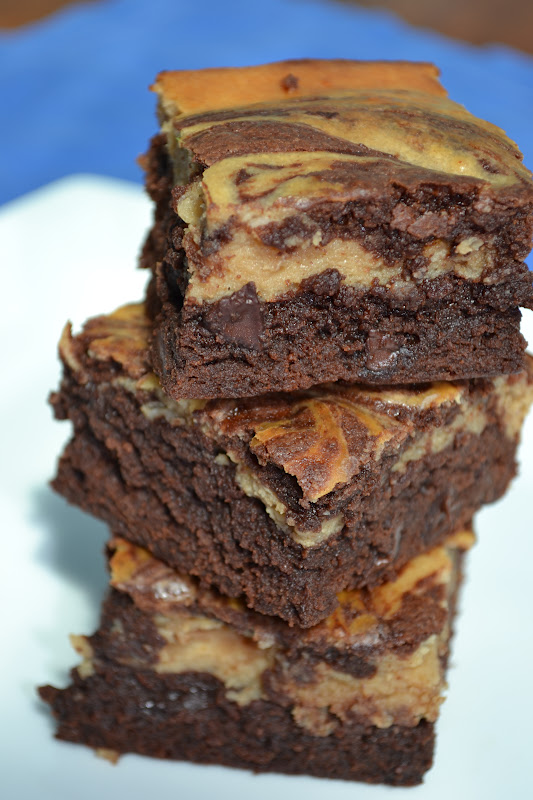
Two years ago..........................I made PB Brownies.
Did you already know.......................
-The Old Port is located in Portland, Maine by the waterfront.
-The Old Port has cobbled streets and historic, brick buildings.
-In the Old Port, there are an assortment of stores, restaurants, and cruises.

Wednesday, August 6, 2014

Nutella Chocolate Zucchini Bread

Lately, my husband is complaining that I should not hid vegetables in his food.  He thinks I should disclose any added vegetables to his food so he has a choice. So, I figured I would see his reaction when I asked him to try my chocolate zucchini bread. He hesitated in taking the bread and I had to convince him that he would like it. He did and couldn't believe the bread had a vegetable in it. My sister said that she couldn't see any zucchini in her piece. I said it's because I coated it in cocoa powder. I even used two medium zucchinis for this bread.
Nutella Chocolate Zucchini Bread
1/2 cup cocoa powder
2 cups sugar
2 cups zucchini, shredded
1/2 cup vegetable oil
1/2 cup Nutella
3 eggs
1 tsp vanilla extract
2 cups flour
1 tsp baking soda
1 tsp salt
1 tsp ground cinnamon
1 cup chocolate chips

Directions:
  1. Preheat oven to 350 degrees F.
  2. Spray two bread pans with nonstick baking spray.
  3. Dust the bread pans with cocoa powder and tap off any excess cocoa powder.
  4. In a large bowl, combine the cocoa powder, sugar, and shredded zucchini.
  5. Add the vegetable oil, Nutella, eggs, and vanilla extract. Stir to incorporate.
  6. Add the flour, baking soda, salt, and cinnamon. Stir until combined.
  7. Fold in the chocolate chips.
  8. Evenly distribute the batter between the two pans.
  9. Bake the bread for 55 minutes or until a toothpick inserted in the middle comes out clean.
Recipe adapted from All Recipes.

One year ago..........................I made Double Roasted Chicken.
Two years ago........................I made Peacharine Cream Cheese Tart.
Did you already know......................
-Zucchini is native to Central America.
-The largest recorded zucchini weighed 65 pounds.
-Zucchini can be eaten cooked or raw.

Friday, February 14, 2014

Spartak Cake

Do you have any plans for today? Do you go out or stay in? Do you ask anyone to be your Valentine whether it is your spouse, special someone, friend, niece, yourself? Can you tell I really like Valentine's Day? It is a nice way for me to express to the people you love. For me, it is my family. I don't just buy my husband a gift but also the kids too. I even make my family a nice dinner. It is always Chicken Parmesan with Fettuccine Alfredo. If I'm going to change anything, it will be the dessert. Maybe this dessert? To make this cake, I used two different sources since I wanted to make two different types of layers. It is a pretty cake. 
Spartak Cake
White layer:
1 egg
1 cup sugar
4 Tbsp butter, softened
1/3 cup milk
1 tsp baking soda
3 cups flour

Directions:
  1. In a heatproof medium bowl, beat together the egg and sugar. 
  2. Add the butter, milk, and baking soda. Mix until smooth.
  3. Place the bowl on top of a pot with boiling water to make a double boiler.
  4. Heat the mixture for 10 minutes. Stir continuously.
  5. Remove the bowl from the heat and immediately add the flour. Mix well.
  6. Set aside and allow to cool for 20 minutes.
  7. Preheat the oven to 350 degrees F.
  8. On a floured surface, roll out the dough to about a 1 inch thickness.
  9. Line a base of a springform pan with parchment paper.
  10. Place the dough over the base of a springform pan.  
  11. Cut around the excess dough from around the springform base.
  12. Bake the dough for about 5 minutes or until the dough is golden brown. 
  13. Remove from the oven and allow to rest for several minutes before transferring to a wire cooling rack.  
  14. Repeat rolling out the rest of the dough steps 8 through 12.
  15. Any remaining scraps bake since it is needed for the sides of the cake.
  16. Allow the cake rounds to cool completely.
Chocolate layer:
3/4 cups butter1/3 cup milk
1/4 cup cocoa powder
1 cup sugar
1 tsp baking soda
1 Tbsp vinegar
2 cups flour
1 egg

Directions:
  1. In a sauce pan, melt the butter, milk, and cocoa powder over low heat while stirring.
  2. Once the mixture is smooth, stir in the sugar and then remove from heat.
  3. Allow to cool for about 5 minutes.
  4. In a small bowl, combine the baking soda with the vinegar.
  5. Stir the baking soda mixture into the cooled slightly butter mixture. 
  6. Add one cup of flour to the butter mixture. Stir until incorporated.
  7. Add one egg and stir. 
  8. Stir in another cup of flour. Mix well. The batter should become a soft dough.
  9. Form a ball with the dough and wrap with plastic wrap. Press down onto the dough to disk. Refrigerate for 20 minutes.
  10. On a floured surface, roll out the dough to about a 1 inch thickness.
  11. Line a base of a springform pan with parchment paper. 
  12. Place the dough over the base of a springform pan.  
  13. Cut around the excess dough from around the springform base.
  14. Bake the dough for about 4 minutes or until the dough is baked through.
  15. Remove from the oven and allow to rest for several minutes before transferring to a wire cooling rack. 
  16. Repeat rolling out the rest of the dough steps 8 through 12.
  17. Any remaining scraps bake since it is needed for the sides of the cake.
  18. Allow the cake rounds to cool completely.
Frosting: 
12 oz. unsalted butter, softened
1 can sweetened condensed milk
8 oz. cream cheese, softened
pinch of salt 

2 cups whip cream

Directions:
  1. In a large bowl, whisk the butter and condensed milk until incorporated.
  2. Add the cream cheese and salt. Mix until incorporated.
  3. Fold in the whip cream.
Cake Assembly:
  1. Frost one completely cooled white cake layer with the frosting.
  2. Place onto cake stand/plate.
  3. Frost a chocolate cake layer with frosting and place on top of the white cake layer.
  4. Repeat frosting a white cake layer and place on top of the chocolate layer.
  5. Continue frosting the layers and alternating between the white layer and the chocolate layer until there is four layers left.
  6. With the remaining frosting, completely cover the top and the sides with the frosting. 
  7. With the remaining cake layers, crush into crumbs.
  8. Cover the sides of the cake with the cake crumbs.
  9. Refrigerate the cake for 10 hours before serving.
The white layer and frosting is adapted from Natasha's kitchen. The chocolate layer is adapted from Grab and Go Recipes.

One year ago...............................I made Vanilla Cupcakes.
Two years ago.............................I made Heart Pie Pops.
Did you already know...................
-Я люблю́ тебя́ means I love you in Russian.
-To say I love you in Russian is pronounced "lyoo-BEET".
-Check out USAToday for pickup lines said in Russian. 

Happy Valentine's Day!

Monday, August 19, 2013

Fallen Hot Chocolate Cake

Sometimes I change a recipe because I really don't want to run to the store for a minor ingredient. A perfect example is I needed 2 Tbsp unsweetened cocoa powder. Now, the last time I looked I thought I had two containers of cocoa powder. Yes, I did just clean out my pantry so shouldn't I remember I needed to pick up more cocoa powder? Shouldn't I have placed something like that on my shopping list? Well, I didn't and I was in the middle of making this recipe when I realized my mistake. I figured I had half an hour before the store closes. Then I realized I had tons of hot chocolate packages. Why not? I will say this flourless dessert came out so good. We caught my son licking his plate. I know manners dictate that you shouldn't lick your plate but there are occasions it happens. This dessert is one of them. My husband said this is probably one of the best desserts I have ever made. It is rich. It is smooth like a souffle or mousse. It is delicate. All I know is it's delicious.
Fallen Hot Chocolate Cake
1 1/8 cup sugar plus more for pan and topping
6 large eggs
1 package hot chocolate mix
1 tsp vanilla extract
3/4 tsp salt
10 oz. 60% bittersweet chocolate chips 
1/2 cup unsalted butter
 2 Tbsp vegetable oil
1 cup chilled heavy cream

Directions:
  1. Preheat oven to 350 degrees F.
  2. Spray a 9 inch springform pan or eight 4" ramekins with nonstick cooking spray. Dust with sugar. Tap out any excess. Set aside.
  3. Separate 4 egg whites from the yolks. Placing the egg whites in one medium bowl and the egg yolks into another medium bowl.
  4. To the egg yolk bowl, add the hot chocolate mix, vanilla, salt, and 1/2 cup sugar. Mix until smooth. Set aside the two bowls.
  5. In a double boiler, simmer water over medium heat. In the top pan, combine the chocolate chips, vegetable oil, and the butter. 
  6. Stir the chocolate often until it is melted. Remove from heat.
  7. Allow the chocolate to rest for 1 minute before gradually pour the melted chocolate into the egg yolk mixture while whisking continuously. Mix well and set aside.
  8. With a mixer on high speed, beat the egg whites until frothy. Slowly beat in 1/2 cup sugar and continue to beat until firm peaks form.
  9. Gently, fold half of the egg whites into the chocolate mixture until just incorporated. Gently fold in the remaining egg whites and mix until just incorporated. 
  10. Evenly divide the batter between the prepared ramekins or gently pour into the prepared springform pan.
  11. Carefully place the pans into the oven. 
  12. Bake for 35 to 45 minutes or until the top is puffed and the cake is starting to crack. The cake should be pulling away from the edge.
  13. Transfer the cake onto a wire rack to cool completely. The cake should collapse in the center.
  14. Before serving, whisk the heavy cream with the remaining 1/8 cup of sugar until soft peaks form. 
  15. Serve the fallen cake with the whipped cream.
Recipe adapted from Bon Appetit March 2013 magazine.

One year ago.........................I made Zucchini Fries.
Did you already know...........
-This recipe was inspired by Richard Sax's chocolate cloud cake.
-Richard Sax was author to eight cookbooks plus contributor to several magazines including Bon Appetit.
-He was founding chef-director of Food & Wine magazine.

Wednesday, July 31, 2013

Lots of Chocolate Chips Cookies

I love chocolate chip cookies but sometimes there isn't enough chips. I wanted to make the chocolate chip cookies with a lot of chips in each bite like when you eat chocolate chip ice cream. So, I took a cup of semi sweet mini chocolate chips and chopped them. Then I chopped them some more. I didn't want to shred the chocolate since I still wanted chips just a lot smaller chips. I made this recipe and my husband family ate the whole batch. Since I wasn't able to take any photos, I made the recipe again and hid a couple of cookies. My youngest daughter still found them but she had to wait until I had taken my photos. She did not want to wait. I think her strategy was she was hoping I would make them a third time within a week. Yes, she liked them that much.
Lots of Chocolate Chips Cookies
2 sticks unsalted butter, softened
1 cup brown sugar
1/2 cup sugar
2 large eggs
1 Tbsp vanilla
2 1/2 cup all purpose flour
2 tsp baking soda
1 tsp salt
1 cup semi sweet mini chocolate chips, chopped several times

Directions:
  1. Preheat oven to 350 degrees F.
  2. Line a baking sheet with parchment paper and set aside.
  3. In a large bowl, cream the butter with the brown sugar and sugar.
  4. Add the eggs one at a time. Mix until incorporated.
  5. Add the vanilla and mix well.
  6. Add the flour, baking soda, and salt. Mix until incorporated.
  7. Fold in the chopped chocolate chips.
  8. Refrigerate for 1 hour.
  9. Scoop the chilled dough into about 2 Tbsp balls onto the cookie sheet spaced about 3 inches apart.
  10. Bake the cookies for about 15 minutes or until the edges are golden brown.
  11. Remove from the oven and allow to cool on the pan for 5 minutes before transferring to a wire rack to cool completely.

One year ago........................I made Bangers and Mash.
 Did you already know..........
-Ruth Wakefield owned a tourist lodge named The Tollhouse Inn.
-She was making cookies when she realized she was missing an ingredient so she chopped a chocolate bar and created chocolate chip cookies.
-The chocolate bar that was used had been given to Ruth Wakefield by Andrew Nestle of the Nestle Chocolate Company.

Friday, July 26, 2013

Chocolate Cupcakes

I love to use pretty cupcake liners. Now, I make sure I don't use them for my son but he was alright with the Spider-man liners I picked out for him. Well, I decided to try these fancy kind of liners. They are very pretty but a little more challenging to use. If I use them again, I will pipe the batter in the center of the liners. The kids don't mind if some of the batter ran down the sides of the liners but I would rather they look a little pretty if I give them away. Also, I would double line the cupcake holder or use a lighter batter next time. The last thing is the cupcakes are a little harder to frost. In the end, all the cupcakes were eaten so that is the best sign of all. No matter what liners you use these are good cupcakes but they taste even better the next day.
Chocolate Cupcakes makes about 16 cupcakes
2 cups all purpose flour
2 1/4 sugar
3/4 cups cocoa powder
2 tsp baking soda
1 tsp baking powder
1 tsp salt
1 cup buttermilk
1/2 cup vegetable oil
2 eggs
1 tsp vanilla extract
1/4 cup brewed hot coffee

Directions:
  1. Preheat oven to 350 degrees F.
  2. Line a cupcake liner in a muffin tin.
  3. In a large bowl, mix the flour, sugar, cocoa, baking soda, baking powder, and salt until combined. 
  4. In a small bowl, combine the buttermilk, oil, eggs, and vanilla.
  5. Slowly, add the buttermilk mixture to the flour mixture. 
  6. Add the coffee and mix until just combined. 
  7. Evenly fill the cupcake liners about 3/4 full with the batter.
  8. Bake the cupcakes for 20 minutes or until a toothpick inserted in the middle comes out clean.
  9. Allow to cool completely before frosting.
Recipe adapted from Barefoot Contessa.
 
One year ago...........................I made Raspberry Cheesecake.
Did you already know.............
-Cupcakes in England are known as fairy cakes.
-Fairy cakes are baked in bun tins which are muffin tins.
-Fairy cakes are smaller versions with icing instead of American cupcakes with frosting.

Wednesday, July 24, 2013

Nutella Chocolate Biscuit Cake

Since the royal baby has arrived, I thought it would only be fitting to make a chocolate biscuit cake like Prince William had for his groom's cake. I did make this cake last year and it was well received in my house (which translates the cake was gone within the day). To celebrate the new addition, I decided to make a new version of this recipe. I was leaning towards peanut butter for my husband but peanut butter is not European at all. I figured Nutella was the perfect addition. Oh, this cake is so delicious. I really like the Nutella in it. This version of the recipe did not last long either. It really is such an easy recipe but so rich. I used a heart shape mold for this dessert. The digestive biscuits were found in a local Maine supermarket in the International aisle so if we have them then you really should be able to find them. I also found them at a British goods store but they are cheaper at the supermarket. (To me and my sister, they taste similar to a graham cracker.) The best part of this cake is it doesn't require a oven which is best during these summer days.
Nutella Chocolate Biscuit Cake
Cake:
1 (8.8 oz.) package of digestive biscuits (I used McVities) crush
1 1/3 cup mini semi sweet chocolate chips
2/3 cups heavy cream
3 Tbsp unsalted butter
1 cup Nutella

Frosting:
1 cups mini semi sweet chocolate chips
1/3 cups heavy cream
1 Tbsp butter
1 Tbsp agave syrup
1/4 cup Nutella for drizzle

Directions:
  1. Spray a spring form pan with nonstick cooking spray. (I used a heart shape mold in the pan.) Set aside.
  2. In a medium bowl, place the 1 1/3 cup of chocolate chips. Set aside.
  3. In a medium pot, heat the 2/3 cups of heavy cream with the 3 Tbsp butter over medium heat. Stir until the mixture begins to boil.
  4. Pour the hot cream carefully over the chocolate chips and stir until smooth.
  5. Stir in the 1 cup of Nutella. Mix well.
  6. Fold in the crushed digestive biscuits into the melted chocolate.
  7. Spoon the mixture into the spring form pan.
  8. Gently, press the chocolate mixture into the pan.
  9. Refrigerate for at least 3 hours. (I refrigerated overnight.)
  10. Remove the pan form the refrigerator and carefully invert the cake onto a serving plate. Set aside.
  11. In a small bowl, place the 1 cup of chocolate chips. Set aside.
  12. In a medium pot, heat the 1/3 cups of heavy cream with the 1 Tbsp butter over medium heat. Stir until the mixture begins to boil.
  13. Remove from heat and stir in the agave syrup.
  14. Pour the hot cream carefully over the chocolate chips and stir until smooth.
  15. Evenly, pour the melted chocolate over the inverted cake. Gently, coat the top and sides of the cake. 
  16. In a small bowl, microwave about 1/4 cup of Nutella for 20 seconds.
  17. Drizzle the heated Nutella over the top of the cake. 
Recipe adapted from Betty Crocker.

One year ago.............................I made Raspberry Cream Sandwiches.
Did you already know...............
-Prince William is the 3rd grandson of Queen Elizabeth.
-The royal baby boy is the 3rd great grandson of Queen Elizabeth.
-As a member of the English Royal Family, His Royal Highness Prince of Cambridge will not commonly use a last name but will be known by the countries names in which he rules over.

Friday, July 19, 2013

No Bake Chocolate Peanut Butter Candy Bars

In this household, anything containing peanut butter is popular. Since my niece is staying with us, peanut butter is even a bigger hit. Even though my husband tried, I think my niece ate the majority of this dessert. Now, I can't be certain since I did see him eating some for breakfast. If I had told on him, then my niece would have joined him and then I would have been in trouble with my sister. I think its funny how as adults we can break certain rules but only as long as we aren't caught by the children. These would be great for breakfast too but don't tell the children I said so. (I did learn my niece did sneak one for breakfast too.)
No Bake Chocolate Peanut Butter Candy Bars
24 Oreo cookies
4 cups miniature marshmallows
1/4 cup unsalted butter
1 can (14 oz.) sweetened condensed milk
1 bag (10 oz) peanut butter chips
1/4 cup creamy peanut butter
10 miniature Snickers bars, chopped roughly
1/2 cup miniature semi sweet chocolate chips

Directions:
  1. Line the bottom and sides of a 13x9 baking pan with wax paper.
  2. In a food processor, pulse the cookies until finely chopped.
  3. In a large saucepan, cook the marshmallows and butter over low heat. Stir constantly until melted.
  4. Stir in the crushed cookies into the melted marshmallow mixture.
  5. Press the marshmallow cookie mixture into the baking dish.
  6. In a microwave safe bowl, microwave the condensed milk with the peanut butter chips for 30 seconds. 
  7. Stir and microwave for another 30 seconds.
  8. Stir until smooth. If needed, microwave for another 15 second increments until the mixture is smooth. Don't overcook.
  9. Stir in the peanut butter and Snickers. Mix well.
  10. Spread the peanut butter mixture over the marshmallow cookie mixture.
  11. In a microwave safe bowl, microwave the chocolate chips for 30 seconds. Stir well.
  12. Spread the chocolate over the peanut butter layer.
  13. Refrigerate for 1 hour or over night.
  14. Once chilled, lift the wax paper with the dessert from the pan and cut into bars.*
Recipe adapted from Betty Crocker.
*Tip: The marshmallow cookie layer is hard to cut so use a sharp knife.

One year ago..............................I made
Did you already know................
-Betty Crocker was created as a way for Washburn Crosby Company (later known as General Mills) to respond in a friendly manner to customer's inquires. 
-The Surname Crocker was chosen since it was the surname of William G. Crocker, a recently retired director of the company.
-A voice and a portrait of her was created by the company.

Thursday, December 13, 2012

PB Candy Bar Brownies

I saw recently a sign that said.........Naughty or Nice Naughty or Nice Decisions, Decisions. Well, I felt very naughty making these cookies but very nice since my husband requested them. Why naughty? Because normally I am happy with sampling my baking and then sharing but I didn't want to share these brownies. They are so good. The brownies crust is made from cookies and it contains candy bars. Now, you know why I didn't want to be nice and share.
Peanut Butter Candy Bar Brownies
1 (16 oz) package of Nutter Butter Cookies, crushed
1/2 cup butter, melted
1 (14 oz) can sweetened condensed milk
1/2 cup smooth peanut butter
1 Tbsp vanilla extract
10 Peanut Butter Cups, coarsely chopped
2 Butterfingers, coarsely chopped
1 cup semisweet mini chocolate chips

Directions:
  1. Preheat the oven to 350 degrees F.

  2. In a medium bowl, combine the crushed cookies and butter.
  3. Press the cookie mixture into a bottom of a greased parchment lined 13x9 pan.
  4. Bake the cookie mixture for about 6 minutes.
  5. In a medium bowl, combine the condensed milk, peanut butter, and vanilla until smooth. Set aside.
  6. Remove the cookie mixture from the oven. Sprinkle the peanut butter cups, the Butterfingers, and chocolate chips over the warm crust. 
  7. Pore the condensed milk mixture over the cookie and chocolate mixture. 
  8. Bake the brownies for about 27 minutes or until lightly browned.
  9. Remove the brownies from the oven and allow to cool completely before slicing.
Recipe adapted from My recipes website.

One year ago................................I made Flour Tortillas.
Did you already know..................
-The Be A Good Cookie Spatula is made from the OXO company. 
-The OXO company donates half of all proceeds from the sale of the spatula to pediatric cancer research.
-The spatula is the most popular item on the OXO website.

Wednesday, November 7, 2012

Chocolate and Oreo Cake

Did you vote? My husband wore his shirt that said Truth and Justice- Vote for Superman. He wanted to make sure everyone knew who had his vote. We brought our youngest children with us so they can be there. Since I finished first, I had my children stand with me at the exit doors. When someone passed us, my son would tell them he voted for Superman. He does love his Dad. Most people smiled at him but one person asked him why he didn't vote for Batman. My son looked at her like why? So, I replied that he would vote for Spiderman if he had the choice. My seven year old son than says that he would vote for Spiderman and Captain America since he has America in his name. The person told him that he couldn't vote for all those people and he said yes he could. I smiled and said he was voting for Congress too. What super hero would have your vote? Mine would be Wonder Woman!
Whoever wins, I just have hopeful thoughts for our nation. Hopefully the economy will improve in our nation and all nations throughout the world. For my positive thoughts, lets eat cake! How about a cake with chocolate and Oreo. Everyone would have something they liked or at least the pink flowers. This cake was really good and I had lots of great compliments. I made some cupcakes with the left over batter. Share the cupcakes and eat the cake!
Chocolate and Oreo Cake
Oreo Layer:
2 2/3 cup all purpose flour
1 1/2 cups sugar
1 Tbsp baking powder
4 egg whites
1 cup milk
1 Tbsp vanilla
2/3 cup salted butter, softened

1 cup crushed Oreo

Directions:


  1. Preheat oven to 350 degrees F.
  2. Line the bottom of an 8 inch cake pan with parchment paper.
  3. Spray the parchment paper with nonstick cooking spray and dust with flour.
  4. In a large bowl, sift together the flour, sugar, and baking powder.
  5. In another bowl, mix together the egg whites, milk, and vanilla.
  6. To the flour bowl, add the butter and mix until it starts to combine.
  7. Slowly add the milk mixture and mix until completely combined.
  8. Fold in the crushed Oreos.
  9. Bake the cake for 35 minutes or until done.
Chocolate Layer:
1 cup unsalted butter
2 cups water
1 cup vegetable oil
4 cups sugar
1 cup unsweetened cocoa powder
4 cups all purpose flour
4 large eggs
1 cup buttermilk
1 Tbsp baking soda
1/2 tsp salt
1 Tbsp vanilla extract
1/4 cup crushed Oreo

Directions:
  1. Preheat oven to 350 degrees F.
  2. Line the bottom of two 8 inch cake pan with parchment paper.
  3. Spray the parchment paper with nonstick cooking spray and dust with flour.
  4. In a medium saucepan, combine the butter, water, and oil. Heat over medium heat.
  5. In a large bowl, whisk together the sugar, cocoa, and flour.
  6. Pour the butter mixture into the sugar mixture and whisk until smooth.
  7. Whisk in the eggs, one at a time.
  8. Whisk in the buttermilk followed by the baking soda, salt, and vanilla.
  9. Fold in the 1/4 cup of crushed Oreos.
  10. Fill the cake pan 3/4 full with the batter. 
  11. Bake the cakes on the middle rack for 35 to 40 minutes or until a toothpick inserted into the center of the cakes comes out clean.
  12. Remove the cakes and allow to cool for 15 minutes before inverting the cakes onto a baking rack.
  13. Allow the cakes to cool at least 2 hours before frosting.
Frosting
1 cup butter, softened
2 tsp vanilla
4 1/2 cups powder sugar
4 tsp milk
food coloring


Directions:


  1. In a medium bowl, cream the butter and vanilla together.
  2. Slowly, add the powder sugar and beat until combined.
  3. Add the milk to the butter cream and mix until smooth.
  4. Add a few drops of food coloring. Mix well. Set aside until ready to use.
To assemble:
  1. Place a chocolate layer on the serving platter.
  2. Add a layer of frosting. 
  3. Sprinkle 1/2 cup crushed Oreo on top of the frosting. Press down.
  4. Place the Oreo cake layer on top of the crushed Oreo.
  5. Add a layer of frosting.
  6. Sprinkle 1/2 cup crushed Oreo on top of the frosting. Press down.
  7. Place the 2nd layer of chocolate cake on top of the crushed Oreo. Press down.
  8. Frost a thin layer of frosting over the whole cake. 
  9. Pipe the roses onto the cake. (I used this technique from I am Baker.)
  10. Make a border around the top and fill in the center with about 1 cup crushed Oreo.
The Oreo Cake was adapted from this recipe. The Chocolate Cake was adapted from The Pastry Queen cookbook for Tuxedo Cake. The frosting recipe was adapted from Bakerella.
Did you already know..... 
- Superman was first published in Action Comics #1 in 1938.
-Originally, Superman was dedicated to Truth and Justice then in the 1940s it was changed to Truth, Justice, and the American Way.
-Since 1945, Superman's S Symbol has been trade marked by DC Comics (known at the time as National Periodical Publications).

Monday, October 29, 2012

Chocolate Brownie Cookies

My youngest daughter is normally pretty good at being on time. She is ready with time to spare. With my son, I don't know what he does with time. It doesn't matter if he is up early or late. He will still be late. Well, my daughter's last soccer game was moved up a day due to conflicting schedules. This would normally not be a problem except we were suppose to bring a snack to the last game. Since I worked that day, I really needed something quick. While the cookies were baking, my daughter realized that we would be a little late to the game. She was a little upset about it until my youngest son looked at her and announced, "Welcome to my life!" My husband and I just started laughing which made my daughter feel better. I did tell my son the difference was that he did it to himself. My husband and oldest daughter agreed.
In the end, my daughter was rewarded when her friends on her soccer team really liked her dessert. One friend told her that these cookies taste just like brownies and were great. I did hide a few for my grateful husband. If you like brownies from a box, you will love these cookies. If you don't have a lot of time but need a dessert for last minute, you will love these cookies. Oh, how I love brownies anyways but now in a cookie form just make them wonderful! I was in such a hurry that I forgot to add 1 Tbsp of water in the recipe but I was lucky and they still came out great. Welcome to my life!

Chocolate Brownie Cookies (roughly 36 cookies)
1 package of chocolate brownie mix
1/4 cup vegetable oil
2 eggs

Directions:
  1. Preheat oven to 325 degrees F.
  2. Line a baking sheet with parchment paper and set aside.
  3. In a large bowl, combine the brownie mix, oil, and eggs until well blended.
  4. Drop the dough onto the parchment paper by a tablespoonful.
  5. Bake the cookies for 12 to 14 minutes or until the edges are set and the center is still soft.
  6. Allow the cookies to cool for 2 minutes before transferring to a cooling rack. 
Adapted from Hershey's Ultimate Chocolate Brownie Mix box recipe. 

One year ago..................I made Mummy Cake Pops
Even if I'm late, I have great hair!
Did you already know...
-According to the Palmer Hotel, they were the first to create the brownie.
-In 1893, the chefs at the hotel created the dessert at the request of the owner Bertha Palmer.
-Mrs. Palmer asked for a dessert that would not be as messy as a cake that would fit inside a box lunch for the Women's Pavilion at the the World’s Columbian Exposition.

Monday, September 24, 2012

Chocolate PB Cupcakes

I figured I hadn't posted a peanut butter recipe for awhile. Besides blueberry muffins, I think I bake with peanut butter the most. Any time there is a sale, I stock up on peanut butter. It still doesn't last long.
These peanut butter cupcakes were a hit at my house. My daughter asked for this recipe for her birthday. I even tried making a couple with a mini Reese's cooked in the middle but I didn't think it made a difference. These are rich and sweet. I will not be surprised if my husband requests these cupcakes for his birthday.
Chocolate Peanut Butter Cupcakes2 1/4 cups all purpose flour
2 cups sugar
1 cup unsweetened cocoa powder
2 tsp baking soda
1/2 tsp salt
1 Tbsp vanilla extract
2/3 cup vegetable oil
2 tsp white vinegar
2 cups cold water

Directions:
  1. Preheat oven to 350 degrees F.
  2. Line a muffin tin with cupcake liners and set aside.
  3. In a large bowl, whisk together the flour, sugar, cocoa powder, baking soda, and salt. Set aside.
  4. In a medium bowl, whisk together the vanilla, oil, vinegar, and water.
  5. Slowly, whisk the vanilla mixture into the dry flour mixture. Do not overmix. The mixture will be very wet.
  6. Fill the cupcaker liners 2/3 full.
  7. Place the muffin tin in the oven for 20-24 minutes or until a toothpick inserted in the center comes out clean.
  8. Remove the muffins from the oven and allow to cool for 10 minutes.
  9. Remove the cupcakes and place on a wire rack to allow to completely cool before frosting.
Recipe adapted from Joy the Baker with the Peanut Butter Frosting recipe.
 Did you already know...
-In 1928, Harry Burnett Reese began to make peanut butter cups in Hersey, Pennsylvania.
-H. B. Reese and his wife Blanche had 16 children.
-The Reese's peanut butter cups were first sold to department stores in bulk for resale. 
-Later, Reese's peanut butter cups were later sold individually in 1 cent to 5 cent sizes. 

Monday, September 17, 2012

Chocolate Chip Pecan Cookies

I use to try to read nightly. Sometimes I am able to achieve this goal but most nights I'm just too tire. I recently purchased Baking from my home to yours by Dorie Greenspan. I have been looking at it nightly. I carry it with me from room to room. It is a great workout since it is not a tiny cookbook. I think I'm going to have to work out more since everything looks so delicious. 
Of all the recipes to bake first I picked her chocolate chip cookies. How could I not? It calls for pecans and she named the recipe her best chocolate chip cookie. I even shared and my family thought they were perfect. They are not crisp but not too soft. They have the prerequisite gooey inside that any chocolate chip cookie should have. Boy, these cookies are good.
Chocolate Chip Pecan Cookies
2 cups all purpose flour
3/4 tsp salt
3/4 tsp baking soda
2 sticks (8oz.) unsalted butter, softened
1 cup sugar
2/3 cup brown sugar
3 tsp vanilla extract
2 eggs
12 oz. semi-sweet chocolate chips
1 1/2 cups pecans, finely chopped

Directions:
  1. Place the rack in the center of the oven.
  2. Preheat oven to 375 degrees F.
  3. Line two baking sheets with parchment paper.
  4. In a medium bowl, whisk together the flour, salt, and baking soda. Set aside.
  5. In a large bowl, cream the butter until smooth.
  6. Add the sugar and brown sugar to the butter. Blend well.
  7. Add the vanilla to the butter mixture and mix.
  8. Add the eggs one at a time beating for 1 minute after each egg.
  9. Slowly, add the dry ingredients in 3 batches to the butter mixture. Mix only until just incorporated before adding the next batch.
  10. Slowly, fold in the chocolate and pecans.
  11. Refrigerate dough for 20 minutes.
  12. Spoon a Tbsp of the chilled dough onto the baking sheets. Space the dough 2 inches apart. (Place the remaining dough into the refrigerator until the other cookies are removed from the oven.)
  13. Bake the cookies one sheet at a time for 5 minutes before rotating. 
  14. Then bake the cookies for another 5 to 7 minutes or until the edges are brown and the center is golden. 
  15. Pull the cookies from the oven and allow the cookies to cool for 1 minute before carefully transferring the cookies to a wire rack to cool.
 Recipe adapted from Baking by Dorie Greenspan.
Did you already know...
- Dorie Greenspan is known for her cookbooks and working with other famous chefs including Pierre Herme and Julia Child.
-Dorie Greenspan has recently opened a retail bakery named Beurre & Sel in New York. 
-Beurre & Sel means Butter and Salt.

Friday, September 7, 2012

PB Brownies

When I am really tired, I have a bad habit of calling people by the wrong name. Normally, it is no big deal. I have on occasion called all of my children by their sibling's name. The children just answer me. They do not even correct me. I have even introduced myself by the wrong name once. I don't even realize I did it. The problem comes when I call my husband by the wrong name. Well, the other night I happen to call my husband by my brother in laws name. Without correcting me, he just answered, "Sweetie, you can call me by any name you want as long as you continue to cook this good!"
One of the recipes my husband was referring to are these brownies. They are dense and chocolatey with the added bonus of peanut butter. These brownies have been requested again. They were gone fast. My oldest daughter ate one and she was in heaven even if I recently called her by my sister's name.
Peanut Butter Marbled Brownies
Peanut Butter Layer:
6 oz. cream cheese, softened
3/4 cup peanut butter
1/4 cup sugar
1 egg
2 Tbsp milk
Chocolate Layer:
1 cup butter, melted
2 cups sugar
2 tsp vanilla extract
3 eggs
3/4 cup unsweetened cocoa powder
1 1/2 cups all purpose flour
1/2 tsp baking powder
1/4 tsp salt
1 cup semisweet chocolate chips
1 Tbsp milk

Directions:
  1. Preheat oven to 350 degrees F.
  2. Grease a 9x13 inch baking pan.
  3. In a medium bowl, beat the cream cheese, peanut butter, 1/4 cup sugar, 1 egg, and 2 Tbsp milk until smooth. Set aside.
  4. In a large bowl, combine the melted butter, 2 cups sugar, and vanilla. 
  5. To the melted butter mixture, add the eggs one at a time. Beat well after each egg. 
  6. In another medium bowl, combine the flour, cocoa, baking powder, and salt. 
  7. Combine the flour mixture to the melted butter mixture.
  8. Remove 1/2 cup of the chocolate batter.
  9. Stir 1 Tbsp milk to the 1/2 cup of the chocolate batter. Set aside.
  10. To the remaining chocolate batter, fold in the chocolate chips.
  11. Spread the chocolate chip batter into the greased baking pan.
  12. Spread the peanut butter filling over the top.
  13. Drop the reserved chocolate batter by spoonful over the peanut butter filling.
  14. Using a knife, gently swirl the topping layer for a marbled effect.
  15. Bake the brownies for 35 to 40 minutes or until a toothpick inserted comes out almost clean.
  16. Allow the brownies to cool completely before slicing into bars.
Recipe adapted from Lick the Bowl Good.

1 year ago post...Snow White Vanilla Birthday Cake
Did you already know...
-About 540 peanuts were used to make a 12 oz. jar of peanut butter.
-60% of consumers prefer creamy peanut butter or chunky.
-In the U.S., peanut butter is the leading use for peanuts.

Tuesday, September 4, 2012

Chocolate Caramel Shortbread

So, I made the shortbread cookies and had a few left over. Alright, I hid them so I could make this recipe. They are chewy and sweet.
I preferred the shortbread cookies without the additional toppings. Now, I will admit I don't care for chocolate chip pancakes or muffins. My youngest daughter and husband loved them. I think they are easier to eat after you make them. To me, they do not taste like a candy bar.
Chocolate Caramel Shortbread Cookies
20 Shortbread cookies
20 pieces of caramel candies
1 Tbsp milk
3 oz. semi sweet chocolate
3 oz. white chocolate

Directions:
  1. Place a piece of foil underneath a wire baking rack to save on clean up.
  2. Spread out the shortbread cookies on a wire rack.
  3. In a microwave bowl, microwave the caramel and milk for 1 1/2 minutes.
  4. Stir the caramel and microwave the caramel for another 30 seconds or until the caramels are melted.
  5. Spread the caramel over the top of the shortbread cookies.
  6. In a double boiler, melt the chocolates.
  7. Spread the chocolates on top of the caramels.
  8. Allow the bars to sit until cooled before serving.
Recipe adapted from Food & Family magazine Fall 2012.
Did you already know...
-In 1967, the American company Mars Inc. introduced the Twix candy bar to the United Kingdom with the name of Raider.
-In 1979, the Twix candy bar was introduced to the U.S.
-The Twix bar was invented by Forrest Mars Sr.