Friday, December 16, 2016

Best of 2016

     I keep meaning to blog, to say hi, or even post a new recipe but time wouldn't slow down for me. Now, we are already at the end of the year. I actually like blogging. I love cooking. I just haven't been cooking as much. Luckily, my husband has been cooking. He really does a good job.
     Before I recap our favorite recipes, I want to recap the year. We are still in North Carolina but we bought a house. Moving is so much work. We still have boxes to unpack and we moved over 5 months ago! At work, I have been working on a temporary detail which I love. However, it is temporary but I am still able to work on the detail for a couple more month. Personally, I love my husband and kids with all my heart. We have lost a cousin, nephew, an Aunt, and friends. It has been hard and they will always have a place in our heart and memories. Now, lets talk about food.
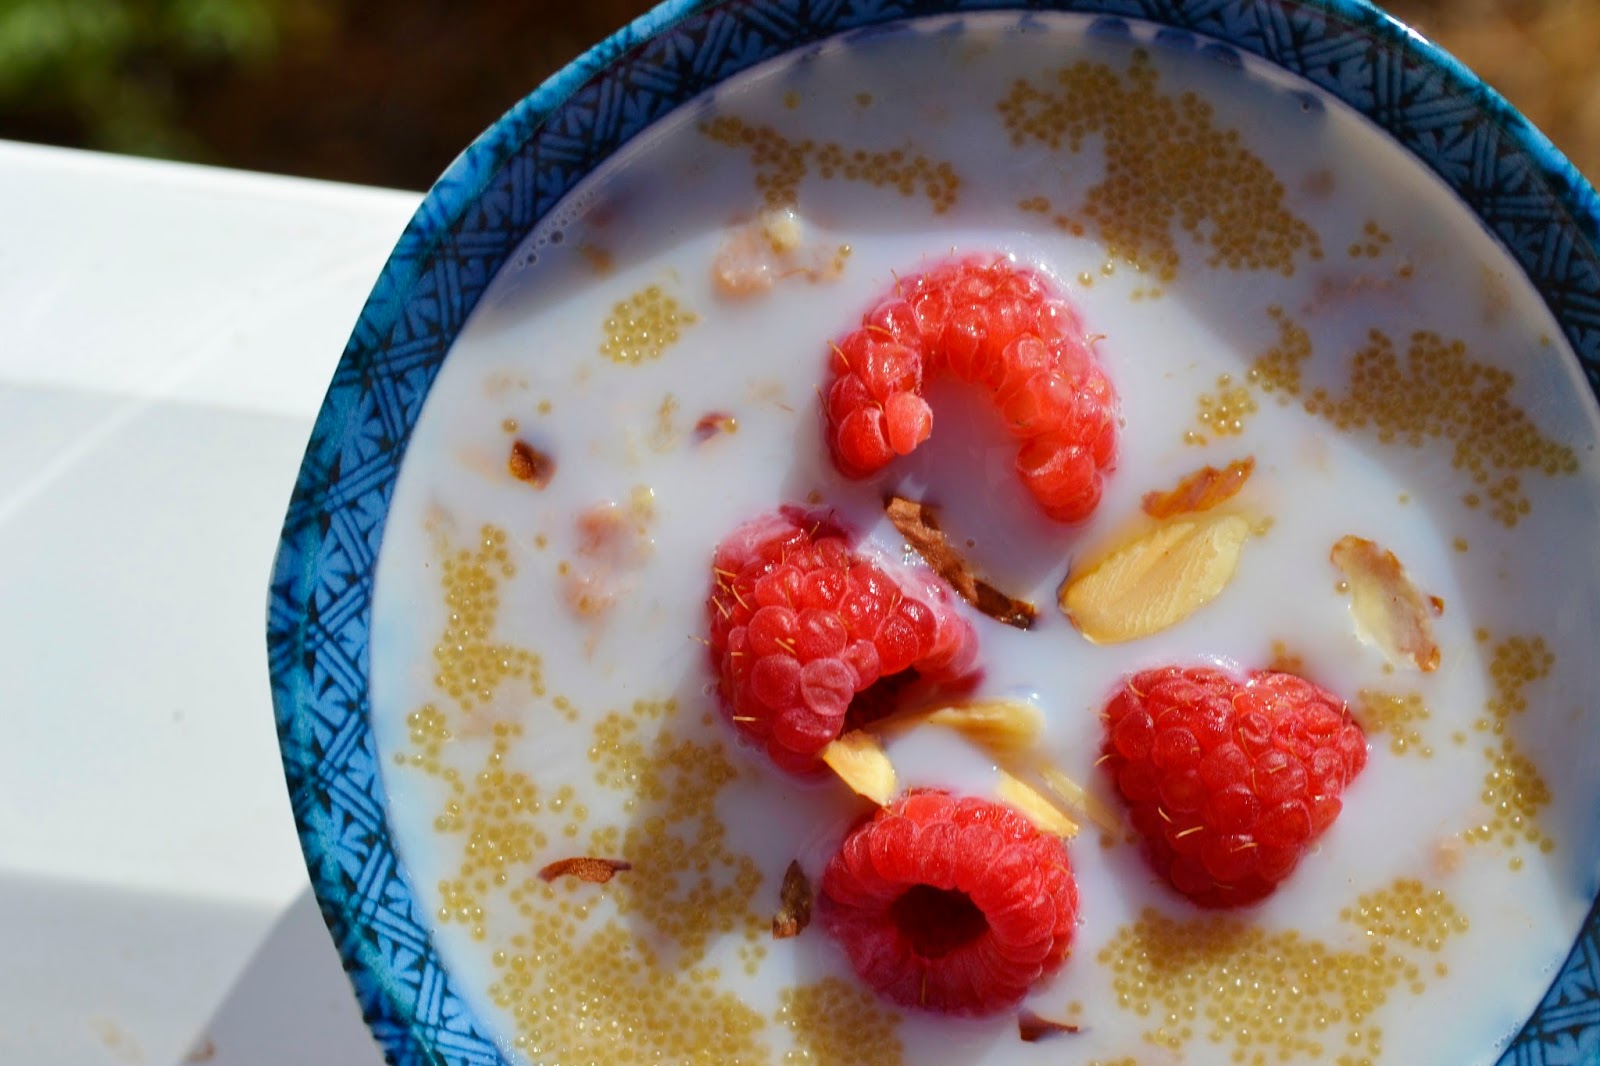
Favorite Breakfast:
 

Favorite Dinner:
 

Favorite Cake:
 

Favorite Dessert:
 

I wish you and your family a 
Merry Christmas and a Wonderful New Year!

Monday, July 11, 2016

Scotland

Greetings Everyone! I have returned from my trip to Scotland. It was great since I spent time with my Dad and sister. Also, I tried some great food over there. Yes, I had tea and scones in Edinburgh. I tried sticky toffee pudding and Cranachan. I had dinner in a pub and snacks on a train. I have photos to share with you.
 This is a photo of Edinburgh castle. Queen Mary of Scots lived there. She gave birth to future King James of England. As you can see, the castle is well defended and was never conquered.
Since we took a tour of the castle, I wanted to share some photos of the grounds. It really is beautiful with a spectacular view. The Edinburgh castle is one of Scotland's most visited attractions. During our visit, we were unable to visit the Holyroodhouse Palace since Queen Elizabeth was in residence.
I had to capture a Scotsman in full outfit. I did see the gentleman at several locations. Normally, I did not see many men wearing the traditional kilt but it was nice to spot some. I did ask the family if anyone wanted me to bring them home a kilt. Sadly, my family said no. Since kilts are not cheap, I didn't buy one even with a lower than normal exchange rate.
This is a photo to show a view of the city. It is beautiful with so much history. One day I will bring the kids and my husband with me. Cheers!

Sunday, July 3, 2016

Six Bean Salad

     Occasionally, I will post a healthy recipe. My philosophy is to eat your fruits and vegetables, then you can have some sweets. No wonder my kids will eat their vegetables. The first time I had a five bean salad was while I was in the military. I liked it but I like beans and green beans. My favorite is green beans so I doubled the green beans.
     Since we were having a cook out. I decided to make some easy side dishes. The five bean salad was one of the side dishes. My husband will not eat this dish. He wouldn't even try it. The kids would try it but they preferred the macaroni salad. 
     I will have to make this dish for my Dad. He would appreciate it as much as I did. I will post photos of my trip soon. I hope you have a wonderful 4th of July. Be safe.
Six Bean Salad
2 cans (15 oz) green beans
1 can (15 oz) waxed yellow beans
1 can (15 oz) kidney beans
1 can (15 oz) black beans
1 can (15 oz) white kidney beans
1 can (15 oz) garbanzo beans
1 tsp grated onion
3/4 cup sugar
2/3 cup apple cider vinegar
1/4 cup vegetable oil
1/2 tsp salt
1/4 tsp black pepper
1 tsp celery salt, additional for garnish

Directions:
  1. In a small saucepan, heat the green beans and yellow wax beans. Drain and allow to cool.
  2. Rinse off the kidney beans, black beans, and garbanzo beans. Set aside. 
  3. In a small bowl, combine the onion, sugar, vinegar, oil, salt, and pepper. 
  4. Gently, toss all the ingredients in a large bowl. 
  5. Lightly top with additional celery salt.
  6. Cover and chill until ready to serve.
Recipe adapted from Samina Cooks

Two years ago.......................I made Strawberry Fool with blueberries.
Three years ago.....................I made Strawberry Whoppie Pies.
Four years ago.......................I made Bacon and Cheddar Scones.
Did you already know........................
-Green beans originated from Mexico and South America.
-In the 16th century, the Spanish explores introduced beans to Europe.
-Green beans and dry beans belong to the Phaseolus vulgaris family.

Friday, June 24, 2016

Cinnamon Tea Cookies

     Alright, I haven't made cookies for while. So, it was time. I wanted something spicy and sweet which match these cookies. These cookies did not last. I really like spice so I did increase the amount of spice in the recipe. 
     Lately, I have made this deal with my daughter. I will make the cookie dough if she bakes the cookies. Since she wants the cookies, she always agrees. I think it is a nice arrangement. She does a great job. She likes the arrangement since she always gets the first cookie. I always tell her if she doesn't want to make all the cookies then freeze the dough. She has never frozen the dough and has made tray after tray of cookies. Why save some dough for later when she can have all the cookies today. Plus she knows Mom will make more cookie dough if asked. 
     Also, I'm heading to Scotland this weekend. I am going with my sister and we will see my Dad. I will post some photos of my trip next month.
Cinnamon Tea Cookies
1 1/3 cup white whole wheat flour
1/2 tsp salt
1 tsp cinnamon powder
1/4 tsp baking soda
1 cup sugar
10 Tbsp butter, softened
1 egg
2 tsp vanilla extract. 

Directions:
  1. Preheat oven to 375 degrees F. 
  2. Line a baking sheet with parchment paper and set aside. 
  3. In a small bowl, whisk the flour, salt, cinnamon, and baking soda. Set aside.
  4. In a large bowl, cream the sugar and butter until fluffy. 
  5. Add the egg and vanilla. Mix until smooth.
  6. Add the flour mixture to the butter mixture and combine. 
  7. Scoop 1 inch dough onto the baking sheet. Space the dough at least 2 inches apart. 
  8. Bake the cookies for 12 minutes or until medium brown.
Recipe adapted from Tazo.

Two years ago.....................I made Paint Splatter Cupcakes.
Three years ago...................I made Flag Cookies.
Four years ago.....................I made Sweet Cakes.
Did you already know.................
-Cinnamon sticks are called quills. 
-Indonesia is the largest producer of cinnamon.
-The ancient Egyptians used cinnamon as an embalming ingredient.

Monday, June 20, 2016

Skillet hamburger Pasta

     Since my son keeps requesting this meal, I had to post it. I think we have made this meal at least three times. When I initially made this dish, I forgot to add the cheese (which is very unbelievable for me). Every since, we haven't added cheese. It is very easy and delicious recipe. However, it is very easy to burn the bottom of the skillet. 
     My son even cooked it by himself including chopping the onion. It was crazy the mess he made just from chopping one onion. It even made him cry. My husband liked that my son actually cooked a whole meal with no help but my husband didn't enjoy the aftermath of the mess left behind from our son. The meal is made with one pan but it still appeared our kitchen was hit by a tornado created by our son. This is the perfect meal for a busy night. Remember if an 11 year can make it, you can too.
Skillet hamburger Pasta

2 tsp olive oil
1 lb. ground beef
1 yellow onion, chopped
1 Tbsp flour
8 oz. can tomato sauce
4 cups chicken broth
1/2 cup pasta, uncooked
2 Tbsp ketchup
2 tsp mustard
1 stalk of green onions, chopped

Directions: 
  1. In a large deep skillet, heat the olive oil over medium heat.
  2. Add the ground beef and onion.
  3. Saute until the beef is browned. 
  4. Sprinkle the flour over top and stir into the meat. Allow to cook for one minute.
  5. Add the tomato sauce and chicken broth. Stir. 
  6. Add the pasta and stir to combine. 
  7. Allow the mixture to cook for 10 minutes or until the pasta is the desired texture. Stir often. 
  8. Add the ketchup and mustard to the mixture and stir to incorporate.
  9. Top with the green onions and serve.
Recipe adapted from Budget Bytes.

One year ago............................I made Southern BBQ chicken.
Two years ago..........................I made Steak Stir Fry.
Three years ago........................I made Radish and Potato Soup.
Four years ago..........................I made Red, White, and Blue Cupcakes.
Did you already know....................
-The U.S. has more tornadoes than any other country.
-The U.S. has about 1,200 tornadoes a year. 
-The fastest winds on Earth were from a tornado which can reach about 300 mph.

Monday, June 13, 2016

Strawberry Sour Cream Streusel Cake

Strawberries are very popular at my house. They are one of my two girls favorite fruit. So everyone agreed that we should try this dessert. It is so good. It is very moist and dense. It didn't need any topping like frosting or powdered sugar. I think whip cream would be a nice addition but not a necessary. This dessert was gone by the next day. I will be making it again but next time I'll it with a different type of berry. I really do like this recipe.
Strawberry Sour Cream Streusel Cake
Strawberry Puree:
8 oz. strawberries
3 Tbsp strawberry jam
2 tsp cornstarch
2 tsp vanilla extract

Cake:
1 cup sugar plus 2 tsp sugar
2 cups plus 2 Tbsp white whole wheat flour
1 tsp baking powder
1/2 tsp baking soda
12 Tbsp cold butter, cut into small cubes
1 cup sour cream
1 large egg
1 Tbsp vanilla extract

Directions: 
  1. In a blender, puree the strawberries with the jam. 
  2. In a small bowl, combine the cornstarch with the vanilla. 
  3. Add the cornstarch mixture to the blender. Mix until smooth. Set aside.
To prepare the cake: 
  1. Preheat oven to 375 degrees F.
  2. Spray a 9 inch spring-form pan with nonstick cooking spray. Set aside.
  3. In a large bowl, combine the sugar, flour, baking powder, and baking soda. 
  4. Add the butter cubes and combine until mixture resembles large crumbs.
  5. Remove 1/2 cup of the flour mixture and set aside in a small bowl.
  6. To the large bowl, add the sour cream, egg, and vanilla. Mix well.
  7. To the prepared pan, drop half of the batter by spoonfuls. 
  8. Pat the batter down and about 1 inch up the sides of the pan.
  9. Add the strawberry puree to the pan and spread over the batter.
  10. Cover with the other half of the batter over the strawberry puree. Set aside.
  11. In the previously set aside small bowl, add 2 tsp sugar to the flour mixture. 
  12. Sprinkle evenly over the cake.
  13. Bake the cake for 45 minutes and until lightly golden brown.
  14. Allow to cool completely before serving.
Recipe adapted from NY Times Cooking

One year ago.................................I made Msemmen Moroccan pancakes.
Two years ago...............................I made White Chocolate Ice Cream.
Three years ago.............................I made Cheese Crackers.
Four years ago...............................I made Macaroni Grill copy-cat bread.
Did you already know.................
-The New York Times began publication in September 1851.
-The newspaper has won 117 Pulitzer Prizes. 
-The New York Times is the second largest circulated newspaper.

Monday, June 6, 2016

Amaranth Porridge

It is summer. It is hot. So, I have been making hot porridge. Where is the logic? Well, my family have been trying these dishes without complaining. I guess when someone is cooking you breakfast with fresh fruit is always a plus. So, I made this porridge with amaranth. I have never cooked with amaranth but I really like the grain. It is smooth and fine. The recipe called for soaking the grain for 24 hours then straining it through a fine mesh strainer before cooking. I have cooked this recipe twice and both times I've soaked it. I hadn't research the grain but had just followed the instructions provided in the recipe. I'm unsure if the soaking is necessary. Other recipes do not state to soak the grain including the package of Bob's Red Mill. The appearance of the grain doesn't appear to change with the soaking and will not plump up. So, I guess it will be your choice to soak or not to soak. I will say that I love amaranth. It still has a slight crunch to it after cooking. Of course I added toasted almonds for even more of a crunch. Again, I really loved this recipe since I've made it a couple of times. Even if it is hot outside, you should try some amaranth porridge today.
Amaranth Porridge with raspberries
1 tsp vegetable oil
1 Tbsp honey
1 tsp ground cinnamon
pinch of sea salt
2/3 cup amaranth
1 1/2 cup milk 
Toppings: milk, toasted almonds, raspberries, etc.

Directions:
  1. In a medium saucepan, heat the oil and honey over medium heat.
  2. Add the cinnamon and stir. Cook for 30 seconds.
  3. Add the amaranth with the sea salt. Stir to coat. 
  4. Add the milk and stir. Bring to a simmer. 
  5. Reduce heat to low and cover. Stir often. 
  6. Cook for at least 20 minutes or until the majority of the milk has been absorbed. The amaranth should be thick and creamy consistency with the grain being tender.
  7. Serve with additional milk and desired toppings.
Recipe adapted from The Green Life.

One year ago................................I made Khobz bread.
Two years ago..............................I made Skillet Lasagna.
Three years ago............................I made Cherry Cheese Danish.
Four years ago..............................I made Chocolate Nutella Cookies.
Did you already know..............
-Amaranth grain was the grain of the Aztecs.
-The Spanish Conquistadors banned amaranth since the Aztecs used the grain in the religious ceremonies. 
-Amaranth grain is gluten free.

Monday, May 30, 2016

Sauteed Mushrooms

     My oldest daughter told me she missed my blogs. I have missed blogging too but I just had this cold that I couldn't shake. I was tired. I didn't want to cook. My husband even made me go to the doctor. Then I had to take medicine which made me feel better than my youngest daughter gave me another cold. So, finally I feel great! Great enough to cook! My oldest daughter said I've been posting a lot of desserts so I decided to post about mushrooms!
     When I lived in Colorado, I liked to eat at this restaurant called The Hungry Farmer. I would order there sauteed mushrooms for an appetizer. Well, I haven't been back to Colorado for over ten years. Also, the restaurant has closed. I did find an old menu online. Does the dish taste like I remember? I can't remember. I know this recipe did taste good. My husband liked it. I think these would be an awesome topping for steak. Are they low calories? No so it is a good thing that it was an appetizer.
Sauteed Mushrooms
1 Tbsp olive oil
2 Tbsp salted butter
8 oz. button white mushrooms
1 tsp garlic salt
1 Tbsp dry parsley

Directions:
  1. In a large skillet, heat the olive oil and butter over medium heat.
  2. Add the mushrooms, garlic salt, and parsley. 
  3. Saute the mushrooms for about 5 minutes or until the mushrooms are cooked.
Recipe by Jen of Sweet Morris. 

One year ago.........................I made Caesar Salad Dressing.
Two years ago.......................I made Hardtack.
Three years ago.....................I made PB Cup PB Cookies.
Four years ago.......................I made Feta Topped Chicken.
Did you already know................
-Mushrooms do not require sunlight to make energy since they have no chlorophyll.
-In the U.S., the white button mushroom is the most popular mushroom.
-During the reign of King Louis XIV, a commercial mushroom farm was created in a cave in France.

Monday, May 2, 2016

Strawberries & Cream Torte

It is strange to go strawberry picking at the end of April. In Maine, we would go strawberry picking around 4th of July. Last year, we missed it since we hadn't realized it was so early. I'm glad we take them since the kids love strawberries. My youngest daughter tells me that there is something wrong with people who don't eat strawberries. I think she is kidding. When I saw this recipe, I thought the kids would really love it. It has a sponge cake, strawberries, and whip cream. When my oldest daughter visits, I'll have to make this for her. It really is good.  Surprising, the cake is cooked with a meringue topping. It is a good cake for a dessert like this since the cake is very thin. I really would make this dessert again.
Strawberries & Cream Torte
1/4 cup unsalted butter, softened
1/2 cup sugar and 2 tsp sugar, divided
2 egg yolks
1/2 tsp vanilla extract
2 egg whites
1 cup white whole wheat flour
1 1/2 tsp baking powder
1/4 tsp salt
1/2 cup milk
2 cups heavy whipping cream
1 pint fresh strawberries, hulled and sliced

Directions:
  1. Preheat oven to 350 degrees F.
  2. Line two 8 inch baking pans with parchment paper.  
  3. Spray the baking pans with nonstick baking spray and set aside. 
  4. In a large bowl, cream butter and 1/2 cup sugar until flight and fluffy. 
  5. Add the egg yolks and beat well. 
  6. Beat the vanilla.
  7. In a large bowl, whisk the flour, baking powder, and salt. 
  8. Add about 1/2 cup of the flour mixture.
  9. Alternate with some milk and then more flour mixture. 
  10. Continue to alternate until all mixture is combined.
  11. Transfer the mixture evenly to the prepared pans. 
  12. In a bowl, beat the egg whites until foamy. 
  13. Add 1/2 tsp of sugar to the egg whites. 
  14. Beat the egg whites until soft peaks form. 
  15. Spread the egg whites meringue over the batter in the prepared pans.
  16. Bake the cake for 12 to 15 minutes or until a toothpick inserted in the middle comes out clean. 
  17. Allow to cool.
  18. In a large bowl, combine the heavy cream until soft peaks form.
  19. Add 1 tsp sugar to the heavy cream. Combine until stiff peaks form. 
  20. In a bowl, combine the majority of the strawberries with 1/2 tsp sugar. 
  21. Carefully remove one cake with the meringue up and place on the serving plate.
  22. Spread some of the sweetened strawberries over the cake.
  23. Add the whip cream and spread evenly over the top.
  24. Top with the second layer of cake with the meringue facing up. 
  25. Spread some of the sweetened strawberries over top.  
  26. Add the remaining whip cream and spread evenly on top.
  27. Top with strawberries.
Recipe adapted from Taste of Home.

One year ago.........................I made Kentucky Hot Brown.
Two years ago.......................I made Chicken Enchiladas.
Three years ago......................I made Guacamole.
Four years ago.......................I made Coconut Cream Cheese Cookies.
Did you already know......................
-The German word for cake is torte. 
-A torte is a layer cake. 
-A torte tends to have a filling layer of whip cream, jams, fruit, mousse, or buttercream.
-A torte is made with less flour than a traditional cake and is shorter in structure. 

Monday, April 25, 2016

Chocolate Tart

Warning: this dessert is rich! It is delicious and wonderful. Sometimes you just want chocolate. Maybe you want chocolate because it is tastes so good?  Maybe you want chocolate because you gave your daughter lots of loving care since she had a cold in which she shared? Maybe after having a cold it is a celebration that you can actually taste again?
Chocolate Tart
Pastry Crust:
2 cups whole wheat white flour
3 Tbsp sugar
1/4 tsp salt
3/4 cups unsalted butter, cold and cut into small pieces
1 egg yolk
2 Tbsp ice water
1 egg white

Filling:
1 cup heavy cream
1/2 cup milk
10 oz. dark chocolate, chopped
2 Tbsp sugar
1/4 tsp salt
2 eggs
1 egg white

Directions:
Pastry:
  1. In a food processor, combine the flour, sugar, and salt. 
  2. Add the butter and pulse about 20 times. 
  3. In a small cup, mix the egg yolk with the ice water in a small bowl.
  4. Slowly, pour the egg yolk mixture into the flour mixture while pulsing.
  5. Pulse until the dough comes together. 
  6. Form the dough into a disk and wrap in plastic wrap. 
  7. Refrigerate 30 minutes.
  8. Roll out the dough into a 12 inch circle on a lightly floured surface.
  9. Place the dough into a 9 inch tart pan with a removable bottom.
  10. Press the dough evenly into the pan and into the scalloped edges.
  11. Cut off any excess dough hanging over the edge with a knife.
  12. Refrigerate the dough for 15 minutes.
  13. Preheat the oven to 350 degrees F.
  14. Place the tart pan onto a cookie sheet. 
  15. Line the tart with aluminum foil and add pie weights/dried beans to keep the sides down.
  16. Bake for 30 minutes. Remove the foil and weights.
  17. Using a pastry brush, coat the crust with a beaten egg white. 
  18. Return the tart to the oven and bake for 8 minutes until golden color.
  19. Set aside to cool.
Tart:
  1. Lower the heat to 325 degrees F.
  2. In a medium pan, heat the heavy cream and milk over medium low temperature.
  3. Heat until the cream comes to a slight simmer around the edges.
  4. Remove from the heat and stir in the chocolate. 
  5. Stir the chocolate until smooth and melted.
  6. Stir in the sugar and salt until incorporated.
  7. In a small bowl, beat the eggs.
  8. Stir the eggs into the chocolate mixture.
  9. Pour the filling into the tart shell. 
  10. Bake for 15 minute or until the filling is set and glossy.
  11. If any bubbles or cracks form, remove from the oven since it is beginning to over bake (like mine).
  12. Allow to cool before serving.
Recipe adapted from Tyler Florence.

One year ago.....................Provence Chicken.
Two years ago...................Lemon Bars.
Three years ago.................Roasted Hazelnut Ice Cream.
Four years ago..................Store Top Chili Mac.
Did you already know.............
-In the US, there are about 1 billion cases of the common cold each year. 
-On average, a 70 year old person probably had over 200 colds in their life time. 
-Most colds last about seven to ten days.

Monday, April 11, 2016

Ciabatta bread

Since I am trying to use up the white flour in the house, I decided to make some bread. I rarely make a sponge when I'm making bread but it really isn't hard. It just takes a little more planning. It came out good. Plus anytime I make bread, my family thinks it is fancy. Soon, I will be making bread with whole wheat flour and I just hope it doesn't come out dense.
Ciabatta Bread
Sponge:
1 package of active dry yeast
pinch of sugar
2 Tbsp warm water (110 degrees F)
1/3 cup warm water (110 degrees F)
1 cup bread flour
Dough: 
1 package of active dry yeast
2 Tbsp warm milk (110 degrees F)
2/3 cups warm water (110 degrees F)
1 Tbsp olive oil
2 cups bread flour
2 tsp salt

Directions:
  1. In a cup, combine the 2 Tbsp of warm water with 1 package of yeast with a pinch of sugar. Allow to rest for 5 minutes.
  2. In a large freezer bag, add the water with the yeast. 
  3. Add the 1/3 cup warm water with 1 cup of bread flour to the freezer bag. Mix well for a couple of minutes.
  4. Seal the bag and allow to set in a cool place for 12 to 24 hours to form a sponge.
  5. In a large bowl, combine 1 package of yeast with the warm milk. Allow to rest for 5 minutes.
  6. Add the sponge mixture to the large bowl with the 2/3 cup water, olive oil, and 2 cups bread flour.
  7. Mix until just combined then add the salt.
  8. Mix for 8 minutes and the mixture is smooth and elastic.
  9. Place the dough into an oiled bowl and cover with plastic wrap. Allow to rest for about 90 minutes.
  10. Turn the dough onto a floured surface and divide into half.
  11. Place each half onto a parchment lined baking sheet and form into oval loaves.
  12. Dust the top of the loaves with flour and dimple the surface with fingertips.
  13. Cover loaves with a dampened kitchen towel and allow to rise for 90 minutes.
  14. Preheat oven to 425 with a baking stone in the oven.
  15. Transfer one loaf with the parchment paper onto the baking stone. 
  16. Bake the loaves one at a time on the baking stone for 20 minutes or until pale golden. 
  17. Allow to cool on a wire rack. 
Recipe adapted from Allrecipe.

One year ago.....................................I made Blueberry Oatmeal.
Two years ago...................................I made Creamy Polenta.
Three years ago.................................I made Lemon Cookies.
Four years ago..................................I made Bruschetta.
Did you already know.....................
-Ciabatta bread originates from Italy.
-Ciabatta means slipper since the shape of the bread resembles a slipper.
-Since the bread is very porous, the bread is chewy and light.