Pages

Wednesday, November 30, 2011

Breakfast Potatoes

For awhile, my husband was taking us out for breakfast. The best thing about eating breakfast out is everyone gets to pick what they want. With the holidays, we tend to stay home more plus it is cold outside. 
Growing up, my Mom would make potatoes for breakfast. She would use leftover potatoes that she had saved the night before. I like her way of thinking. Since I had Yukon gold potatoes, I had precooked the potatoes the night before knowing I would finish them for breakfast. I have made this recipe with russet potatoes before and they are just as good. 
Breakfast Potatoes Recipe

2 Tbsp vegetable oil
3 Yukon potatoes, peeled and cut into cubes
salt and pepper
3 Tbsp water
1/2 onion, chopped
1 Tbsp butter, unsalted

Directions:
  1. In a skillet, heat the vegetable oil over medium-high heat.
  2. Add the potatoes and cook for about five minutes. Stir occasionally.
  3. Season with salt and pepper.
  4. Add the water to the skillet and cover the potatoes for 2 minutes.
  5. Let potatoes cool and store in the refrigerator until morning or continue to the next step.
  6. Add butter to a skillet and let melt.
  7. Add the onions and stir occasionally for 2 minutes.
  8. To the skillet, add the potatoes and cook for 15 minutes or until the potatoes are brown.
 Recipe adapted from my Mom's recipe.

Did you already know..............
-Potatoes originated from South America.
-Potatoes are the fourth largest crop in the world.
-The potato was introduced to Europe by the Spanish around 1570.
-The leaves of a potato are poisonous.

Tuesday, November 29, 2011

Apple-Cranberry Pie

I remember when I was growing up my Mom would make a lot of cobblers. I'm not complaining since I love cobblers. During the holidays, we would have several pies. When I was in high school, I remember making an apple pie. It was delicious.
I really wanted to make an apple pie for Thanksgiving but I decided to make my daughter's request for cherry and strawberry pies. My Mom brought a pumpkin and peanut butter pie. So, the apple had to wait.
I had left over fresh cranberries which I wanted to use up. The package of cranberries has an apple cranberry pie listed. I used the apple pie recipe I usually make and just added the cranberries. It is a great combination.
Apple-Cranberry Pie
Two 9 inch pie crust
1 cup sugar
1/4 cup flour
1/2 tsp ground nutmeg
2 tsp ground cinnamon
Dash of salt
7 cups apples, peeled and sliced
1 cup fresh cranberries
2 Tbsp butter
1 egg and 1 tsp milk to brush the top of the pie crust

Directions:
Heat oven to 425 degrees.
In a bowl, combine the sugar, flour, nutmeg, cinnamon, and salt.
Slowly, fold in the apples until well coated with the sugar mixture. Set aside.
Line the pie pan with one of the pie crust.
Layer 1/2 cup of the cranberries on top pie crust.
Add the apple mixture on top of the cranberries.
Top the apple mixture with the remaining cranberries.
Dot the top of the mixture with the butter.
Cover the apple mixture with the second pie crust in desired design just need slits in the top of the pie crust.
Whisk the egg with the milk in a small bowl and brush the mixture onto the top pie crust.
Cover the edge with aluminum foil if desired to prevent excessive browning just remove during the last 20 minutes of baking.
Bake the pie for 40-50 minutes or until the crust is brown and the juices are bubbling on top of the pie.

Recipe adapted from Betty Crocker's 40th Anniversary Edition Cookbook.
Do you like my little apple cut outs?
Did you already know....................
-Pie pastry is thought to originated from the Greeks.
-Medieval England, preferred their pies (or as they called them pyes) filled with meat.
-Apple pie is originally from England.

Monday, November 28, 2011

Rotel Dip

Do you have any recipes you have been making forever? I say forever because I have been making this recipe dip for longer than my oldest daughter has been welcomed to this world. I have been making this recipe before there was the internet. If you are wondering my age, I will say I'm 29. Just remember, I am 29 right now and I was 29 last year. Next year, I will be 29 again.
I received this recipe from an Air Force friend. I did some research and I could not find this recipe on the Rotel website. I did find it posted on several other sites. This is my oldest daughter's favorite dip recipe.
 Rotel sausage dip

1 (10 oz.) can of Rotel
1 1/2 (12 oz.) package of cream cheese
1 package of Jimmy Dean or pork sausage
chips, crackers, vegetables, or other items for dipping

Directions:
  1. Drain the can of Rotel.
  2. In a microwave safe bowl, microwave the cream cheese and Rotel for one minute.
  3. In a skillet, cook the sausage thoroughly.
  4. Add the cream cheese and Rotel to the skillet. 
  5. Cook the mixture for about 5 minutes.
  6. Let cool for a few minutes and serve.
Recipe adapted from Kelly but unknown original source.
 Did you already know..................
-Rotel is diced tomatoes with green chili peppers.
-In 1943, Carl Roettele with his wife opened his canning factory in Texas.
-Mr. Roettele named his product Ro-tel because he didn't think no one would be able to pronounce his name.
-ConAgra Foods now own Rotel.

Sunday, November 27, 2011

Cheesy Potato Gratin

I have an evasive teenager. I bring out the camera and she disappears. My mother is the same way so I am unsure if it a learned behavior or an inherited one. There are probably more photos of Bigfoot than my daughter as a teenager. I guess I could hide and wait for her to go by. A lot of the photos of my teenager, she thinks she is a movie star and holds up her hand so the photo can not be used or sold. 
My children especially my teenager likes to help in the kitchen. For some reason, my phone seems to ring when I'm cooking. I hear a lot of "Mom, it is important. The person on the phone wants to talk to you." When I pick up the phone, the call could have waited. You are probably wondering why we don't have a cordless phone. We do but it is always missing. Bigfoot probably is using it somewhere.
I saw this recipe and wanted to try it before Thanksgiving. It didn't happen but I am glad I made it this weekend. It is very, good especially with leftover Turkey.


Cheesy Potato Gratin


1 Tbsp butter, unsalted
1 shallot, finely chopped
2 Tbsp flour, all purpose
1/2 cup chicken stock
1/2 cup heavy cream
1 cup Gruyere cheese, grated
2 tsp thyme
salt and pepper, to taste
3 lbs. Yukon Gold potatoes, peeled and sliced
1/2 cup Parmigiano cheese, grated


Directions:
  1. Preheat oven to 375 degrees.
  2. In a nonstick skillet, melt butter over medium heat.
  3. Add the chopped shallot and cook for 4 minutes, stirring occasionally.
  4. Add the flour and stir. Cook for about 1 minute.
  5. Slowly, stir in the chicken stock and cream.
  6. Add the Gruyere cheese and thyme. Stir until the cheese has melted.
  7. Season with salt and pepper.
  8. Add the potatoes and gently stir to coat the potatoes with the cheese mixture.
  9. Cover the pan and cook over medium heat for 15 minutes.
  10. Remove the lid and transfer the potatoes to a oven safe dish.
  11. Sprinkle the Parmigiano cheese on top.
  12. Cook uncovered for about 30 to 35 minutes until the edges are bubbling.
  13. Let cool for 15 minutes
Recipe adapted from Williams-Sonoma.  
 Did you already know.................
-There are Bigfoot Field Researchers.
-Another name for Bigfoot is sasquatch which means "wild man".
-Bigfoot is purportedly to be native to the Pacific Northwest of North
America.

-The scientific community have no evidence of the existence of Bigfoot, sasquatch, or Yeti sightings.

Friday, November 25, 2011

Chocolate Chip Cookies

My youngest sister loves chocolate. When I was a child, we would receive chocolate for the holidays. My sister would eat all of her chocolate and then wait. Why was she waiting? She knew I would eat a few pieces of my chocolate and hide the rest for later. After a couple of weeks, my sister would always find my hidden stash. I would normally catch her in my closet with the evidence. I never got mad at her. She was just to cute.
Today, I decided to bake up some cookies. Within the hour, my youngest sister happen to visit me. She didn't know I was making cookies and I wasn't expecting her. I wasn't surprised since my family would joke and say if there was chocolate around, my sister would find it.
My sister and I agree these cookies are good. Aren't all chocolate chip cookies good? I have previously told you how my youngest sister will eat dessert instead of her meals. These cookies were my sister's breakfast. These cookies do have my sisters stamp of approval.These cookies are a nice start to kick off the holiday season.
Warning: These cookies need to be chilled for at least 24 hours.

Chocolate Chip Cookies from Jacques Torres
2 cups cake flour, measure and take out 2 Tbsp of the cake flour
1 2/3 cups bread flour
1 1/4 tsp baking soda
1 1/2 tsp baking powder
1 1/2 tsp salt
1 1/4 cup (2 1/2 sticks) butter, unsalted
1 1/4 cups light brown sugar
1 cup and 2 Tbsp sugar
2 eggs
1 Tbsp vanilla extract
1 1/4 lbs. bittersweet chocolate disks or chips
sea salt for the top of the cookies

Directions:
Whisk the cake flour, bread flour, baking soda, baking powder, and salt in a bowl. Set aside.
Cream the butter and the sugars in another bowl.
Add the eggs, one at a time and mix.
Stir in the vanilla and mix well.
Add the flour mixture and mix well.
Fold in the chocolate pieces and mix until the chocolate is incorporated.
Press plastic wrap against the dough and refrigerate for 24 to 36 hours.
Next day, scoop the dough onto a baking sheet about the size of a golf ball.
Sprinkle the top of the dough with sea salt.
Bake between 16 minutes or until the cookies are golden brown and still soft.
Wait about a minute and then transfer the cookies onto a wire rack to cool.

Recipe adapted from New York Times website.
Did you already know....................
-Jacques Torres was raised in France but now makes his home in New York City.
-In 2000, Jacques Torres opened his first chocolate factory in Brooklyn, New York.
-Mr. Torres makes his own chocolate by starting from the cocoa bean.
-Mr. Torres is referred as Mr. Chocolate. He is married to a fellow chocolatier.

Thursday, November 24, 2011

Poultry Seasoning

 Happy Thanksgiving!

I have so many seasonings in my cabinet. I know I have to use them so when I ran out of poultry seasoning last year. I read the container and did some research online. The recipes online didn't look like the ingredients listed on the container. I guessed the measurements and did the sniff test. I sure wasn't going to taste it. I even recruited my children to smell. They thought this was a lot of fun. I had everyone compare my concoction to the poultry seasoning bottle. Finally, I had something that appear to smell very similar. I use poultry seasoning in my meatloaf so I go through it often. Everyone told me the meatloaf tasted like before. 
Since it is Thanksgiving, no stores are open in my area. I wanted to post my poultry seasoning concoction just in case you need it.
Poultry Seasoning
1 1/2 Tbsp thyme
1 Tbsp sage
1 tsp marjoram
1/2 tsp rosemary
1/2 tsp parsley
1/4 tsp onion powder
1/4 tsp pepper
small, tiny pinch nutmeg

Directions:
  1. Mix all the seasonings and grind if desired for a more ground texture.
Recipe from Jen of Sweet Morris
Love the snow!
I hope you have a wonderful Thanksgiving!

Wednesday, November 23, 2011

Buffalo Chicken Dip

I love hot and spicy foods. My two youngest children have no problem eating spicy foods. I call my youngest daughter spicy girl. Our two older children would rather I hold off on the hotness. It is funny to watch them try to eat a spicy dish and appear to be cool especially when their younger siblings have no problem. 
My husband loves spicy foods and request any type of dish with Buffalo chicken. My husband doesn't cook much but he will make this recipe. When I make this dish, I add a little more heat but you can always adjust the Buffalo sauce depending on how spicy you are feeling.
Buffalo Chicken Dip

8 oz. package of reduced fat cream cheese, softened
1/2 cup reduced fat ranch salad dressing
3/4 cup Frank's Redhot Buffalo Wing Sauce
1/2 cup mozzarella cheese, shredded
1/2 cup cheddar cheese, shredded
2 cups cooked chicken, shredded

Directions:
  1. Heat oven to 350 degrees.
  2. Add the chicken, cream cheese, ranch, and Buffalo sauce to a deep baking dish. Mix well. 
  3. Add half the cheeses and combine. 
  4. Spread mixture evenly on the dish.
  5. Top the dish with the remaining cheese.
  6. Bake between 20 or until mixture is heated through.
  7. If the cheese is not golden, place under broiler for a few minutes.
  8. Serve with chips, crackers, or vegetables.
Recipe adapted from Frank's Redhot.
For work, I have been to Buffalo, NY several times. The last time my friends talking me into going to the Anchor Bar. The wings were good and I would go back!

Did you already know............
-The owner of the Anchor Bar in Buffalo, NY is credited for creating the Buffalo wings.
-On Oct. 30th, 1964, owner Teressa Bellissimo fried up some chicken wings and dipped them in a buttery, spicy hot chile sauce for her son and his college friends for a late snack.(There are several other versions on how Teressa Bellissimo created the dish but this version is from the Anchor Br website.)
-When in Buffalo, Buffalo chicken wings are called chicken wings.

Monday, November 21, 2011

Pancakes

When I was a teenager, I would occasionally have to watch my baby sisters. My mom would tell me that I would have to cook them supper. I knew how to cook but I didn't. I have three younger sisters. (I still tell my Mom that I am an only child.) My sister who is over a year younger than me would cook all the time. So, I didn't. When I would ask my baby sisters what they wanted for supper, they would tell me cereal. Why argue with them? Cereal is great! My kitchen always has a minimum of five different boxes of cereal at a time. 
Growing up, there was one food I really liked to cook and it was pancakes. My youngest daughter has inherited my love for pancakes. I normally do not order pancakes for breakfast if we eat out. I like my pancakes better. 
Silver Dollar Pancakes
 Pancakes

2 cups flour
1 Tbsp sugar
1 tsp baking powder
1/2 tsp baking soda
1/2 tsp salt
2 cups buttermilk
1 egg
2 Tbsp butter, melted
vegetable oil or butter to coat the skillet

Directions:
  1. Combine the flour, sugar, baking powder, baking soda, and salt in a bowl.
  2. Whisk the dry ingredients.
  3. Add the buttermilk and mix just to combine.
  4. Add the egg and still a few times just to combine.
  5. Add the melted butter and mix just to combine. Don't over mix.
  6. Set the batter aside.
  7. Heat a skillet on medium to medium low heat.
  8. Add oil or butter to the skillet.
  9. Scope about 1/3 cup of batter into the pan for regular size pancakes. Scope about 1/8 cup of batter into the pan to make silver dollar pancakes.
  10. Once the batter starts to form bubbles, flip the pancake. Cook about one minute and serve.
Recipe adapted from Katy's Kitchen originally from Pastry Queen.

 Did you already know............................
-In the past, buttermilk was the liquid left over after milk was made into butter.
-Today, dairies usually adds lactic acid to low fat milk to produce buttermilk.
-Buttermilk is low in fat and calories.
-To help with digestive problems, buttermilk is said to be a better choice than milk because of the lactic acid and it is quicker to digest.

Sunday, November 20, 2011

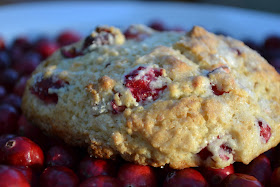
Cranberry Scones

What is your favorite juice? Is it the popular orange juice? My son will pick cranberry juice over orange juice. To tell the truth I would too. Since it is so close to Thanksgiving, it is so easy to find fresh cranberries.
Tea anyone?
Talking about Thanksgiving, I am thankful for my family. After I had my oldest daughter, it was almost ten years before my youngest daughter arrived. I recently asked her why she made me wait ten years before entering my life. She looked at me and smiled. She told me that she was up there (as she glanced upwards) and she was really busy helping people out (in heaven) but once she was done she rushed right to me. Is that not the cutest answer? I can see her helping people out since she is very thoughtful.
If you are having guest arrive for the holidays, this is a great recipe to prepare for breakfast one cold morning. They can be made prior to your guest arriving and be frozen until needed. 
Cranberry Scones 2 Tbsp grated lemon zest
2 1/2 cups all-purpose flour
3/4 cup sugar
3 Tbsp sugar for the cranberries and additional for the top
1 Tbsp baking powder
1 tsp salt
6 Tbsp cold unsalted butter, cut into small cubes
1¼ cups fresh cranberries, coarsely chopped
1 large egg
1 large egg yolk
1 cup heavy cream


  1. Preheat the oven to 400 degrees. 
  2. Line a baking sheet with parchment paper.
  3. In a small bowl, toss the chopped cranberries and the 3 Tbsp of sugar.
  4. In a food processor, combine lemon zest, flour, ½ cup of sugar, baking powder, and salt. Pulse about 5 times.
  5. Add the butter and pulse about 8-10 times until it looks like course crumbs. 
  6. Add the egg, egg yolk, and heavy cream to the flour mixture.
  7. Pulse about 10 times.
  8. Generously flour working surface.
  9. Add the dough to the flour working surface and form a ball.
  10. Using a 2½ inch round biscuit cutter, scoop some dough into the cutter to form a 1 inch scone.
  11. Repeat with the remaining dough about 3 inches apart. ***
  12. Sprinkle the top of the scones with sugar.
  13. Bake the scones for about 15-20 minutes or until light golden brown.
***Place the baking sheet in freezer about 30 minutes or until frozen. Transfer the frozen scones to a freezer storage bag until ready to use. When ready to use, continue with direction 12 but bake for 20-25 minutes or until golden brown.
Recipe adapted from Annie's Eats and originally from Gourmet.
Did you already know.............
-Scones can be found in the 1513 Oxford English Dictionary.
-Scones are usually associated with Scotland, Ireland and England.
-English plain scones are often eaten with jam, preserves, lemon curd or honey, or clotted cream.
-Dried fruit scones and other flavored scones are usually enjoyed without butter or jam.

I enjoy my scones plain or with a little butter and of course tea!

Friday, November 18, 2011

Chocolate-Peanut Butter Whoopie Pies

A while ago, I use to give my sister a subscription to her favorite magazine. It was a gift that she could enjoy all year long. Maybe think of me? 
Since my Mom knew I like to read magazines, she asked me if I wanted a subscription to her favorite magazine. I said sure. In the magazine, it has a monthly recipe contest you can enter. I thought sure, why not. Wouldn't it be cool to win something? The recipe contest for that month featured peanut butter. My husband loves peanut butter. I had experimented with lots of recipes that weekend and this recipe is the one I entered two years ago. I was very happy when I heard that my recipe was selected and featured in the magazine. I didn't win the top prize but I did win. I did the happy dance because I won. Any time I win something I perform the happy dance. My husband finds me very amusing. The kids just dance with me.
Chocolate-Peanut Butter Whoopie Pies
1 (12 oz.) package miniature semisweet chocolate chips
2 Tbsp milk
3/4 cup butter, softened
1/4 cup creamy peanut butter
1 1/2 cups sugar
1 tsp baking soda
1 tsp baking powder
2 eggs
1/2 cup milk
2 tsp vanilla
1/2 cup unsweetened cocoa powder
3 cups all purpose flour
Filling recipe below


Directions:
  1. Preheat oven to 350 degrees F. 
  2. Set aside 1/4 cup chocolate pieces to sprinkle on cookies.
  3. In microwave-safe bowl, combine 1 cup of the chocolate pieces and 2 tablespoons milk. Microwave for1 minute or until melted; stir once. Set aside. 
  4. In another bowl, beat butter and peanut butter until combine. 
  5. Add sugar, soda, baking powder, and 1/2 teaspoon salt; beat to combine. Add eggs, 1/2 cup milk, vanilla, and melted chocolate; beat until combined. 
  6. Beat in cocoa powder and flour until combined. 
  7. Stir in remaining chocolate pieces except the 1/4 cup of chocolate pieces.
  8. Drop by rounded teaspoons 2 inches apart onto ungreased cookie sheets. Sprinkle with reserved chocolate. 
  9. Bake 9 minutes or until tops are set. 
  10. Cool on sheets 1 minute. Transfer to wire racks; cool completely. 
  11. To assemble, spread flat sides of half the cookies with Filling; top with remaining cookies.
Peanut Butter Filling
1 cup butter, softened
1 cup creamy peanut butter
1 cup marshmallow creme
2 cups powder sugar
2 Tbsp milk

In a bowl, combine all the ingredients except the milk.
Add one Tbsp milk at a time until the desired filling consistency.

My recipe adapted from Better Homes and Gardens.
Did you already know.............. 
-Better Homes and Gardens has been around since 1922.
-In 1924, Fruit, Garden and Home changed its name to Better Homes and Gardens magazine.
-In the U.S., Better Homes and Gardens is the fourth best selling magazine.

Thursday, November 17, 2011

Honey Yeast Rolls

I know a lot of people who will see a bee and freak out. I really understand this behavior if you are allergic to bees. I know I am not allergic to bees. How do I know?
When I was a little girl, my younger sister thought it would be cool to throw rocks at a bee hive. We all know the bees do not take kindly to this type of behavior. They swarmed after her. She took off running and ran right past me without warning me what was chasing her. Some memories from childhood will never be forgotten and I know I am not allergic to bees. I also know I do not have a reaction to red ants but that is another story.

Honey Yeast Rolls 1 (.25 oz) package of instant dry yeast
1 cup warm water (105-115 degrees)
1/4 cup honey
3 Tbsp. canola oil
1 1/2 tsp salt
1 egg, lightly beaten
4 cups bread flour
vegetable cooking spray
2 Tbsp butter, melted
2 Tbsp honey

Directions
  1. In a small bowl, combine the yeast and warm water.
  2. In another bowl, combine the honey, oil, salt, and egg. Mix well.
  3. Add the yeast and water to the honey bowl.
  4. Add 1 cup of flour at a time to the honey bowl and mixing well after adding the flour.
  5. Turn the dough onto a floured surface and knead for 8 minutes or until the dough is smooth and elastic.
  6. Transfer the dough into a lightly oiled bowl. Turning once to coat and cover the bowl with plastic wrap. Let the dough rise for about 2 hours.
  7. Punch down the dough and knead for 30 seconds. 
  8. Cover with plastic wrap and let rest for 10 minutes. 
  9. Punch down the dough again and divide dough into 12 equal pieces.
  10. Shape the dough into a smooth ball.
  11. Place the balls of dough into a round greased 10 inch baking dish or place each ball of dough in a muffin tin. Let rise for 30 minutes.
  12. Preheat oven to 400 degrees.
  13. Combine the melted butter and honey.
  14. Brush the tops of each balls of dough with the honey butter.
  15. Bake 15-20 minutes or until the rolls are golden brown and cooked through.
Recipe adapted from Annie's Eats.
Did you already know................
-Honey has been found sealed in Egyptian tombs and was still edible.
-Honey means "enchant" in Ancient Hebrew.
-In medieval Germany, peasants were required to pay their feudal lords in honey and beeswax. 
I added 3 small balls to one muffin tin.
I made these for Thanksgiving last year and they were a hit even with my honey.

Wednesday, November 16, 2011

Whip Cream 101

Please do not say, "Jen, I can not make my own whip cream. It is too hard." Do you know what I'll say? "What? What! It isn't hard little grasshopper. You will become a master in no time." I always called my oldest daughter little grasshopper and my youngest daughter little sparrow. Don't be surprised but I am the Master! 

Now, listen to me little grasshopper because I am the Master! Follow the steps below to make your own whip cream. My son volunteered to show you the way.
Whip Cream 101
1 cup of heavy cream
1 Tbsp powder sugar
1 tsp vanilla extract


Directions:
1. Place all the ingredients in a mixing bowl or a plastic container.
2. Whip
Whip
 Whip
Am I done yet?
Whip until the whip cream stays on the beater.
Stop beating because if you do not you just may make butter.
I did reward my helper with the beater.

You can vary the amounts of the powder sugar and extracts to your taste!


Enjoy with dessert!

Tuesday, November 15, 2011

Cranberry-Cream Cheese Bundt Cake

At work, my coworker suggested we should have little get-together and celebrate with the honored food for the month. Of course, it is a nice break and fun to see what others have made for this celebration. 
I have previously made a Bundt cake and will be bring it into work since it was requested by my friend. However, my husband doesn't think it is very nice of me to tease him with the promise of a cake and not make him something. So, I have to make something for home.
When I saw this cake, I knew it would be prefect to make for home. My husband agrees! I also had helpers making this cake.
Cranberry-Cream Cheese Bundt Cake 2 sticks unsalted butter, softened
8 oz. cream cheese
2 1/2 cups sugar
3 eggs
1 lemon
1/4 tsp almond extract
1 tsp vanilla extract
2 1/2 cups cake flour
1 tsp salt
2 1/2 cups fresh cranberries
1 Tbsp flour
whipped cream (optional for topping)

Directions:
  1. Preheat oven to 350 degrees and grease the Bundt pan with cooking spray.
  2. In a small bowl, carefully cover the cranberries with the 1 Tbsp flour. Set aside.
  3. Cream the butter with the cream cheese in a bowl.
  4. Add the sugar to the butter and cream.
  5. One at the time, add the eggs.
  6. Add the zest of the lemon and then the juice.
  7. Mix in the almond and vanilla extract.
  8. Add the cake flour and salt. Mix well.
  9. Carefully, fold in the flour covered cranberries.
  10. Add the batter to the Bundt pan.
  11. Cook for 60 minutes or until done. *
  12. Let cool for about 10 minutes before removing from pan.

Recipe adapted from Confections of a Foodie Bride.

*I had to cover my cake around 45 minutes because the bottom was becoming dark. However, I'm thinking it is my pan.
I will post a how to make whip cream tomorrow if you would like to know how. 
Did you already know....................
-The Bundt pan evolved because of the European kugelhopf molds.
-In 1950, Nordic ware invent the aluminum Bundt pan because owner H. David Dalquist was approached by a group of Minneapolis women asking him to make the pan for them.
-In 1966, Bundt cakes become very popular after one is featured in the Pillsbury cookoff and wins 2nd place.

Monday, November 14, 2011

Butternut Squash Risotto

Any time my son sneezes, he expects me to say, "God bless you." The problem is I do not always hear him. If he is upstairs and sneezes, he will come downstairs and find me. He will ask me, "What do you say?" I'll reply, "What?" He will repeat a little impatiently, "What do you say?" 


It takes me a few seconds and it will dawn on me what he wants so I will reply, "God bless you." Then he will say, "Momma, I sneezed twice." "God bless you again." Sometimes I try to be ahead so when he does this I will add a few "God bless you". He doesn't do this to my husband but only me. I actually think it is really cute!
I wanted a quick meal. Since my husband wasn't eating, I thought this was the perfect recipe. My son even asked for seconds. My youngest daughter said, "What? We are only having rice for supper?" Don't worry she also had a milkshake for dessert.

Butternut Squash Risotto

32oz. chicken broth
1 package frozen butternut squash (about 10 oz.)
1 tsp olive oil
1 tsp butter
1 shallot
1 cup Arborio rice
1/2 cup white wine
4 cups chicken broth
1/4 cup Parmesan cheese, grated
salt and pepper for taste

Directions:
Place the chicken broth in a small saucepan to heat.
Microwave the squash in a microwavable safe bowl for 5 minutes.
Stir the squash and set aside.
Heat a medium saucepan over medium heat with the olive oil and butter.
Add the shallot and cook about 4 minutes.
Add the rice to the shallot and stir for about 3 minutes to toast rice.
Stir in the white wine for about a minute.
Add 1/2 cup of the heated chicken broth to the rice and continue to stir until the liquid is absorbed.
Continue to add 1/2 cup of the heated chicken broth until the liquid is absorbed for about 15 minutes.
Stir in the squash into the risotto and continue stirring until the risotto is creamy.
Remove the saucepan from the heat and stir in the cheese.
Season with salt and pepper.

Recipe adapted from allrecipes.
Did you already know..................
-Risotto is a rice.
-Risotto is originally from Northern Italy.
-During the medieval times, the Arabs introduced rice to Italy.
-Due to the humidity of the Mediterranean, the Italians found rice is a productive crop.

Sunday, November 13, 2011

Asparagus with lemon and thyme

Do you like asparagus? My son does. One morning, he asked me to make asparagus for supper. My husband would never ask for anything green for any meal. My husband thinks my son is crazy.
 Since I just made the roast chicken with lemon and thyme, I thought it would be a nice addition to the asparagus. Also, I wanted to try it out before Thanksgiving. 
I asked my son if he wanted to help and he said sure. At home, I think my son's two favorite words are sure and Mamma. "Son, do you want me to add lemon to the asparagus?" He shrugs, "Sure." "Should I try adding a little thyme?" "Sure." My oldest replies, "Why not?"

Asparagus with lemon and thyme 1 lb asparagus
1 1/2 tsp olive oil
1/4 lemon zest, cut into stripes
1 tsp dry thyme
salt and pepper
  1. Preheat oven to 450 degrees.
  2. Take one stalk of asparagus and bend it in half until it snaps.
  3. Cut the other pieces of asparagus the same length as the snapped asparagus.
  4. Drizzle the olive oil over the asparagus.
  5. Add the lemon zest, thyme, salt, and pepper. Toss to coat the asparagus.
  6. Cook the asparagus for about 15 to 18 minutes.
Recipe by Jen of Sweet Morris.
 Did you already know..............
-Asparagus is a member of the lily family.
-When harvesting is completed, the asparagus spear will grow into ferns.
-A well cared asparagus plant can produce asparagus for about fifteen years from the same plant.