Sunday, July 22, 2012

Chock Full of Nuts Cookies

I love nuts in my cookies. So, I was very glad this recipe was not previously picked the members of The Project Pastry Queen. If you take a cookie and add four different types of nuts to it, this is the cookie you would have. Any other type of nuts can easily be substituted to your taste but why mess with perfection. Please check out the other members to see if they substituted different nuts in their cookies.
The hardest thing about making this recipe was keeping my children away from the toasted macadamia nuts. Alright, I will admit I did sample a couple of them but it was only for quality purposes. I did half the amount of the almond extract but added the omitted extract to the vanilla extract. 
Chock-Full-of-Nuts Cookies
3 cups pecan pieces
1 1/2 cups chopped macadamia nuts
1 1/2 cups chopped walnuts
1 1/2 cups slivered blanched almonds
1 1/2 cups butter, at room temperature
1 1/2 cups sugar
1 1/2 cups firmly packed brown sugar
3 large eggs
1 1/2 Tbsp vanilla extract
1 1/2 tsp almond extract
3 1/2 cups all purpose flour 
1 1/2 tsp baking soda
1 tsp salt

Directions:
  1. Preheat the oven to 350 degrees F.
  2. On a baking sheet, arrange the nuts in a single layer and toast them for 7 to 9 minutes or until golden brown.
  3. Allow the nuts to cool for 5 minutes.
  4. Chop the nuts into smaller pieces.
  5. Line the baking sheet with parchment paper.
  6. In a large bowl, cream the butter and both sugars until light and fluffy.
  7. Add the eggs, vanilla extract, and almond extract. Beat for 1 minute.
  8. Add the flour, baking soda, and salt. Beat for about 30 seconds or until the ingredients are thoroughly mixed.
  9. Stir in the nuts until combined.
  10. Scoop the dough about the size of a gold ball onto the baking sheet about 2 inches apart.
  11. Bake the cookies for 10 to 12 minutes and the cookies are golden brown around the edges with no raw looking dough in the middle. 
  12. Allow the cookies to cool for 10 minutes before transferring to a cooling rack.
The 6 1/2 dozen cookies will keep for 3 to 4 days in an airtight container or frozen well wrapped for up to 1 month. 
Recipe adapted from The Pastry Queen by Rebecca Rather. 
Did you already know...
-Hawaii grows 90% of the macadamia nuts worldwide.
-The macadamia nut is not native to Hawaii.
-A macadamia nut tree was first planted around 1881. 
-The macadamia nut originated from Australia.

Thursday, July 19, 2012

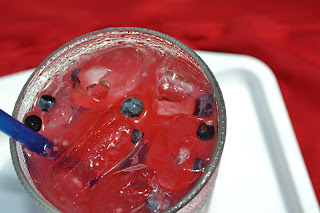
Berry Lemonade

My favorite drink is Sweet Tea. Oh, today's blog isn't about Sweet Tea but my second favorite drink: the great, the tangy, lemonade. Yea! My favorite friend asked if I still had some blueberries left. My supply is slow diminishing but don't worry I am going to freeze the rest.
Some children have their Dad build them tree houses. My oldest daughter had her Dad build her a lemonade stand. It turned out pretty good. My youngest children have already been trying to talk me into letting them put up the stand. Then I would have to share my lemonade and that is pretty hard. Now, the sweets I make I have no problem sharing but lemonade is a different problem.
Berry Lemonade
2 cups water for the sugar syrup
2 cups sugar for the sugar syrup
3 cups water
2 cups freshly squeezed lemon juice
1 cup freshly squeezed lime juice
2 cups of fresh berries (I used blueberries and raspberries.)
3 cups ice cubes

Directions:
  1. In a medium saucepan, combine 2 cups of water with the 2 cups of sugar to make the sugar syrup.
  2. Heat the water and sugar over medium heat and boil for 10 minutes.
  3. Allow the sugar water to cool and refrigerate for about 30 minutes or until ready to use.
  4. In a large pitcher, combine 2 cups of the chilled sugar syrup, 3 cups of water, lemon juice, and lime juice.
  5. In a small bowl, add 1 cup of the fresh berries and smash for about 20 seconds.
  6. Add the smashed berries and the remaining 1 cup of fresh berries to the pitcher. Stir well.
  7. Add the ice cubes and serve.
Recipe adapted from The Pastry Queen by Rebecca Rather.
Did you already know....
-One lemon will produce about 2 to 3 Tbsp of juice.
-According to Guinness World Records, the largest lemon weighed  11 lbs. 9.7 oz.
-The largest lemon was grown in Israel in 2003.

Wednesday, July 18, 2012

Blueberry Muffins

Since I have been making everything with blueberries this week, my youngest daughter begged for blueberry muffins. She loves them! She really loves them. I don't think you realize how much she loves them. My youngest daughter asks me to bake one thing and it is always blueberry muffins. When my husband gets his coffee at a coffee chain, she wants a blueberry muffin.
 I made this recipe and my daughter ate four of them in one day. I know I posted a blueberry muffin recipe last year which was very good but not four in a day good. I have bookmarked this recipe awhile ago and I'm glad I finally made it. If you have blueberries on hand, this is the recipe to make. These muffins taste just as good the next day. I can't tell you if they taste good the following day since we didn't have any left.
Baking Illustrated's Blueberry Muffin
2 cups all purpose flour
1 Tbsp baking powder
1/2 tsp salt
1 egg
1 cup sugar
4 Tbsp unsalted butter, melted and cooled slightly
1 1/4 cups sour cream
1 1/4 cups fresh wild blueberries

Directions:
  1. Preheat oven to 350 degrees F.
  2. Line a cupcake tin with the muffin liners and set aside.
  3. In a medium bowl, whisk the flour, baking powder, and salt until combined.
  4. In another medium bowl, whisk the egg until well combined about 20 seconds.
  5. To the egg, add the sugar and whisk vigorously for about 30 seconds. 
  6. Add half of the slightly cooled melted butter to the egg mixture and whisk to combine. 
  7. Add the remaining butter to the egg mixture and whisk to combine.
  8. Add the sour cream to the egg mixture and whisk just to combine.
  9. To the flour mixture, add the blueberries and gently toss to coat the berries.
  10. Fold the egg mixture to the flour mixture until the batter comes together for about 30 seconds. There may be some spots of flour remaining but it is fine and the batter should be very thick. Do not overmix.
  11. Divide the batter evenly in the lined cupcake tin. 
  12. Bake the muffins for 15 minutes and then rotate the pan from front to back.
  13. Cook the muffins for another 10 to 15 minutes and the muffins are light golden brown. The muffins are done when checked with a toothpick and the toothpick comes out clean.
  14. Remover the muffins from the oven and allow to cool on a wire rack for at least 5 minutes.
Recipe adapted from Brown Eyed Baker.
Did you already know...
-In 1948, Bill Rosenberg opened a doughnut restaurant named Open Kettle.
-Two years later, the restaurant was renamed Dunkin Donuts.
-In 1978, Dunkin Donuts added muffins to their menu.
(It wouldn't have taken my daughter 30 years to add muffins to the menu.)

Monday, July 16, 2012

Blueberry Pies

Oh, blueberry pie! How easy you are to make! I really don't know why I don't make you more often. Maybe there are other pies that compete with you like strawberry or peach. How silly of them since there is no slicing involved except to serve you. 
Mini Blueberry Pies
7 cups fresh wild blueberries, picked over and cleaned
1 cup sugar plus additional for sprinkling
3 Tbsp all purpose flour, plus more for the work surface
pinch of coarse salt
2 pie crust dough
2 Tbsp unsalted butter

Directions:
  1. Preheat oven to 425 degrees F.
  2. In a large bowl, combine the blueberries, sugar, flour, and salt.
  3. Gently toss to coat the blueberries. Set aside.
  4. On a floured work surface, roll out one pie crust dough to about 1/8 inch thickness.
  5. Take a large glass and cut out circles.
  6. In a cupcake tin, place each circle in the individual cups.
  7. Spoon the blueberry filling on top of the dough in the cupcake tin until it reaches just below the edge of the dough.
  8. Dot a little of the butter on top of the blueberry filling.
  9. Roll out the other pie crust dough to about 1/8 inch thickness. 
  10. Cut out desired shapes and place over each blueberry filling. Press down lightly to seal.
  11. Bake the pies about 30 minutes and golden brown.
  12. Remove the cupcake tin from the oven and allow the pies to cool before serving since the filling is very hot.
Recipe adapted from Martha Stewart Living 2002 Annual Recipes.
Did you already know...
-During the Civil War, blueberries were canned and shipped to the Union Troops.
-In Maine, wild blueberries are grown on over 60,000 acres.
-The bilberry is a cousin of the blueberry.
 I hope you have a wonderful week even though it is Monday!

Sunday, July 15, 2012

Blueberry Pie Bars

This weeks Project Pastry Queen recipe was picked by Amanda of Homekeeping Adventures. These pie bars are so delicious! I substituted the blackberries for blueberries. I am definitely making these bars again and try other types of fruit. Please make sure to check out the other member's version of this recipe.
Since there are so many different types of berries in season, I didn't want to use frozen. My husband is not a big fan of fruit desserts and he thought these were great. Everyone that came by to visit thought these bars were delicious. The best part about this dessert is that it is a pretty easy dessert to make. I have over six cups of blueberries still to use so guess what will be posting next?
Blueberry Pie Bars
Crust and Topping
3 cups all purpose flour
1 1/2 cups sugar
1/2 tsp salt
1 1/2 cups unsalted butter, chilled and cut into 1/2 inch cubes

Fruit Filling
4 large eggs
2 cups sugar
1 cup sour cream
3/4 cup all purpose flour
1/4 tsp salt
2 lbs. wild blueberries, picked over and cleaned

Directions:
  1. Preheat the oven to 350 degrees F.
  2. Grease a 9x13 inch baking pan with cooking spray.
  3. In a food processor, add the flour, sugar, and salt. Pulse for 45 seconds.
  4. To the flour mixture, add the butter. Pulse until the butter is evenly distributed into the flour about 30 to 60 seconds.
  5. Reserve 1 1/2 cups of the crust mixture to use as a topping.
  6. Press the flour mixture into the bottom of the greased pan.
  7. Bake the crust for 12 to 15 minutes or until golden brown.
  8. Allow the crust to cool for 10 minutes.
  9. To make the filling, whisk the eggs in a large bowl.
  10. Add the sugar, sour cream, flour, and salt to the eggs. Combine well.
  11. Gently fold in the blueberries.
  12. Spoon the mixture evenly over the crust.
  13. Sprinkle the reserved crust mixture evenly over the filling.
  14. Bake the blueberry pie bars for 45 to 55 minutes, until the top is lightly browned.
  15. Allow to cool at least 1 hour before cutting into the bars.
Recipe adapted from The Pastry Queen cookbook by Rebecca Rather.
Did you already know...
-The wild blueberry is one of four native fruit crops to North America.
-Maine produces 15% of all blueberries in North America.
-The top fruit export of Canada is the blueberry.