Monday, July 30, 2012

Bangers and Mash

Since my oldest daughter just returned from England, I asked her if she had Bangers and Mash when she was over there. She said no so I asked her if she saw it on the menu. She said yes but she didn't know what it was. My Dad said she never asked. My Dad said Bangers and Mash is a common pub dish. 
I told my daughter that Bangers and Mash is sausage and mashed potatoes. She said she would have ate it if she had known. My family really liked this dish very much. It is an easy dish to make. The sausage and potatoes are served with a sauce or gravy. I will admit that I don't know how authentic my dishes will be this week but they taste good. The traditional gravy is made with a stock but when I went into the pantry I couldn't find any. The meal was done and I didn't feel like having anyone wait so I decided to make ours cheesy.
Bangers and Mash
2 lbs. russet potatoes, peeled and diced
8 links beef sausage
1 Tbsp vegetable oil
1 large onion, sliced
2 Tbsp flour
4 cups milk
 1/4 cup Cheddar Cheese
2 Tbsp butter
2 Tbsp milk
2 Tbsp heavy cream
salt and pepper

Directions:
  1. In a large saucepan, cover the potatoes with cold water.
  2. Bring the potatoes to a boil and simmer for 20 minutes.
  3. In a skillet, add the oil and heat over medium heat.
  4. Add the sausage to the skillet and brown.
  5. Remove the sausage and place on a plate to the side.
  6. To the skillet, add the onion to the pan. Cook the onion until soft about 5 minutes.
  7. Add the flour to the skillet and cook for 1 minute. 
  8. Whisk in the milk to the skillet and return the sausage to the pan.
  9. Cook the sausage for about 15 minutes until the liquid is reduce to the desired consistency. Stirring occasionally. 
  10. Stir in the cheese.
  11. When the potatoes are done, drain the potatoes and mash.
  12. To the mashed potatoes, add the butter, milk, heavy cream, salt, and pepper. 
  13. To serve, place the mashed potatoes on a plate. Place the sausage on top of the potatoes. Cover the sausage and potatoes with the cheese sauce. 
Recipe adapted from Foodnetwork. com.
Did you already know...
-Bangers and Mash is a traditional English meal. 
-Bangers and Mash are often served with an onion gravy.
-A popular side to Bangers and Mash is peas.

Sunday, July 29, 2012

Dulce de Leche Macaroons

This week's Project Pastry Queen was picked by Missy of Creative Missy. The Macaroons are rich, sweet, and delicious. My youngest daughter loves Dulce de Leche so she thought I should shouldn't be adding it to coconut but these are good. My Mom loves Macaroons and she liked them. 
I didn't add anything else to the batch I made. You can add chocolate or toasted almonds but I kept it simple. I wish I had thought to add English toffee to them since I have been making English fare but next time I will. My next post will be back to my culinary English journey.
Dulce de Leche Macaroons
1 can of Dulce de Leche (click here for recipe)
3 cups lightly packed sweetened flaked coconut
2 tsp vanilla extract

Directions:
  1. Preheat oven to 350 degrees F.
  2. Line a baking sheet with parchment paper.
  3. In a medium bowl, combine the cooled Dulce de Leche, coconut, and vanilla. Stir until combined.
  4. Using a 1 3/4 inch diameter scoop, spoon a firmly packed spoonful of the coconut mixture onto the parchment lined baking sheet. Space the coconut mixture about 1 1/2 inches apart.
  5. With a wet fingertip, lightly flatten the coconut mixture gently.
  6. Bake the Macaroons for 12 to 14 minutes. The edges should be dark brown and crisp.
  7. Allow the Macaroons to cool for 10 to 15 minutes.
Recipe adapted from The Pastry Queen cookbook by Rebecca Rather.
Did you already know...
-Toffee became popular in England in the late 1800s.
-In 1889, a toffee house owned by Mrs. Bushell was located outside the Everton Football Club (Everton FC).
-Many football patrons purchased vast quantities of the toffee.
-In 1892, the football club was moved and Mrs. Bushell received permission to sell her toffee inside the football stadium before the games.
-The Everton FC's nickname is The Toffees.
-In America, Everton FC is a soccer team.

Friday, July 27, 2012

Olympics begins

Since the Olympics opening ceremony is tonight, I thought scones would be a fitting way to use up the remaining raspberries I have. Next week, I am going to post some British dishes. This is going to be a culinary journey for my family. Yes, this even includes my oldest daughter since she ate mostly hamburgers when she was in England.
A couple years ago, my husband and I spent the night in England but it was only because we were in transit. We arrived when it was dark outside and we left at dawn. We did not enjoy warm scones but we were able to get our passport stamped. Next time, we will stay longer.
I love scones since they are easy to make and make a quick breakfast for the next day. My youngest daughter likes scones since they are similar to muffins and biscuits. My youngest son just like to say the name scones. Would you like some scones this morning?

Raspberry Cream Cheese Scones
2 1/2 cups all purpose flour
5 Tbsp unsalted butter, cold and cut into small pieces
1/2 cup sugar
2 tsp baking powder
1/4 tsp salt
7 Tbsp cream cheese, softened
1/3 cup milk
1 egg, lightly beaten
1/2 cup fresh raspberries

Directions:
  1. Preheat oven to 400 degrees F.
  2. Line a baking sheet with parchment paper and set aside.
  3. In a medium bowl, gently stir cream cheese, milk, and egg together until combined.
  4. In a large bowl, whisk together the flour, baking powder, salt, and sugar.
  5. Cut in the butter to the flour mixture using your hands, pastry blender, or two forks until the mixture resembles fine crumbs.
  6. Create a well in the center of the flour mixture and add the cream cheese mixture with the raspberries.
  7. Carefully, mix together the dough.
  8. Form the dough into a circle 1 inch thick.
  9. Cut 2 inch circles into the dough and place the circles on the parchment paper spacing about 1 inch apart.
  10. Carefully gather the remaining scrapes and cut out a few more circles while trying not to rework the dough to much.
  11. Bake the scones for 20 minutes or until golden brown and cooked through.   
Recipe adapted from Raspberri Cupcakes.
Did you already know...
-Great Britain comprises of England, Scotland, and Wales.
-Scones originate from Scotland.
-The United Kingdom comprises of England, Northern Ireland, Scotland, and Wales.

Thursday, July 26, 2012

Raspberry cheesecake

I am always surprised how advance technology has advanced but sometimes I am surprised we haven't advanced to The Jetsons technology yet. Do you remember The Jetsons? I always liked Rosey the robot. 
 The reason I thought about The Jetsons was because my family are big gamers. They play on the PS3 with other family members and friends. I choice to blog. The other day my sister was playing and she has a Bluetooth so she can talk during the game. Since she knew my husband was playing, my nieces said hi to him. My children heard their cousin,s voices and started to talk to the TV. Of course, my nieces couldn't hear them. Since my sister only lives within 20 minutes of me, I think we will pass when The Jetson's TV monitor comes out. Just picture this- I go downstairs in my pjs (which means my old t-shirts since they are comfy but I can't wear them out) and I am greeted full screen by someone I would rather not see me. It just isn't going to happen no matter how much my husband tries. No Jetson's TVs in this household. How about you? Would you get one? I am not talking about Skype either just the next level of Skype.
Raspberry Cheesecake 
1 1/4 cups graham cracker crumbs
4 Tbsp. unsalted butter, melted
3 Tbsp. sugar for the crust

Tuesday, July 24, 2012

Raspberry Cream Sandwiches

I will admit my favorite way to eat raspberries are plain. I also love adding raspberries to my cereal. I add a little cereal and a lot of milk so I end up eating mostly raspberries with milk. What is your favorite way to eat raspberries? I know my daughters prefer plain.
 Since we normally eat the raspberries before I can make any recipes, I went raspberry picking twice this year. We probably will go again but it will be for some golden raspberries. Have you ever seen a golden raspberry? I saw this recipe at the beginning of the year and I bookmarked it. The cookie is a nice sugar cookie in which my daughter preferred with no filling. My husband saw me scrapping the vanilla bean and asked me what was I doing. I held out the vanilla bean and asked him to smell. He hesitated so my son did. My son looked up at his dad and said it is vanilla. My husband confirmed it was vanilla. I think my son spends a lot of time in the kitchen with me. Now, how do I get my husband in their more often is the question?
 Raspberry Cream Sandwiches
1 3/4 all purpose flour
2 tsp baking soda
1/4 tsp salt
10 Tbsp unsalted butter, softened
1 1/2 cups sugar
1 egg
1 Tbsp vanilla extract
1 vanilla bean, halved lengthwise, seeds scraped and reserved
1 1/3 cups fresh raspberries
1 Tbsp sugar, for the filling
7 oz. white chocolate, coarsely chopped
1/3 cup heavy cream

Directions:
  1. Preheat oven to 350 degrees F. 
  2. Line a baking sheet with parchment paper and set aside.
  3. In a large bowl, whisk together the flour, baking soda, and salt. 
  4. In another bowl, cream the butter and sugar together.
  5. Add the egg, vanilla, and scraped vanilla seeds into the sugar butter. Mix until smooth.
  6. Gradually add the flour mixture to the sugar butter mixture.
  7. Scoop 1 inch mounds of dough onto the baking sheet spacing the dough 2 inches apart. 
  8. Bake the cookies for 4 minutes and then rotate.
  9. Bake the cookies for another 4 to 5 minutes or until the cookies are golden.
  10. Allow the cookies to cool on wire racks.
  11. In a food processor, puree the raspberries and the sugar to make the filling.
  12. Pour the raspberries through a fine sieve to extract the juice and remove the seeds.
  13. Melt the chocolate in a double broiler over simmering water.
  14. Remove the melted chocolate from the heat and whisk in the cream in a slow, steady stream.
  15. Add the raspberry mixture to the chocolate. Whisk slowly until pale about 3 minutes. 
  16. Refrigerate the raspberry chocolate mixture for about 30 minutes.
  17. To assemble the cookies by spreading 1 Tbsp of the raspberry chocolate mixture on the bottom of one cookie. 
  18. Add another cookie to sandwich the filling in the middle.
  19. Cookies can be refrigerated between layers of wax paper in an airtight container at room temperature up to 2 days.
Recipe adapted from Martha Stewart's Cookies.
Did you already know...
-Different types of raspberries include red, golden, purple, and black.
-It is believed raspberries originated from Southeast Asia.
-Raspberries have a hollow core. Blackberries are not hollow in the center.

Monday, July 23, 2012

Raspberry Phyllo Tarts


Since I really didn't think you had enough berries recipes already, I will (just for you) post a few raspberry recipes. Oh, your welcome. You don't have to thank me. My children have been thanking me lately. They must be my children since they aren't complaining yet.
If you couldn't tell by now, I love berries. So, I was looking up raspberry recipe in Cooking Light Annual Recipes 2008 cookbook and noticed a raspberry Phyllo tart recipe. It looked easy. It looked quick and I totally changed it besides a few ingredients. All of my tarts were gone within the hour. So, here is my inspired recipe from Cooking Light.
Raspberry Phyllo Tart Recipe
1 (2.1 oz.) package of mini phyllo shells
4 oz. reduced fat cream cheese, softened
2 Tbsp honey
1/4 tsp almond extract
1/2 cup chopped almonds, toasted
1/4 cup raspberries
Crushed almonds and additional raspberries for garnish


Directions:
  1. Preheat oven to 350 degrees F.
  2. Place shells on a baking sheet.
  3. In a medium bowl, combine the cream cheese, honey, and almond extract.
  4. Stir in 1/4 cup of the chopped almonds and the 1/4 cup raspberries. Mix until well combined.
  5. Spoon in about 1 tsp of the cream cheese mixture into the Phyllo shells.
  6. Bake the shells for about 5 minutes and rotate pan.
  7. Bake the shells for another 5 minutes or until the cream cheese mixture is firm.
  8. Remove the shells from the oven and allow to cool for about 5 minutes.
  9. Top the shells with crushed almonds and raspberries if desired.
 Recipe created by Jen of Sweet Morris.
 Did you already know...
-Another name for phyllo is filo or fillo. 
-The largest producer of phyllo products is Athens Foods.
-Phyllo dough has been produced since the Ottoman Empire but Athens foods have been producing it for over 50 years.

Sunday, July 22, 2012

Chock Full of Nuts Cookies

I love nuts in my cookies. So, I was very glad this recipe was not previously picked the members of The Project Pastry Queen. If you take a cookie and add four different types of nuts to it, this is the cookie you would have. Any other type of nuts can easily be substituted to your taste but why mess with perfection. Please check out the other members to see if they substituted different nuts in their cookies.
The hardest thing about making this recipe was keeping my children away from the toasted macadamia nuts. Alright, I will admit I did sample a couple of them but it was only for quality purposes. I did half the amount of the almond extract but added the omitted extract to the vanilla extract. 
Chock-Full-of-Nuts Cookies
3 cups pecan pieces
1 1/2 cups chopped macadamia nuts
1 1/2 cups chopped walnuts
1 1/2 cups slivered blanched almonds
1 1/2 cups butter, at room temperature
1 1/2 cups sugar
1 1/2 cups firmly packed brown sugar
3 large eggs
1 1/2 Tbsp vanilla extract
1 1/2 tsp almond extract
3 1/2 cups all purpose flour 
1 1/2 tsp baking soda
1 tsp salt

Directions:
  1. Preheat the oven to 350 degrees F.
  2. On a baking sheet, arrange the nuts in a single layer and toast them for 7 to 9 minutes or until golden brown.
  3. Allow the nuts to cool for 5 minutes.
  4. Chop the nuts into smaller pieces.
  5. Line the baking sheet with parchment paper.
  6. In a large bowl, cream the butter and both sugars until light and fluffy.
  7. Add the eggs, vanilla extract, and almond extract. Beat for 1 minute.
  8. Add the flour, baking soda, and salt. Beat for about 30 seconds or until the ingredients are thoroughly mixed.
  9. Stir in the nuts until combined.
  10. Scoop the dough about the size of a gold ball onto the baking sheet about 2 inches apart.
  11. Bake the cookies for 10 to 12 minutes and the cookies are golden brown around the edges with no raw looking dough in the middle. 
  12. Allow the cookies to cool for 10 minutes before transferring to a cooling rack.
The 6 1/2 dozen cookies will keep for 3 to 4 days in an airtight container or frozen well wrapped for up to 1 month. 
Recipe adapted from The Pastry Queen by Rebecca Rather. 
Did you already know...
-Hawaii grows 90% of the macadamia nuts worldwide.
-The macadamia nut is not native to Hawaii.
-A macadamia nut tree was first planted around 1881. 
-The macadamia nut originated from Australia.

Thursday, July 19, 2012

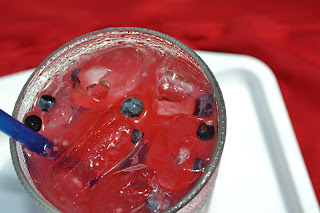
Berry Lemonade

My favorite drink is Sweet Tea. Oh, today's blog isn't about Sweet Tea but my second favorite drink: the great, the tangy, lemonade. Yea! My favorite friend asked if I still had some blueberries left. My supply is slow diminishing but don't worry I am going to freeze the rest.
Some children have their Dad build them tree houses. My oldest daughter had her Dad build her a lemonade stand. It turned out pretty good. My youngest children have already been trying to talk me into letting them put up the stand. Then I would have to share my lemonade and that is pretty hard. Now, the sweets I make I have no problem sharing but lemonade is a different problem.
Berry Lemonade
2 cups water for the sugar syrup
2 cups sugar for the sugar syrup
3 cups water
2 cups freshly squeezed lemon juice
1 cup freshly squeezed lime juice
2 cups of fresh berries (I used blueberries and raspberries.)
3 cups ice cubes

Directions:
  1. In a medium saucepan, combine 2 cups of water with the 2 cups of sugar to make the sugar syrup.
  2. Heat the water and sugar over medium heat and boil for 10 minutes.
  3. Allow the sugar water to cool and refrigerate for about 30 minutes or until ready to use.
  4. In a large pitcher, combine 2 cups of the chilled sugar syrup, 3 cups of water, lemon juice, and lime juice.
  5. In a small bowl, add 1 cup of the fresh berries and smash for about 20 seconds.
  6. Add the smashed berries and the remaining 1 cup of fresh berries to the pitcher. Stir well.
  7. Add the ice cubes and serve.
Recipe adapted from The Pastry Queen by Rebecca Rather.
Did you already know....
-One lemon will produce about 2 to 3 Tbsp of juice.
-According to Guinness World Records, the largest lemon weighed  11 lbs. 9.7 oz.
-The largest lemon was grown in Israel in 2003.

Wednesday, July 18, 2012

Blueberry Muffins

Since I have been making everything with blueberries this week, my youngest daughter begged for blueberry muffins. She loves them! She really loves them. I don't think you realize how much she loves them. My youngest daughter asks me to bake one thing and it is always blueberry muffins. When my husband gets his coffee at a coffee chain, she wants a blueberry muffin.
 I made this recipe and my daughter ate four of them in one day. I know I posted a blueberry muffin recipe last year which was very good but not four in a day good. I have bookmarked this recipe awhile ago and I'm glad I finally made it. If you have blueberries on hand, this is the recipe to make. These muffins taste just as good the next day. I can't tell you if they taste good the following day since we didn't have any left.
Baking Illustrated's Blueberry Muffin
2 cups all purpose flour
1 Tbsp baking powder
1/2 tsp salt
1 egg
1 cup sugar
4 Tbsp unsalted butter, melted and cooled slightly
1 1/4 cups sour cream
1 1/4 cups fresh wild blueberries

Directions:
  1. Preheat oven to 350 degrees F.
  2. Line a cupcake tin with the muffin liners and set aside.
  3. In a medium bowl, whisk the flour, baking powder, and salt until combined.
  4. In another medium bowl, whisk the egg until well combined about 20 seconds.
  5. To the egg, add the sugar and whisk vigorously for about 30 seconds. 
  6. Add half of the slightly cooled melted butter to the egg mixture and whisk to combine. 
  7. Add the remaining butter to the egg mixture and whisk to combine.
  8. Add the sour cream to the egg mixture and whisk just to combine.
  9. To the flour mixture, add the blueberries and gently toss to coat the berries.
  10. Fold the egg mixture to the flour mixture until the batter comes together for about 30 seconds. There may be some spots of flour remaining but it is fine and the batter should be very thick. Do not overmix.
  11. Divide the batter evenly in the lined cupcake tin. 
  12. Bake the muffins for 15 minutes and then rotate the pan from front to back.
  13. Cook the muffins for another 10 to 15 minutes and the muffins are light golden brown. The muffins are done when checked with a toothpick and the toothpick comes out clean.
  14. Remover the muffins from the oven and allow to cool on a wire rack for at least 5 minutes.
Recipe adapted from Brown Eyed Baker.
Did you already know...
-In 1948, Bill Rosenberg opened a doughnut restaurant named Open Kettle.
-Two years later, the restaurant was renamed Dunkin Donuts.
-In 1978, Dunkin Donuts added muffins to their menu.
(It wouldn't have taken my daughter 30 years to add muffins to the menu.)

Monday, July 16, 2012

Blueberry Pies

Oh, blueberry pie! How easy you are to make! I really don't know why I don't make you more often. Maybe there are other pies that compete with you like strawberry or peach. How silly of them since there is no slicing involved except to serve you. 
Mini Blueberry Pies
7 cups fresh wild blueberries, picked over and cleaned
1 cup sugar plus additional for sprinkling
3 Tbsp all purpose flour, plus more for the work surface
pinch of coarse salt
2 pie crust dough
2 Tbsp unsalted butter

Directions:
  1. Preheat oven to 425 degrees F.
  2. In a large bowl, combine the blueberries, sugar, flour, and salt.
  3. Gently toss to coat the blueberries. Set aside.
  4. On a floured work surface, roll out one pie crust dough to about 1/8 inch thickness.
  5. Take a large glass and cut out circles.
  6. In a cupcake tin, place each circle in the individual cups.
  7. Spoon the blueberry filling on top of the dough in the cupcake tin until it reaches just below the edge of the dough.
  8. Dot a little of the butter on top of the blueberry filling.
  9. Roll out the other pie crust dough to about 1/8 inch thickness. 
  10. Cut out desired shapes and place over each blueberry filling. Press down lightly to seal.
  11. Bake the pies about 30 minutes and golden brown.
  12. Remove the cupcake tin from the oven and allow the pies to cool before serving since the filling is very hot.
Recipe adapted from Martha Stewart Living 2002 Annual Recipes.
Did you already know...
-During the Civil War, blueberries were canned and shipped to the Union Troops.
-In Maine, wild blueberries are grown on over 60,000 acres.
-The bilberry is a cousin of the blueberry.
 I hope you have a wonderful week even though it is Monday!

Sunday, July 15, 2012

Blueberry Pie Bars

This weeks Project Pastry Queen recipe was picked by Amanda of Homekeeping Adventures. These pie bars are so delicious! I substituted the blackberries for blueberries. I am definitely making these bars again and try other types of fruit. Please make sure to check out the other member's version of this recipe.
Since there are so many different types of berries in season, I didn't want to use frozen. My husband is not a big fan of fruit desserts and he thought these were great. Everyone that came by to visit thought these bars were delicious. The best part about this dessert is that it is a pretty easy dessert to make. I have over six cups of blueberries still to use so guess what will be posting next?
Blueberry Pie Bars
Crust and Topping
3 cups all purpose flour
1 1/2 cups sugar
1/2 tsp salt
1 1/2 cups unsalted butter, chilled and cut into 1/2 inch cubes

Fruit Filling
4 large eggs
2 cups sugar
1 cup sour cream
3/4 cup all purpose flour
1/4 tsp salt
2 lbs. wild blueberries, picked over and cleaned

Directions:
  1. Preheat the oven to 350 degrees F.
  2. Grease a 9x13 inch baking pan with cooking spray.
  3. In a food processor, add the flour, sugar, and salt. Pulse for 45 seconds.
  4. To the flour mixture, add the butter. Pulse until the butter is evenly distributed into the flour about 30 to 60 seconds.
  5. Reserve 1 1/2 cups of the crust mixture to use as a topping.
  6. Press the flour mixture into the bottom of the greased pan.
  7. Bake the crust for 12 to 15 minutes or until golden brown.
  8. Allow the crust to cool for 10 minutes.
  9. To make the filling, whisk the eggs in a large bowl.
  10. Add the sugar, sour cream, flour, and salt to the eggs. Combine well.
  11. Gently fold in the blueberries.
  12. Spoon the mixture evenly over the crust.
  13. Sprinkle the reserved crust mixture evenly over the filling.
  14. Bake the blueberry pie bars for 45 to 55 minutes, until the top is lightly browned.
  15. Allow to cool at least 1 hour before cutting into the bars.
Recipe adapted from The Pastry Queen cookbook by Rebecca Rather.
Did you already know...
-The wild blueberry is one of four native fruit crops to North America.
-Maine produces 15% of all blueberries in North America.
-The top fruit export of Canada is the blueberry.

Saturday, July 14, 2012

Blueberry Season

Are you blue? Have you been having some bad luck lately? Yesterday was Friday the 13th and it is over. Only good luck ahead for all of us, right? I will admit the only thing blue lately for me would be all the blueberries I have been eating. My husband can not say the same since he just had knee surgery-yes ouch!
 It is blueberry season here in Maine and I have picked over 6 cups of wild blueberries lately. So, please forgive me now but I will be posting some blueberry recipes in the next coming days. I have warned you. Don't worry I will be going raspberry picking in a couple of days. Then I may surprise you one day when you are expecting another blueberry recipe and they are gone like all my blueberries.
I decided to remake the Ultimate Streusel Cake with Streusel Filling into a blueberry coffee cake. This remake was suggested by my oldest daughter and it came out pretty good. My husband really liked it and he doesn't eat fruit often.


Blueberry Coffee Cake 
Streusel Filling:
1/2 cups brown sugar
1/4cup sugar
3/4 cups almonds, toasted and chopped
1/4 cup all purpose flour
3Tbsp unsalted butter, room temperature

Cake:
2 1/2 cups of all purpose flour
1 tsp baking soda
1 tsp baking powder
1/4 tsp coarse salt
10 Tbsp unsalted butter, room temperature
1 cup sugar
3 large eggs
1 tsp vanilla extract
1  cups sour cream 
1 cup of blueberries ( I used wild Maine blueberries)

Icing:
2 1/2 cups of powder sugar

1/4 cup milk

1 tsp vanilla extract
Additional powder sugar, for dusting if desired


Directions:
1. Preheat oven to 350 degrees.
2. Grease the Bundt pan.
3. Combine all the ingredients of the streusel filling together. Store in the refrigerator until needed.
4. In another bowl to make the cake, whisk flour, baking soda, baking powder, and salt into a bowl.
5. In a third bowl, cream butter and sugar until light and fluffy.

6. Add the eggs, vanilla, and sour cream to the butter mixture. Mix until just combined.

7. Slowly, add the flour mixture to the butter mixture. Mix until just combine.

8. Spoon half of the batter into the Bundt pan. Top with two thirds of the streusel filling.

9. Spoon the rest of the batter into the Bundt pan covering the streusel filling.

10. Top with the remaining streusel filling.

11. Bake until golden brown and cake tester comes out clean, about an hour.

12. Transfer cake to wire rack and let cool for 20 minutes.

13. When the cake is cooled enough, remove cake from pan.

14. In a medium bowl, prepare the icing by mixing the powder sugar and milk until well combined. Drizzle over cake.

15. Dust with powder sugar.


Adapted from Martha Stewart Living 2002 Annual Recipes. 

Did you already know...
-The most common knee injure is a torn meniscus.
-Each knee has 2 meniscus which is the cartilage that acts like a cushion between the shinbone and thighbone.
-By forcefully rotating or twisting the knee, the meniscus can become torn.

Tuesday, July 10, 2012

Fresh Strawberry Jam

Since our oldest son is in his 20s, he doesn't live with us but we are very fortunate to see him often. He has been working at restaurants for awhile now but he only works in the evenings. My husband called him the other day and said this is your boss and we have decided to start serving breakfast so you need to come in. Our son called right back and said that he didn't fall for it and he wasn't even going to come over to make us breakfast. Hey, I thought it was a good try on my husband's part. 
Our son did come over later that day to join us for dinner. I offered him some of my jam and he really liked it. Everyone in my household liked it. I was glad since it was my first time ever making jam. Were you surprised? I have a great friend and she makes jam every year in a pressure cooker. I think the pressure cooker intimidated me. Plus I still have nightmares of sterilizing baby bottles so why start with mason glasses? This is an easy recipe and next time I'm going to get fancy with it.
Fresh Strawberry Jam
1 1/2 pint of strawberries, hulled and halfed
2 cups sugar (use slightly less if the strawberries are very sweet.)
1/2 lemon, freshly squeezed

Directions:
In a small saucepan, combine the sugar and lemon juice over low heat for 10 minutes or until the sugar dissolves.
Add the strawberries and continue to cook over very low heat for 20 minutes or until mixture boils slowly. 
Continue to cook until a small amount of the juice gels on a very cold plate.
Store in a sealed container in the refrigerator for a week, freeze, or follow proper canning guidelines.

Recipe adapted from Ina Garten.  
Did you already know...
-In 1858, John Landis Mason patented his Mason jars.
-John Mason gave another company his patent rights and passed away in 1900 a poor man.
-Over the years, there has only been a few iterations to Mr. Mason's original design.

Sunday, July 8, 2012

Tostadas with Chicken and Parsley

Today's Project Pastry Queen recipe was picked by Shawnda from Confections of a Foodie Bride. The original recipe was Prosciutto Tostadas with Shrimp and Parsley. 
Well, I conferred with my husband and he said he wasn't a big fan of prosciutto but he could eat shrimp anytime. Anytime means fried at a local restaurant. The problem with shrimp is that it is not in season here and I didn't feel like it. Don't you have to be in the mood for it? I live in Maine and I usually only have lobster maybe twice a year. So, I made this recipe with chicken.
Tostadas with Chicken and Parsley
1/4 cup vegetable oil
1 lb. chicken breast, cut into chunks
2 green onions, chopped
3 cloves of garlic, minced
2 Tbsp lemon juice, freshly squeezed
1 Tbsp champagne vinegar
1/4 cup chopped Italian parsley
salt and pepper
6 flour tortillas
2 cups mixed baby greens, washed
1 red bell pepper, roasted and julienned

Directions:
  1. Heat a skillet with the vegetable oil over medium heat.
  2. Add one tortilla at a time and fry for 30 seconds or until golden brown. Flip and repeat on the other side. Remove the tortilla and place on a plate lined with paper towels.
  3. Repeat with 4 more tortillas. The last tortilla cut into strips before frying.
  4. In the same skillet used for the tortillas, lower the heat to low.
  5. After a few minutes, add the chicken breast. Cook the chicken for about 3 minutes or until golden brown before repeating on the other side.
  6. Add the green onions and garlic to the skillet with the chicken. Cook the chicken for about 2 minutes or until cooked all the way through.
  7. Remove the skillet from the heat. 
  8. Add the lemon juice, vinegar, and parsley. Season with salt and pepper.
  9. On a plate, place on fried tortilla.
  10. Top the tortilla with the baby greens, roasted red pepper, some of the chicken, and a few fried tortilla strips.
  11. Repeat with the other 5 tortillas to feed a family of five.
Recipe adapted from The Pastry Queen cookbook. Please make sure to check out the other's members versions of this recipe.
Did you already know...
-Maine Northern shrimp season is normally from December to May.
-It is estimated the New England shrimp fishery harvested approximately 6 million pounds of shrimp before regulators ended the season in February this year.
-Northern shrimp mature as males for 2 1/2 years before becoming females a year later.
How my daughter ate her tostada-note the added ranch dressing

Friday, July 6, 2012

Hand Pies

We did make it to the beach with no rain for the 4th of July. We even had no problem finding parking. Every time my children enter the cold Maine ocean water, I really expect them to come out blue. Not even their lips were blue so I know they are true Maineiacs. I may have been born in New England but I won't even put my toe into the New England ocean. I can say I have done it hence why I won't do it again.
 In Maine, it is strawberry picking time around the 4th of July. Since I had fresh strawberries, I decided to make Rebecca Rather's Fourth of July Fried Pies. I also made the cherries and blueberries. My favorite was the blueberry. My youngest daughter's favorite was the cherry but my mother in law liked the strawberry. The recipe in the book even had peaches. This time, I decided to bake the pies but next time I will definitely try frying them.
Fruit filling
1 cup fresh fruit (I tried strawberries, blueberries, and cherries)
1/2 cup fruit preserve to match the fresh fruit used

Directions:
  1. In a bowl, combine the fruit with their matching preserves. Set aside.
Dough
3 1/2 cups all purpose flour
2 cups white whole wheat flour
2 tsp salt
1 cup unsalted butter, chilled and cut into 1/2 inch cubes
1 1/2 cups ice water
1 large egg
2 Tbsp water

Directions:
  1. Preheat the oven to 375 degrees F.
  2. Line a baking sheet with parchment paper.
  3. In a large bowl, combine the flour, baking powder, and salt.
  4. Work the butter into the flour mixture until the mixture resembles cornmeal.
  5. Add the ice water and gently form the dough into a ball.
  6. Divide the dough into thirds.
  7. Lightly flour a clean surface and roll out each portion of the dough to 1/16th inch thickness.
  8. Cut the dough into 5 inch diameter circles.
  9. Place 1 Tbsp of the desired filling in the center of each dough round.
  10. Fold the rounds in half and with wet fingers press the edges to seal using water.
  11. Crimp the edges of each hand pie with the tines of a fork.
  12. Beat the egg and water together to make an egg wash.
  13. Lightly brush the tops of each hand pie with the egg wash.
  14. Bake the pies for about 12 minutes or until golden brown.
Toppings:
Sprinkle with powder sugar.
Recipe adapted from the Pastry Queen cookbook.
Did you already know... 
-The first fruit to ripen in the Spring are strawberries.
-There are about 200 seeds in one strawberry.
- Strawberries and roses belong to the Biological classification Rosaceae family.

Wednesday, July 4, 2012

4th of July

Happy 4th of July! Do you have big plans? We are just hoping it will not rain. My youngest daughter keeps telling me that we can still go to the beach. It doesn't matter if it is raining since we will be getting wet anyways. I guess it is the perfect way to miss the crowd.
When I was growing up, we would visit my relatives in New Hampshire around the 4th of July. 4th of July was my grandmother's birthday. We would go swimming at the pond and visit with our relatives. Plus my uncles would have a fireworks war. 
 Chocolate Cookie Cutouts
1 1/2 cups all purpose flour
1/2 cups unsweetened cocoa powder
1/8 tsp salt
3/4 cup unsalted butter, room temperature
1 1/2 cups powder sugar, sifted
1 large egg, lightly beaten
1/2 tsp vanilla extract
nonparelis, colored sugar, other decorations

Directions:
  1. Line a baking sheet with parchment paper.
  2. In a medium bowl, sift the flour, cocoa powder, and salt.
  3. In a large bowl, cream the butter and powder sugar until fluffy.
  4. Add the egg to the butter mixture and vanilla.
  5. Slowly, add the flour to the butter mixture. Mix until incorporated.
  6. Wrap the dough in plastic wrap and refrigerate for 1 hour or overnight.
  7. After the dough is chilled, roll out the dough to 1/8 inch thickness onto a lightly floured surface.
  8. Using a cookie cutter, cut out the desired shapes. Transferred the cutout shapes to baking sheet, spacing them about 2 inches apart.
  9. Transfer the baking sheet to the refrigerator and allow to chill for 20 minutes. (I worked in batches so the dough was chilling while some were baking.)
  10. Sprinkle the dough with desired edible decorations. 
  11. Bake the cookies for about 8 minutes or until crisp.
  12. Allow the cookies to cool completely on wire racks.
Recipe adapted from Martha Stewart's Cookies.
(If you store these in plastic bags, the cookies will still taste good but will become soft.)
Did you already know...
-According to the weather channel, the weather in Philadelphia was 76 degrees F on July 4th, 1776.
-When the Continental Congress approved the Declaration of Independence on July 4th, 1776, there were 2.5 million people living in the newly independent nation.
-This July 4th, 2012, there is an estimated 314 million people living in the United States.
Happy Fourth of July!