Pages

Monday, March 31, 2014

Vanilla Wafer Cookies

When I made these cookies, it was late so the recipe seemed a little off to me. I decided to bake one cookie as a test. When it came out of the oven, my daughter rushed over to try one until she saw I had make only one cookie. She had to go tell her Dad that I made only one cookie like I was crazy. So, my husband and son came over to witness my lone cookie on the baking sheet. I told them my dilemma about the recipe. Then I realized I forgot to add the vanilla. They all decided then that I was crazy since I was making vanilla wafer cookies. We split the lone cookie. My husband is so sweet and told me that my lone cookie tasted pretty good even with missing the key ingredient. I added the vanilla to the remaining dough and then made the rest of the cookies. They were pretty popular with my kids and husband. Do they taste like the box vanilla wafers? No but they are still pretty good.
Vanilla Wafer Cookies
1 cup all purpose flour, sifted
1/2 cup sugar
1/2 tsp baking powder
1/4 tsp salt
2 Tbsp vanilla extract
4 Tbsp unsalted butter, melted
2 egg yolks

Directions:
  1. Preheat oven to 350 degrees F.
  2. Line a baking sheet with parchment paper and set aside.
  3. In a large bowl, whisk together the baking powder, salt, and sugar.
  4. Whisk in the vanilla and melted butter. Whisk until smooth.
  5. Add the egg yolks and whisk until incorporated.
  6. Add the flour and combine until just incorporated. Dough will be stiff.
  7. Spoon a round tsp of dough onto the baking sheet.
  8. Flatten each ball of dough slightly.
  9. Bake the cookies for 6 minutes and rotate the baking sheet.
  10. Bake the cookies for another 6 minutes or until the edges are golden brown.
Recipe adapted from Instructables.

Two years ago.....................................I made Chicken Spaghetti.
Did you already know..........................
-In 1968, Nabisco introduced Nilla Wafers.
-Nilla Wafers use synthetic vanilla.
-The Nilla Wafer line includes reduced fat, mini, and pie crust.

Friday, March 28, 2014

Macadamia Nut Pie

I love macadamia nuts. Sometimes it is a good thing some things are expensive like these nuts. I would eat them more than once a year. If I bake with macadamia nuts, I usually add them to cookies. When I first saw this Parade recipe, I knew I would eventually make this pie. This pie is similar to a pecan pie but with macadamia nuts. It is a pretty easy pie to make and oh, so delicious. I really had to share this pie since it is so rich and tempting. I will admit I added additional nuts to the original recipe since I scooped out too many macadamia nuts from the bulk bin. I felt a little awkward putting them back so I just took them all. Would you have put some back? Maybe for a snack later?
Macadamia Nut Pie
1 cup dark corn syrup
2/3 cup sugar
3 eggs, lightly beaten
8 oz. macadamia nuts
1/4 cup butter, melted
1 (9 inch) unbaked pie crust

Directions:
  1. Preheat the oven to 350 degrees F.
  2. Roll out the pie crust and line the bottom of the pie pan.
  3. In a large bowl, mix together the corn syrup, sugar, and eggs.
  4. Fold in the macadamia nuts and melted butter.
  5. Pour the mixture into the unbaked pie crust.
  6. Bake the pie for 50 minutes or until the filling is set. If the crust begins to brown, then cover the edges with foil.
Recipe adapted from Parade.  

One year ago....................................I made Hot Cross Buns.
Two years ago..................................I made Peanut Butter Ice Cream.
Did you already know.........................
-Macadamia nuts are difficult to shell since they have the hardest shell of all the nuts.
-Do not feed macadamia nuts to dogs since it could cause severe lethargy and other symptoms.
-Botanist Ferdinand von Mueller gave the nut its scientific name macadamia after his friend John Macadam.

Wednesday, March 26, 2014

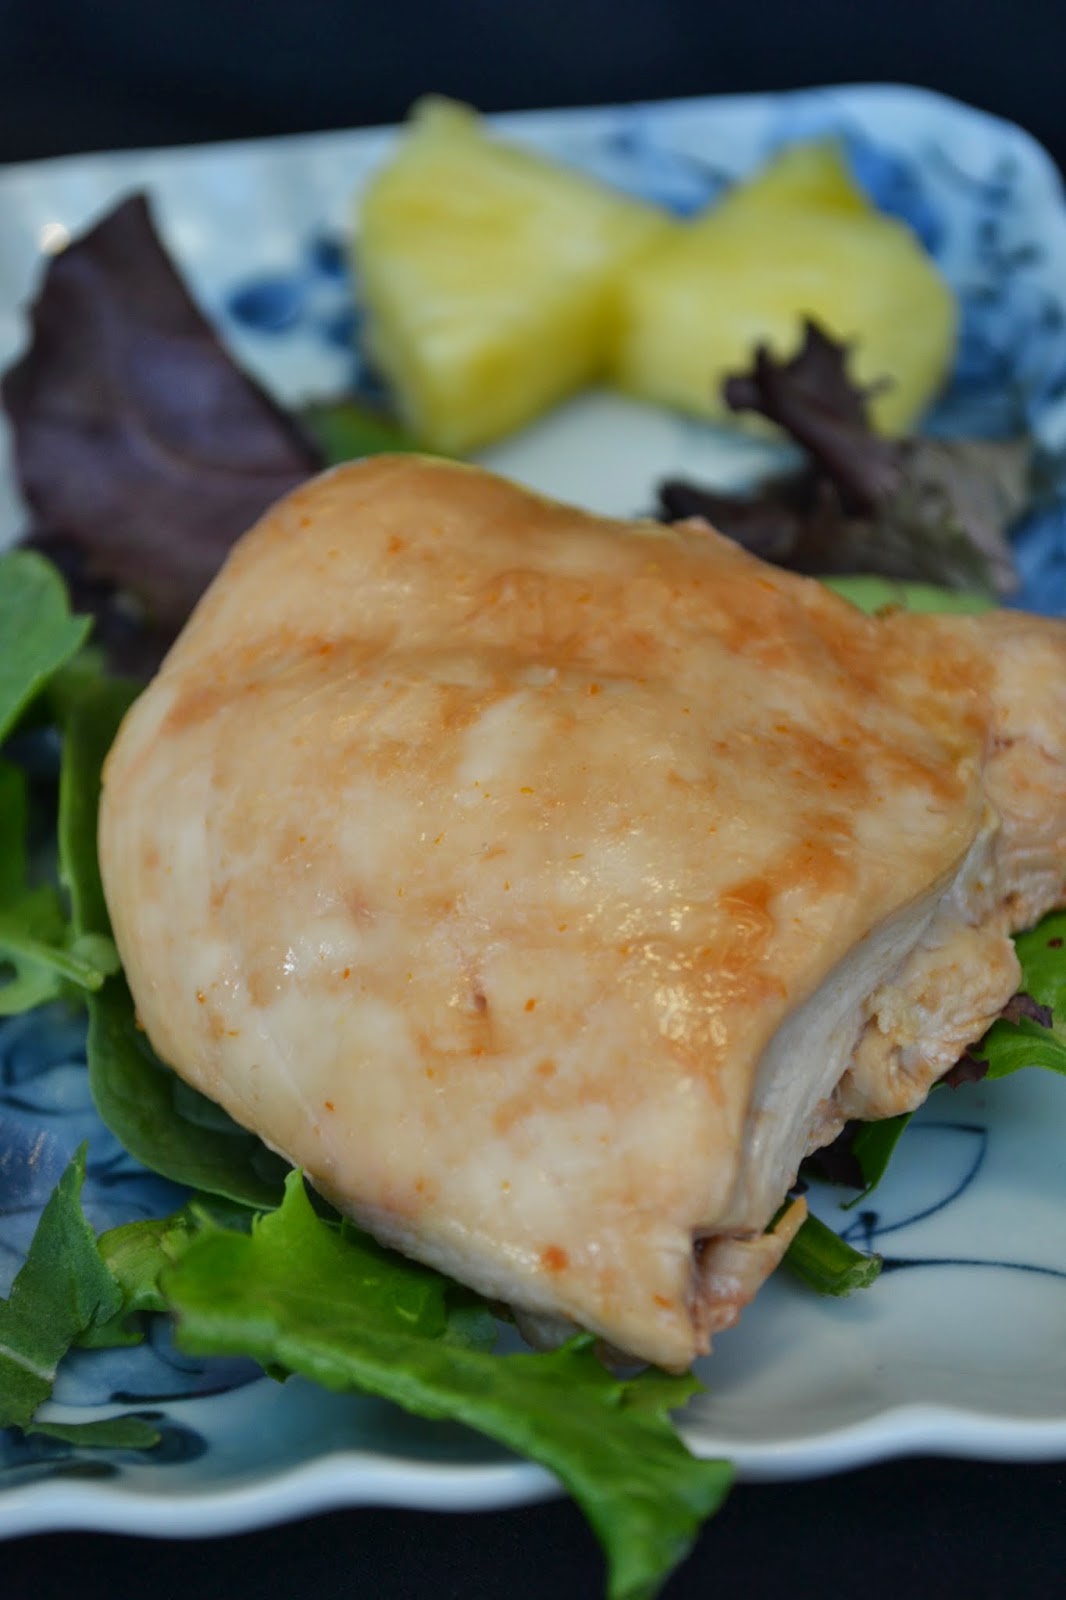
Huli Huli Chicken

Since we decided to leave our grill outside, it is currently decorated with snow. Yes, we could unbury it but then we would have to spend some time outside grilling. I'm not volunteering and I know my husband will not then it leaves the oven. I do have an inside grill pan but it does smoke a lot. The chicken did turn out pretty tender. It does have a nice mild flavor. I thought it would be similar to a teriyaki sauce but this version didn't remind me of teriyaki. We will have to try making this on the grill when we find our grill again.
Huli Huli Chicken
1/2 cup pineapple juice
1/3 cup white wine
1/2 cup chicken broth
1/4 cup soy sauce
1/4 cup ketchup
1/4 tsp ginger
1/8 tsp Worcestershire sauce 
2 lbs chicken

Directions:
  1. In a large zip lock plastic bag, combine the pineapple juice, white wine, chicken broth, soy sauce, ketchup, ginger, and Worcestershire sauce. 
  2. Add the chicken and marinate for 30 minutes in the refrigerator. 
  3. Preheat the oven to 350 degrees.
  4. Remove the chicken from the plastic bag and place in a baking dish. Reserve the marinade.
  5. Cover the dish and bake for 15 minutes. Discard the marinade.
  6. Brush the chicken with some of the reserved marinade and cook the chicken for another 15 minutes or until cooked through.
Recipe adapted from Polynesia. com

One year ago.................................I made Sugar Cookies with Sprinkles.
Two years ago...............................I made Hazelnut filling.
Did you already know...........................
-The Hawaiian word huli means turn.
-In 1955, Huli Huli sauce was created by Ernest Morgado as his version of teriyaki sauce.
-The original sauce is a trade secret since it is available commercially.

Monday, March 24, 2014

Coconut Pudding

Because it is suppose to be Spring.....................
Because there is snow still on the ground...........
Because it is my sister's birthday........................
Because my sister was born in Hawaii...............
Because Hawaii sounds good right now.............
I decided to try making some Hawaiian recipes like Haupia which is Coconut Pudding.  Haupia is suppose to set and should be able to cut into squares. I guess I should have let mine set just a little longer before removing from the container but it didn't matter since it still tasted good. My Mom remembered having it before and likes this dessert. I think if I was going to make it again then I may just try using cornstarch instead of the arrowroot which may make the difference. It is suppose to be the consistence of jello maybe next time. It is creamy and smooth with a nice hint of coconut.
Haupia aka coconut pudding
6 Tbsp sugar
6 Tbsp arrowroot
2 cup coconut milk
1 cup whole milk
1/4 tsp vanilla

Directions:
  1. In a small bowl, combine the sugar with the arrowroot. Set aside.
  2. In a saucepan, add 1 cup of coconut milk, sugar, and arrowroot. 
  3. Heat the mixture over low heat until thicken about 8 minutes.
  4. Add the other 1 cup coconut milk and the whole milk.
  5. Continue to heat the mixture until the mixture is thick about another 8 minutes.
  6. Pour the mixture into an 8 inch pan until firm.
Recipe adapted from About. com

One year ago.........................................I made Peanut Butter Frosting.
Two years ago.......................................I made Sloppy Joes.
Did you already know............................
-Haupia is very popular at Luau.
-Haupia was originally made with arrowroot.
-Besides being served in squares, haupia can be a filling in cakes and pies.

Friday, March 21, 2014

Maple and Brown Sugar Cinnamon Rolls

In Maine, the fourth Sunday of March is typically Maple Sunday. So, we will be bringing the children to one of the many sugarhouses to see how maple syrup is made. My husband's favorite is when he tries the maple syrup over ice cream. I think this year we will be joining my sister since it happens to fall on her birthday!
Maple and Brown Sugar Cinnamon Rolls
Rolls
2 medium russet potatoes, peeled and cubed
3 (1/4 oz.) packages of instant yeast
3/4 cup sugar
1 cup unsalted butter, melted
3 eggs
2 tsp salt
5 cups all purpose flour
4 cups bread flour

Filling
1/2 cup maple syrup
3 cups brown sugar
1 Tbsp cinnamon
1/4 tsp salt
1/4 cup all purpose flour
1 cup unsalted butter, melted

Icing
2 1/2 cups powdered sugar, sifted
1/4 cup maple syrup
1 tsp milk

Directions:
Rolls:

  1. In a large pot, boil the potatoes in water until tender about 10 minutes.
  2. Remove 3 cups of the potato water and set aside.
  3. Drain the potatoes and mash. Place in a large bowl and set aside.
  4. Allow the potato water to cool to 110 degrees F.
  5. Add the yeast and 1 tsp of sugar to the cooled potato water. 
  6. Allow the yeast to sit for 5 minutes to proof.
  7. Add the yeast to the large bowl with the potatoes.
  8. Add 3/4 cup sugar, the melted butter, eggs, and salt. Whisk the mixture together.
  9. Add 3 cups of all purpose flour to the potato bowl and stir until incorporated.
  10. Add 4 cups of the bread flour and mix until incorporated. 
  11. Add the remaining all purpose flour and mix until the dough is no longer very sticky. (More flour may be needed.)
  12. Cover with greased plastic wrap and leave in a warm place until the dough doubles in size about 1 hour.
  13. Punch down the dough and recover. 
  14. Place in the refrigerator overnight.
To make the filling:

  1. In a medium bowl, gently combine the maple syrup, brown sugar, cinnamon, salt, and flour. Set aside. 
  2. Grease 2 9x13 inch disposable pans with butter and nonstick cooking spray. Set aside. 
  3. Remove half of the dough from the bowl and place onto a floured surface.
  4. Roll the dough into 1/4 inch thick rectangle.
  5. Spread the melted butter over the dough.
  6. Sprinkle the maple filling over the top of the dough.
  7. Starting on 1 of the long side of the dough, carefully roll the dough tightly to the other side to form one long cylinder.
  8. With a sharp serrated knife, cut the roll into 2 inch slices.
  9. Place the slices with the cut side down into the greased pan. Leave about an inch apart between each slice. 
  10. Allow the rolls to rise for an hour in a warm place until puffy.
  11. Preheat oven to 375 degrees F.
  12. bake the rolls for 20 minutes or until light brown.
  13. Remove the rolls from the oven. Set aside.
To make the icing:

  1. In a small bowl, combine the powdered sugar, maple syrup, and milk. 
  2. Spread the icing on top of the rolls while warm.
  3. Serve immediately or once cooled. 
Recipe adapted from The Pastry Queen Cookbook.

One year ago.....................................I made PB Oreo Brownie Cupcakes.
Two years ago...................................I made Milk Chocolate Cookies
Did you already know....................
-In one season, a maple tree can produce 40 quarts of sap which will make only one quart of syrup. 
-The modern maple syrup producers use tubing that transports the sap to the sugarhouse.
-Here is a website of some of the sugarhouses participating in Maple Sunday.

Wednesday, March 19, 2014

Gnocchi with roasted vegetables

I will admit my husband did not try this dish. There are way to many vegetables for him. He decided the leftovers sounded good. However, my kids loved it. My daughter and I tried a similar dish at CRT a few months ago. I figured I would try to replicate the dish. The original dish did not have asparagus but I figured I would add some. My daughter said it was her favorite vegetable of all. My son liked the summer squash the best. I liked the servings of vegetables my children were eating. Now, how to get my husband to eat more vegetables is the hard part.
Gnocchi with roasted vegetables
1 eggplant
2 summer squash
1 zucchini
1/2 red pepper
1 bunch of asparagus
8 oz. button mushrooms
1/2 large red onion
1 Tbsp olive oil
salt and pepper for taste
2 cups arugula
1 package of gnocchi 
2 Tbsp aged balsamic vinegar
1/8 cup shaved Parmesan cheese

Directions:
  1. Preheat oven to 450 degrees F.
  2. Chop the vegetables into bite size pieces.
  3. Arrange the vegetables onto a baking sheet.
  4. Toss the vegetables with 1 Tbsp olive oil and spread into a single layer.
  5. Season with salt and pepper. 
  6. Roast the vegetables for 15 minutes.
  7. Stir the vegetables and bake for another 15 minutes or until desired tenderness.  
  8. In a large skillet, heat 1 Tbsp olive oil over medium heat.
  9. Add the gnocchi and cook until golden brown. 
  10. In a large bowl, combine the gnocchi and roasted vegetables.
  11. Drizzle the balsamic vinegar over the gnocchi and vegetables. Lightly toss.
  12. Top with the shaved Parmesan cheese.
Inpired by the Cinderella's Royal Table dish.

One year ago...............................I made Chocolate Chip Oreo and PB cups Cookies.
Two years ago.............................I made Rice Pilaf.
Did you already know....................
-In 1971, the Cinderella Castle's restaurant was called King Stefan's Banquet Hall.
-In 1997, the restaurant's name was changed to Cinderella's Royal Table.
-There are over 40 coats of arms displayed in the restaurant.

Monday, March 17, 2014

Green Velvet Cake

Happy Saint Patrick's Day! Are you wearing green? Are you having a special Irish or Irish/American meal today? Maybe corn beef and cabbage? My husband did not have corn beef and cabbage on Saint Patrick's Day as a kid even though he grew up in an Irish household. Since I grew up eating it, we have it around Saint Patrick's Day. When I suggested making a green velvet cake too, my husband thought it was a great idea. This recipe was the cake my Nana would make. I know this recipe is over thirty years old. I did adapt it a little by replacing some of the shortening with butter plus I made it green instead of red. I'm going to provide the original recipe that I received. My sister wants this cake for her birthday but only blue.
Green Velvet Cake
4 oz. food coloring
2 1/2 Tbsp. cocoa
1/2 cup shortening
1 1/2 cup sugar
2 eggs 
1 cup buttermilk
2 1/2 cup all purpose flour, shifted
1/2 tsp salt
1 Tbsp. vanilla extract
1 Tbsp. distilled vinegar
1 tsp baking soda

Directions:
Preheat the oven to 350 degrees F.
Line two 8 inch cake pans with parchment paper and then coat with nonstick cooking spray. Set aside.
In a small bowl, combine the food coloring and with the coca powder. Set aside.
In a large bowl, cream the shortening, sugar, and eggs.
Add the food coloring and cocoa mixture. Mix.
In a small bowl, combine the shifted flour with the salt. Set aside.
Add some of the buttermilk while alternating with the flour mixture.
In a small bowl, combine the vanilla, vinegar, and baking soda.
Fold the vanilla mixture into the cake mixture.
Pour the cake batter evenly between the two cake pans.
Bake the cake for 35 minutes.
Allow to cool for 5 minutes in the pan before removing the cakes onto a wire rack to cool.
Recipe from my Nana.

One year ago, I made..................................Creamed Spinach.
Two years ago, I made...............................Brownies
Did you already know..............................
-In 1762, New York City hosted the first Saint Patrick's Day parade.
-Due to pork being expensive, the Irish immigrants adapted their Irish bacon for an affordable corn beef since it was cured and cooked the same way.
-There are over 34 million Americans that claim Irish ancestry.
Happy Saint Patrick's Day!

Friday, March 14, 2014

Mint Chocolate Pudding

How many of you grew up on instant pudding? I'm raising my hand too! I still buy it but I no longer have to make it since the kids willingly make it. The first time I had homemade pudding there was a fine film on top. I thought it was the grosses thing. Pudding should be silky like the ones you buy in the stores. There is no film. So, I normally will cover my homemade pudding with the plastic touching the top to prevent the film from forming. I've made this pudding recipe before and it is wonderful. It is a nice indulgent without being pretentious. Since this time of year, I think of green and mint. I noticed I tend to always making something with mint around this time of year. So, I had to make my pudding with a faint hint of mint since my husband has asked for me to tone the mint flavor down a little. Lately, I guess I have been going a little over board.
Mint Chocolate Pudding
1/2 cup sugar
1/4 cup cornstarch
2 Tbsp unsweetened cocoa powder
1/8 tsp salt
3 cups whole milk
3/4 cups semi sweet chocolate chips
1/4 tsp mint extract
1/2 tsp vanilla extract

Directions:
  1. In a medium saucepan, whisk the sugar, cornstarch, cocoa powder, and salt.
  2. Slowly, whisk in the milk until smooth.
  3. Heat the mixture over medium heat for about 15 minutes or until the mixture begins to thicken. Lower heat if the mixture begins to bubble.
  4. Once the mixture begins to thicken, stir in the chocolate chips.
  5. Lower the heat and allow the chocolate chips to melt for about 2 minutes.
  6. Remove from heat.
  7. Stir in the mint and vanilla extract.
  8. Spoon the pudding into individuals cups or a large bowl and store in the refrigerator for 2 hours. 
Recipe adapted from Smitten Kitchen.

One year ago........................I made Mint cheesecake pie.
Two years ago......................I made Irish Mint Chocolate Ice Cream.
Did you already know..........
-Pudding has been around since ancient times but tended to be made with sausage.
-In the 17th century, English would boil their savory and sweet puddings in a bag.
-With the use of custard powder and cornstarch, instant puddings could be made.

Wednesday, March 12, 2014

Creamed Spinach Soup

My daughter keeps asking me to make creamed spinach. First, she asked for creamed spinach soup. She even found a recipe I should try making. Then she asked for creamed spinach like I did last year. My husband thought she was crazy. To ask to eat something green is a sign of craziness. To please my daughter, I made creamed spinach soup. I really liked it. My son loved it. My husband thinks the craziness must have been inherited from the children's maternal side.
Creamed Spinach Soup
1 lb. fresh spinach
4 cups chicken broth
1 scallion, minced
1 Tbsp butter
1 Tbsp olive oil
2 Tbsp flour
4 oz. cream cheese, softened
2 cups half and half
salt and pepper to taste

Directions:
  1. In a large pot, place the spinach, chicken broth, and scallion. 
  2. Bring the spinach to a boil over medium high heat.
  3. Reduce the heat to medium low.
  4. In a small saucepan, melt the butter in the olive oil over medium heat.
  5. Whisk in the flour until smooth. Cook for 1 minute.
  6. Add the cream cheese and whisk. Cook for 1 minute.
  7. Stir in the half and half. Mix until incorporated.
  8. Add the cream cheese mixture to the spinach pot.
  9. Stir and allow to simmer for 10 minutes.
  10. Season to taste with salt and pepper. 
Recipe inspired by Allrecipes.

One year ago...........................I made Lasagna French Bread Pizza.
Two years ago.........................I made Bourbon Cookies.
Did you already know...........
-Spinach originated from the Middle East.
-Spinach was the first commercial sold frozen vegetable.
-In 1929, spinach became very popular to kids with the debut of Popeye.

Monday, March 10, 2014

Mint Flourless Brownies

For my son's birthday, my son wanted brownies instead of cake. As you can tell on this blog, I don't make a lot of homemade brownies. I looked through different recipes and decided to make this one. There is a taste scale I use to find out if my husband liked them. First, I ask if he liked them. If he says yes, he then tells me how many of them he ate. My husband said he ate three of them. He would have eaten more if I had omitted the mint. Three bars translated the brownies are good.
Mint Flourless Chocolate Brownies
2 cups mini semi sweet chocolate chips
3/4 cup butter, cut into cubes
3 Tbsp water
3/4 cup sugar
3 large eggs
1 tsp vanilla extract
1/4 cup heavy cream 
1/2 cup Andes mints, chopped

Directions:
  1. Preheat oven to 300 degrees F.
  2. Line a 9x9 baking dish with parchment paper. 
  3. Spray the dish with nonstick cooking spray.
  4. In a medium saucepan, melt the semi sweet chocolate chips, butter, water, and 1/2 cup sugar over medium heat. Stir constantly until the chocolate has melted. 
  5. Remove from heat and set aside.
  6. In a medium bowl, whisk together the eggs and 1/4 cup sugar until thick.
  7. Stir in the vanilla extract.
  8. Fold half of the egg mixture into the chocolate mixture until incorporated.
  9. Fold in the remaining egg mixture until thoroughly incorporated.
  10. Pour the batter into the baking dish.
  11. Bake for 35 minutes or until the center has risen and the edges have become firm. 
  12. Allow the brownie to cool completely on a wire rack.
  13. Cover the brownies and refrigerate for 4 hours.
  14. In a small microwave safe bowl, heat the heavy cream for 30 seconds.
  15. Add the Andes mints to the heavy cream. Let stand for 2 minutes or until the chocolate has melted.
  16. Spread the melted mint ganache over the chilled brownies.
  17. Refrigerate for 30 minutes before removing from the baking dish.
Recipe adapted from Toll House Nestle Cookies Cookbook. 

One year ago...........................I made Lasagna Roll Ups.
Two years ago.........................I made Fried Meatball Sandwich


Did you already know.............
-There are over 30 varieties of mint.
-Mint is named after the Greek river nymph Minthe. 
-Minthe was turned into a plant by Hades jealous wife.

Friday, March 7, 2014

Chicken Pot Pie

My Mom use to make chicken pot pie often. My sister makes it for supper for her girls a lot. I'm unsure why I don't. It could be my husbands adverse fear of peas. We once had a family member make it for us and she had omitted the peas. I figured I would do the same and make my husband happy. However, I figured I would do most of the prep the day before to make it easy on me. The day before I made this chicken for supper. Since I normally roast vegetables with the chicken, I went ahead and used the same type of vegetables. I just chopped additional vegetables in preparation of making this dish. I also made the pie crust and stored it in the refrigerator. The chicken had lots of flavor which added a nice touch to the dish. My husband loved this dish. The pie crust had flavor. The kids ate it up. Anytime I have leftover chicken/turkey, I may just be making this dish again.
Chicken Pot Pie
3 celery stalks, finely diced
3 medium carrots, peeled and finely diced
1 large yellow onion, finely diced
2 Tbsp olive oil
2 Tbsp butter
2 cups cooked chicken, chopped into bite sized pieces
1/2 cup all purpose flour
2 cups chicken broth
1 cup milk
2 tsp ground thyme
1 tsp salt
1/2 tsp pepper
1 (8") pie crust


Directions:
  1. Preheat oven to 400 degrees F.
  2. In a large pot, melt the butter in the olive oil over medium heat.
  3. Add the onion, carrots, and celery. Saute for 2 minutes.
  4. Stir in the chicken.
  5. Sprinkle the flour over the chicken and vegetables. Gently, mix to combine.
  6. Add the chicken broth and stir.
  7. Add the milk and stir. Cook for 5 minutes.
  8. Season with thyme, salt, and pepper. 
  9. Pour the mixture into a deep dish pie pan or casserole dish.
  10. Roll out the pie crust so it will be slightly larger than the casserole dish.
  11. Place the pie crust over the chicken mixture. Cut slits on top of the pie crust.
  12. Bake the pot pie for 30 minutes or until golden brown.
  13. Allow the pot pie to cool for 10 minutes before serving.
Recipe adapted from The Pioneer Woman Cooks Cookbook.

One year ago..............................I made PB Nutella Oatmeal.
Two years ago............................I made Agent P Sandwich.
Did you already know..................
-Chicken pot pie consists of chicken, gravy, and vegetables.
-Meat pies have been around since Roman times.
-Early pot pies were cooked on open hearths. 

Wednesday, March 5, 2014

Blueberry and lemon Breakfast Rolls

I heard a bird singing the other day so I'm sure spring will arrive soon. I am very hopefully even if the ground is still buried with lots of snow. I even warned the kids that they had better enjoy the snow because soon it will be mud season. Yes, we have mud season here in Maine. It is what happens when the snow disappears. In anticipation for the arrival of Spring, I made blueberry and lemon cinnamon rolls. They came out pretty good. My daughter loved them. My son really loved the icing. 
Blueberry and Lemon Breakfast Rolls
Rolls
2 medium russet potatoes, peeled and cubed
3 (1/4 oz.) packages of instant yeast
3/4 cup sugar
1 cup unsalted butter, melted
3 eggs
2 tsp salt
5 cups all purpose flour
4 cups bread flour

Filling
3 cups frozen blueberries
3 cups sugar
2 Tbsp lemon zest
1/4 cup all purpose flour
1 cup unsalted butter, melted

Icing
2 1/2 cups powdered sugar
1/4 cup lemon juice
1 tsp lemon zest

Directions:
Rolls:
  1. In a large pot, boil the potatoes in water until tender about 10 minutes.
  2. Remove 3 cups of the potato water and set aside.
  3. Drain the potatoes and mash. Place in a large bowl and set aside.
  4. Allow the potato water to cool to 110 degrees F.
  5. Add the yeast and 1 tsp of sugar to the cooled potato water. 
  6. Allow the yeast to sit for 5 minutes to proof.
  7. Add the yeast to the large bowl with the potatoes.
  8. Add 3/4 cup sugar, the melted butter, eggs, and salt. Whisk the mixture together.
  9. Add 3 cups of all purpose flour to the potato bowl and stir until incorporated.
  10. Add 4 cups of the bread flour and mix until incorporated. 
  11. Add the remaining all purpose flour and mix until the dough is no longer very sticky. (More flour may be needed.)
  12. Cover with greased plastic wrap and leave in a warm place until the dough doubles in size about 1 hour.
  13. Punch down the dough and recover. 
  14. Place in the refrigerator overnight.
To make the filling:
  1. In a medium bowl, gently combine the blueberries with the sugar, lemon zest, and flour. Set aside. 
  2. Grease 2 9x13 inch disposable pans with butter and nonstick cooking spray. Set aside. 
  3. Remove half of the dough from the bowl and place onto a floured surface.
  4. Roll the dough into 1/4 inch thick rectangle.
  5. Spread the melted butter over the dough.
  6. Sprinkle the blueberry filling over the top of the dough.
  7. Starting on 1 of the long side of the dough, carefully roll the dough tightly to the other side to form one long cylinder.
  8. With a sharp serrated knife, cut the roll into 2 inch slices.
  9. Place the slices with the cut side down into the greased pan. Leave about an inch apart between each slice. 
  10. Allow the rolls to rise for an hour in a warm place until puffy.
  11. Preheat oven to 375 degrees F.
  12. bake the rolls for 20 minutes or until light brown.
  13. Remove the rolls from the oven. Set aside.
To make the icing:
  1. In a small bowl, combine the powdered sugar, lemon juice, and lemon zest. 
  2. Spread the icing on top of the rolls while warm.
  3. Serve immediately or once cooled. 
Recipe adapted from The Pastry Queen Cookbook.

One year ago..............................I made Chicken Cutlets.
Two years ago............................I made Tiramisu.
Did you already know..................
-The Spring Equinox is also called the Vernal Equinox.
-At Spring, the Earth's axis is tilted towards the sun.
-The Number of hours of light and darkness occurs before the Spring Equinox.