Wednesday, October 31, 2012

Corn Muffins

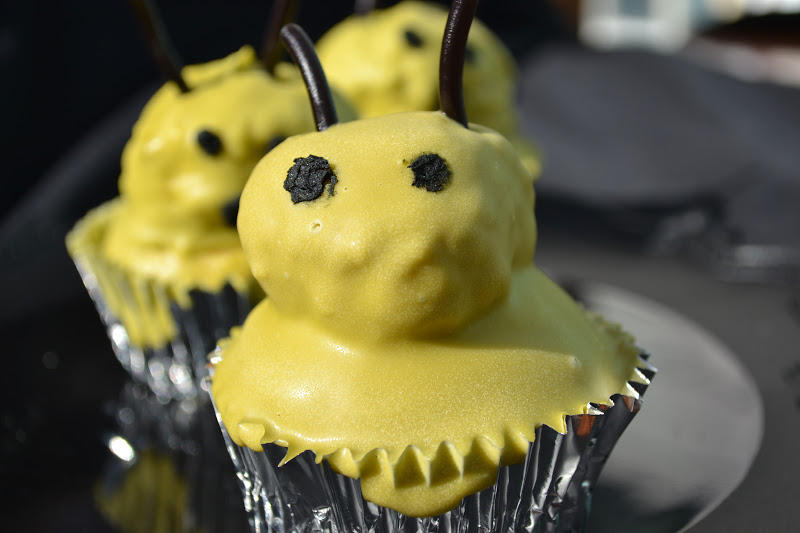
When my mother was a little girl, her grandmother needed to reupholster a chair. Her grandmother asked my mother, what fabric should she choose. My mother picked a leopard print. To this day, the chair still has that leopard print on it. My daughter loves it. Since it is Halloween, I decided to dress up my corn muffins in a wild cat print. Are you dressing up this year? Maybe in some leopard prints? My youngest daughter is dressing up as a singer. We are trying to get my son to dress up as Sulley from Monster, Inc. but so far he hasn't agreed. Both my daughters wore the costume so lets see if they can convince him.
Even if these corn muffins weren't made in a cool wrapper, they are delicious. They are a little sweet but not overbearing. They are the perfect accompaniment to a chili or soup. They are quick to make which is always the best when there is trick or treating that needs to be done.
Rather Rich Corn Muffins (24 muffins)
1 1/2 sticks unsalted butter, melted
2 1/2 cups heavy whipping cream
3 large eggs
3 1/4 cups all purpose flour
1 1/2 cups cornmeal plus extra for top
3/4 cup sugar
2 Tbsp baking powder
1/2 tsp salt

Directions:
  1. Preheat oven to 350 degrees F.
  2. Line 24 muffin cups in a cupcake tin.
  3. In a large bowl, add the butter, cream, and eggs.
  4. Add the flour, cornmeal, sugar, baking powder, and salt to the butter mixture. Mix until the ingredients are just combined and not lumpy.
  5. Fill each muffin cup two-thirds full.
  6. Sprinkle a little cornmeal on top of each muffin.
  7. Bake the muffins for 12 to 15 minutes or until lightly brown.
Recipe adapted from The Pastry Queen cookbook by Rebecca Rather.
Did you already know...
-Monsters, Inc was released in 2001 by Disney Pixar.
-Sulley's full name is James P. Sullivan. 
-The movie grossed over $62 million opening weekend in the U.S. and grossed over $255 million in the U.S.

Happy Halloween! 

Tuesday, October 30, 2012

Lobstah Chowdah

Are you ready for Halloween? Have you been watching some scary movies? Has anyone tried to scare you yet? When I made the stock for this soup, I think it looked pretty scary. My oldest suggested I should take a photo of the stock and show you. Don't worry-I decided not to try to scare you until the end of this post. Just remember, I tried to warn you. You may not want to scroll past the third photo.
I will admit the soup is delicious. It isn't overbearing with a strong lobster taste. It is creamy with potatoes and lobster meat. My husband had ordered it at a restaurant once and came home to tell me all about it. Yes, he liked it that much. Then he asked me if I could try making it for him. After I made it for him, he told me that my "chowdah" was better than the one he had at the restaurant. He knows how to say the sweetest things. I have made this for him several times now and wanted to share it with you.
Lobster Chowder
2 whole lobsters, cooked with shell
Stock:
6 Tbsp unsalted butter
1 cup leeks, chopped
1/4 cups cream sherry
2 tsp paprika
3 cups skim milk
3 cups heavy cream
1 cup white wine
Soup:
1 Tbsp olive oil
1/4 lb. bacon, large diced
2 cups Yukon gold potatoes, large diced
1 1/2 cups yellow onions, chopped
2 cups celery, diced
1 Tbsp salt
1 tsp ground black pepper
2 tsp fresh chives, chopped
1/4 cup cream sherry

Directions:

  1. Remove the meat from the shells of the lobster in a large bowl. Reserve the meat and the shells with the juices in the bowl. (Keep everything except for the tomalley.)
  2. Cut the meat into large cubes and place them in a small bowl. Cover the bowl with plastic wrap and refrigerate.
  3. In a large pot or Dutch oven, melt the butter.
  4. Add the onion to the melted butter and cook over medium low heat for 7 minutes until translucent. Stir occasionally.
  5. Add the sherry and paprika to the pot. Cook for 1 minute.
  6. Add the milk, cream, wine, lobster shells, and the lobster juices to the pot.
  7. Bring the mixture to a simmer. Once, it reaches a simmer cover the pot partially and lower the heat to low for 30 minutes.
  8. Allow the mixture to cool before pouring the liquid through a strainer into a large bowl. Discard the lobster shell. (At this time, the stock liquid can be cooled and placed in the refrigerator overnight to make the chowder the next day.)
  9. To make the soup, heat the olive oil in a large pot or Dutch oven. 
  10. Add the bacon to the pot and cook over medium-low heat for 4 to 5 minutes or until crisp.
  11. Remove the bacon with a slotted spoon and place on a paper towel lined plate to cool.
  12. Add the potatoes, onions, celery, salt, and pepper to the pot. Saute for 5 minutes.
  13. Add the lobster stock to the potato mixture. Simmer the chowder over 15 minutes or until the potatoes are tender. (Add about 15 minutes more if the stock had been stored overnight.)
  14. Add the cooked lobster, chives, and sherry to the chowder. Heat gently and season to taste.
  15. Serve the chowder hot garnished with the crisp bacon and chives.
Recipe adapted from Food Network's Barefoot Contessa.
Did you already know.....
-The green stuff in the raw lobster is the tomalley.
-The tomalley is the lobster's liver, pancreas and intestines.
-In 2008, the U.S. FDA recommended not to eat the tomalley since it may have accumulate contaminants from the environment.
Lobster Stock simmering

Monday, October 29, 2012

Chocolate Brownie Cookies

My youngest daughter is normally pretty good at being on time. She is ready with time to spare. With my son, I don't know what he does with time. It doesn't matter if he is up early or late. He will still be late. Well, my daughter's last soccer game was moved up a day due to conflicting schedules. This would normally not be a problem except we were suppose to bring a snack to the last game. Since I worked that day, I really needed something quick. While the cookies were baking, my daughter realized that we would be a little late to the game. She was a little upset about it until my youngest son looked at her and announced, "Welcome to my life!" My husband and I just started laughing which made my daughter feel better. I did tell my son the difference was that he did it to himself. My husband and oldest daughter agreed.
In the end, my daughter was rewarded when her friends on her soccer team really liked her dessert. One friend told her that these cookies taste just like brownies and were great. I did hide a few for my grateful husband. If you like brownies from a box, you will love these cookies. If you don't have a lot of time but need a dessert for last minute, you will love these cookies. Oh, how I love brownies anyways but now in a cookie form just make them wonderful! I was in such a hurry that I forgot to add 1 Tbsp of water in the recipe but I was lucky and they still came out great. Welcome to my life!

Chocolate Brownie Cookies (roughly 36 cookies)
1 package of chocolate brownie mix
1/4 cup vegetable oil
2 eggs

Directions:
  1. Preheat oven to 325 degrees F.
  2. Line a baking sheet with parchment paper and set aside.
  3. In a large bowl, combine the brownie mix, oil, and eggs until well blended.
  4. Drop the dough onto the parchment paper by a tablespoonful.
  5. Bake the cookies for 12 to 14 minutes or until the edges are set and the center is still soft.
  6. Allow the cookies to cool for 2 minutes before transferring to a cooling rack. 
Adapted from Hershey's Ultimate Chocolate Brownie Mix box recipe. 

One year ago..................I made Mummy Cake Pops
Even if I'm late, I have great hair!
Did you already know...
-According to the Palmer Hotel, they were the first to create the brownie.
-In 1893, the chefs at the hotel created the dessert at the request of the owner Bertha Palmer.
-Mrs. Palmer asked for a dessert that would not be as messy as a cake that would fit inside a box lunch for the Women's Pavilion at the the World’s Columbian Exposition.

Friday, October 26, 2012

Mars Alien Cupcakes not Pluto

Have you seen any aliens lately? I figure I'll see a few next week on Halloween. Well, my sister made these aliens and brought them over. My daughters thought they looked adorable. I'll remind them of their comment when if we are invaded. Cute? Not scary?
One thing about these aliens are they are tasty. I know some people are into trying strange cuisine but I don't think I'll ever try real alien in my lifetime. Would you if they were edible? Or would you be finicky and only prefer aliens from Mars but not Pluto?
Alien Cupcakes
24 cupcakes
2 cups of frosting

1 package of candy melts

4 strings of black licorice, cut into 1/2 inch pieces
1 black food pen or candy or sunflower seed (for the eyes) 
  1. Crumble 12 cupcakes in a bowl.
  2. Stir in 1 cup of frosting into the crumbled cupcakes. Mix well.
  3. Roll the cupcake mixture into 1 to 1 1/2 inch balls.
  4. Place the balls on a cookie sheet and place in the freezer for about 30 minutes.
  5. Take the cake balls out of the freezer and add a little frosting to the bottom of the ball. 
  6. Place the frosting side down onto a cupcake. Press well.
  7. Place the cupcakes with the cupcake ball into the freezer for at least 1 hour or overnight. 
  8. Add water to pot with a heat proof bowl on top of the pot to make a double boiler.
  9. Place the candy melts in the heat proof bowl and stir until melted. Remove from burner.
  10. Take a few of the cupcakes from the freezer.
  11. Dip the chilled cupcake upside down into the bowl quickly into the melted candy to coat. 
  12. Carefully place the cupcake onto a plate to cool. Be careful not to remove to many of the cupcakes from the freezer at a time of the cake ball will fall off the cupcake. 
  13. Stir the melted candy melts between cupcake dips. If the candy starts to harden, reheat or make goblins or crazy looking aliens. 
Recipe adapted from Hello, Cupcake! cookbook by Karen Tack and Alan Richardson.

One year ago...........I made Vanilla Buttermilk Cupcakes.
Did you already know...
-Currently, Mars can be seen low in the southwest at dusk.
-The surface of Mars can be seen in detail from Earth.
-This month, NASA's rover Curiosity is taking samples of soil on Mars and analyzing it.

Wednesday, October 24, 2012

Halloween PB Cookies

With this cookie, I was trying to make it look like the back of a stegosaurus. I think I failed. When I asked the kids what it looked like, I was told a flower by my son. Yes, my son did said a flower. My youngest daughter said it looked like a scary mouth and teeth. My oldest daughter said witch's warts. At least the girls was thinking spooky. My husband was the only one who said stegosaurus. What do you think? Stegosaurus?
My husband declared these are one of his favorite cookies. Yes, they are that good. I made several with the jelly in the middle like the original recipe called but I didn't like how the jelly turned out. My husband still liked them especially since he isn't a peanut person even if he loves peanut butter. My youngest daughter brought one in for her lunch and her friend saw it. She traded a piece of gum for a piece. After trying it, she traded my daughter another piece of gum for more. In the end, my daughter gave her cookie to her friend who loved it. Don't feel bad for my daughter since she had another one for snack after school. 
PB Cookies with Honey-Roasted Peanuts aka Spike Cookies
1 1/2 cups unsalted butter, softened
1 1/2 cups smooth peanut butter
1 1/2 cups sugar
1 1/2 cups firmly packed brown sugar
3 large eggs
1 Tbsp vanilla extract
3 cups all purpose flour
1 1/2 tsp baking soda
1 1/2 tsp salt
3/4 cup honey roasted peanuts

Directions:
  1. Preheat the oven to 375 degrees F.
  2. Line a baking sheet with parchment paper and set aside.
  3. In a large bowl, cream the butter and peanut butter until fluffy.
  4. Add the sugar and brown sugar. Mix until incorporated.
  5. Add the eggs and vanilla. Beat until smooth.
  6. Stir in the flour, baking soda, and salt. Mix until well combined.
  7. Using a 1 3/4 inch scoop, drop the dough onto the prepared baking sheet. Space the cookies at least 2 inches apart. 
  8. Bake the cookies for 10 to 12 minutes or until golden brown around the edges.
  9. Remove from the oven and carefully place the peanuts vertically into the cookies about half way through.
  10. Allow the cookies to cool for 10 minutes before transferring them to a wire rack to cool completely.
Recipe adapted from The Pastry Queen cookbook by Rebecca Rather. 

One year ago.............................I made Onion Dip
Did you already know....
-Stegosaurus dinosaurs name means roofed lizard.
-It is thought the stegosaurus brain was the size of a walnut.
-The cluster of spikes at the end of a stegosaurus is called a thagomizer.
-The thagomizer was first named by Gary Larson in his Far Side Cartoon.

Monday, October 22, 2012

Pretzel Dogs

Near our house, there is a bike path for bikers and walkers. While I was out walking, I passed a tiny woman pushing a stroller. Inside the stroller, there was a Pit bull bigger than her. I couldn't help but smile. He is one spoiled puppy.
Every year, I make the mummy hot dogs for my children. This year I wanted to try something different. So, I made Pretzel buns with bratwurst inside. I knew my husband would love it and I was right. I just wasn't sure about the kids. I shouldn't have worried since they have asked for me to make these mummies again. I will say I was surprised by how sweet the bread tasted but it was still a nice combination.
 Pretzel Buns with Bratwurst aka Mummy Dogs
1 cup milk
1/4 cup brown sugar
2 Tbsp honey
1 packet active dry yeast
2 Tbsp unsalted butter
2 cloves garlic, grated
3 cups all purpose flour, plus more for dusting
1 cup bread flour
8 links of Bratwurst sausage
3 Tbsp water
1/2 tsp vegetable oil
coarse sea salt, for sprinkling

Directions:
  1. Line 2 baking sheets with parchment paper and set aside. 
  2. In a small saucepan, heat the milk, 1/2 cup water, sugar, and honey until the mixture reaches between 105 to 110 degrees F.
  3. Slowly, add the milk mixture to the bowl of a stand mixer.
  4. Sprinkle the yeast mixture over the milk mixture and let rest for 15 minutes for the yeast to bloom.
  5. Wipe out the small saucepan. Add the butter and garlic over medium heat for 2 to 3 minutes. 
  6. In another bowl, combine the all purpose flour with the bread flour.
  7. Add the flour to the yeast mixing bowl with the melted garlic butter.
  8. Mix the flour and garlic butter into the milk mixture on medium speed for about 5 to 7 minutes. The dough should be smooth and elastic plus pulling away from the sides of the bowl.
  9. Turn the dough onto a lightly floured clean surface and form a ball.
  10. Cut the dough into 12 equal pieces. Roll each piece into a ball and place onto the parchment paper lined baking sheets. Cover and place in a warm place to rise for 15 minutes.
  11. Roll out each ball into a log and place onto the baking sheet to rise for another 30 minutes. Make sure to cover and place in a warm place. 
  12. While the buns are rising, heat the bratwurst in a small skillet over medium heat with 3 Tbsp water and 1/2 tsp vegetable oil until golden brown. Set aside to cool. 
  13. Cut each bratwurst in half and set aside.
  14. With a sharp knife, slowly and carefully cut each bun down the middle vertically but leave one bun alone.
  15. Place the cooled Bratwurst in the center of the bun and press the dough together. Continue with all the buns until the one bun is left.
  16. Take the last bun and cut off about 1/2 tsp of dough. Roll the dough into long, vertical pieces. Continue making long pieces until all the dough of the last bun are just pieces of dough like . Secure the pieces of dough over the buns with the Bratwurst inside. Cris-cross the dough over each other and press down to flatten. 
  17. Sprinkle with the sea salt if desired.
  18. Preheat the oven to 425 degrees F. Place one oven rack high and the other in the low position.
  19. Place the baking sheets into the oven for about 15 minutes or until golden brown. Make sure to rotate the baking sheets halfway through baking so the top sheet is on the bottom rack and the bottom sheet is on the top rack.
Recipe adapted from Jeff Mauro of the Foodnetwork

One year ago...........................I made Chicken Enchiladas.
Did you already know...
-Other names for the Pit Bull is the American Pit Bull Terrier.
-The Pit Bull usually weighs between 22 to 78 pounds.
-Some dog associations do not accept blue eyed or merle coats for a Pit bull into the registry. 
-The Pit bull was first bread to be an all around farm dog.

Friday, October 19, 2012

Crab Rangoon

Are you scared yet? Are you scared of all this fried food? I don't like to make a lot of fried foods. I refuse to buy a deep fryer but we have a cotton candy machine. We know what is important in this house, right?
If you are going to fry, you might as well make more than one recipe like the Sausage Dumplings. I don't keep the grease since I don't want to encourage it in our daily meals. We make these recipes once a year or every other year even if my oldest would make these monthly, weekly, or even daily. They have a soft, creamy filling with a crisp shell. Oh, they are so delicious that I'm glad we rarely make them. If you like the restaurant versions, you will really like these homemade fresh ones.
Crab Rangoon aka Witch's pouches
2 (8 oz.) package of cream cheese, softened
2 scallions, chopped finely
1/2 cup of crab meat or imitation crab meat
1/2 tsp sugar
1 package of wonton wrappers
2 cups vegetable oil

Directions:

  1. In a large bowl, mix the cream cheese, scallions, meat, and sugar.
  2. Place 1 Tbsp of the filling in the center of the wonton wrapper.
  3. Lightly dampen finger with water and dampen the edges of the wonton wrappers with finger.
  4. Fold the wonton wrappers so the opposite corners touch. Press down firmly to seal.
  5. Heat the oil in a large pot over medium heat until the back of a wooden spoon bubbles.
  6. Gently add the crab rangoon into the hot oil. 
  7. Fry each side for about a minute or until golden brown before flipping.
  8. When the whole crab rangoon is golden brown, remove from the oil and place on a paper towel covered plate.
  9. Allow to cool before serving.
Recipe given to me with permission by Mary.

A year ago I made ..........Cheddar Bay Biscuits (my oldest favorite).
Did you already know...
-Imitation crab meat is surimi seafood.
-Surimi seafood is fish protein from Alaska pollock or Pacific whiting.
-Imitation crab meat has Omega-3. 

Wednesday, October 17, 2012

Fried Sausage Dumplings

I was trying to think of scary names for these sausage dumplings.  So, I asked the children if they wanted to help. I provided some examples but they didn't like any of them. Then my son said the dumplings name was Red Goblin Noses. I suggested how about just Goblin Noses but my son said it had to be Red Goblin Noses. I said but there is no red. My son replied so. Who am I to argue with such logic?
The first time I made sausage dumplings were over ten years ago. I can't even believe it was that long ago. I had never heard of a blog. I would watch a lot of Food Network for recipes. I learned how to make egg rolls from my Dad but I wanted to make some dishes with it when I saw this Oriental Pork Wrappers recipe. My pork was raw inside. I tried several other ways to cook the wrappers. When I served them to my family, they liked them. Well, my daughter really wanted to cook up some dumplings and crab rangoon (recipe posting soon). I think she did a pretty good job.
Fried Sausage Dumplings aka Red Goblin Noses
1 lb. ground pork
2 stalks of scallions
1/4 cup hoisin sauce
salt and pepper to taste
1 package of wonton wrappers
2 cups vegetable oil

Directions:
  1. In a large skillet, brown the pork for about 3 minutes over medium heat. 
  2. Add the scallions and cook for 2 minutes.
  3. Remove the skillet from the heat and mix in the hoisin sauce.
  4. Add salt and pepper and incorporate well.
  5. Place about 1 Tbsp in the center of the wonton wrapper. 
  6. Moisten the edges of the wonton wrapper with water and fold over to form a triangle. Press securely to seal.
  7. In a large Dutch oven (large pot, deep fryer) , heat oil until the back of a wooden spoon bubbles.
  8. Carefully add the sausage dumplings one at a time without over crowding. Cook until golden brown and flip about a minute per a side.
  9. With tongs, remove the dumplings and place on a plate lined with paper towels.
  10. Allow the dumplings to cool for a few minutes before serving.
  11. Serve with a dipping sauce if desired.
One year ago I made..........Pork Chops with garlic and herbs.
Did you already know...
-The word Goblin is derived from the Greek word for rogue.
-Some goblins reside in grottoes which are caves if not your house.
-One of the most famous goblins is Rumpelstiltskin.

Monday, October 15, 2012

Chocolate Cookies

We always decorate cookies at Christmas time but when I saw this posting I figured it was time to create some monsters. 
I wanted to use a dark cookie since I thought it was more appropriate for Halloween. Since the cookies are pretty plain tasting by themselves, I wanted a sweet filling. My daughter just happen to place the jar of Nutella on the counter. I think she thought she needed to take a spoonful to make sure the newly opened jar still tasted good. After I assembled the cookies with the Nutella filling, we created our monsters using candy corns, Reese's pieces, marshmallows, and other candies. The kids loved it. Don't be afraid to make some crazy cookies!
Chocolate Cookies (1 1/2 dozen cookies)
3/4 cups all purpose flour
1/4 cup unsweetened cocoa
3/4 tsp coarse salt
1/4 tsp baking powder
1/2 cup sugar
1/4 cup brown sugar
2 Tbsp unsalted butter, softened
1 egg
1 egg yolk
4 oz semisweet chocolate, melted and cooled
1/2 tsp vanilla extract

Directions:
  1. In a medium  bowl, whisk the flour, cocoa, salt and baking powder.
  2. In another bowl, cream the butter with the sugars until fluffy.
  3. Into the creamed butter, add the egg, egg yolk, chocolate, and vanilla until incorporated.
  4. Slowly, add the flour and beat until just combined.
  5. Shape into a disk and refrigerate for 1 hour. (The dough will feel really soft.)
  6. Line a cookie sheet with parchment paper.
  7. Preheat oven to 375 degrees F.
  8. On a lightly floured surface, roll the chilled dough to 1/8 thickness.
  9. Cut out 2 inch circles. 
  10. Space the circles onto the parchment paper 1 inch apart.
  11. Bake the cookies for about 7 to 9 minutes or until set.
  12. Allow the cookies to cool before filling.
Recipe adapted from Martha Stewart's Cookies

Nutella Filling
4 Tbsp unsalted butter, softened
2 cups powdered sugar
1 cup Nutella spread
1-2 Tbsp milk

Directions:
  1. In a medium bowl, cream the butter.
  2. Add the sugar and incorporate well.
  3. Add the Nutella to the butter mixture. Mix well.
  4. Add 1 Tbsp milk and mix. Add more milk until the desired filling consistency. 
Recipe by Jen of Sweet Morris. 

One year ago I made................Sloppy Joes (even with a funny face).
Did you already know...
-The fear of Halloween is called Samhainophobia.
-The fear of the color black is Melanophobia.
-The fear of teenagers is called Ephebiphobia.
What to do on a rainy day! The Artist!

Friday, October 12, 2012

Roasted Vegetable Panini

We just started to decorate for Halloween. I have several containers full of spooky stuff. I even have some of my sister's decorations. I had stored her scarey crows away and the kids thought they were great. I did have to remind them that she will want them back. Instead, they decorated my house with them. When I saw them, I told my husband the bad news how some black crows had actually entered our home. He said he saw them and didn't know how our cat was going to take the news. It wasn't our cat that we should have been worried about but our dog. He kept staring at them. My husband thought it was funny to make one chase our dog while making cawing noises. Our dog retaliated by jumping up on him. Don't worry the crow is safe.
My youngest daughter calls these broccoli sandwiches. I guess she is right. I think of them as roasted vegetable sandwiches. I tried to make the photo look like claws. The kids thought it looked scarey or acted scared.
Ahhhh..........
Roasted Vegetable Panini (aka Scary Claw Sandwich)
2 cups broccoli, cut into small florets
1 Tbsp olive oil
Salt and black pepper
1 cup cremini mushrooms
1 red bell pepper, seeded and cut into 1/2 inch strips
1 zucchini, thinly sliced
4 oz. butter
1 clove of garlic
 8 thick slices of french bread (I ask the bakery to slice the loaf)
4 slices of provolone cheese

Directions:
  1. Preheat broiler on high.
  2. Line a baking sheet with parchment paper.
  3. Toss the broccoli with the olive oil. Season with salt and pepper to taste.
  4. Place the broccoli on the parchment paper and broil for about 5 minutes.
  5. Remove the baking sheet.
  6. Add the mushrooms, bell pepper, and zucchini to the broccoli. Toss.
  7. Broil the vegetables for about 5 more minutes, tossing once while in the oven.
  8. Remove from the oven and set aside to cool.
  9. In a small microwave safe bowl, add the butter and garlic.
  10. Microwave the butter for 1 minute or until melted.
  11. Brush two slices of the bread with the melted butter.
  12. Place the slices in a heated panini press or skillet.
  13. Top the bread with the vegetables and a slice of cheese.
  14. Place another slice of butter bread on top.
  15. Cook until golden brown and the cheese has melted.
Recipe adapted from Annie's Eats.

One year ago I made...............Black Forest Cherry Torte
Did you already know...
-The old English word wicce (witch) meant wise women. 
-It is said that witches held meetings on Halloween.
-Witches is a popular costume in the U.S.
Does she convince you that she is scared?

Wednesday, October 10, 2012

Mace Crumb Muffins

Even though it is cold in the morning, my children think they still can wear shorts to school. I figure they still will be asking when there is snow on the ground. Can you imagine two children at the bus stop in shorts with heavy jackets on? I would even make them wear their hats. I know if I allowed it then it would backfire since they would be saying you let us before. Right?
I figured I would make some muffins for breakfast before school. My son even argues about eating breakfast before school. Even if he is eating breakfast at the bus stop, he still needs to eat. When I picked this recipe, I thought I had allspice. I had run out so I looked for a nice substitute. I found I had mace. A spice I like but I don't use often. The kids liked it but they like streusel on any muffin. I really liked them. They are fragrant. they are light and full of flavor. It seemed like a perfect muffin for the fall.
Mace Crumb Muffins
Streusel:
1/2 cup all purpose flour
1/2 cup brown sugar
1/2 tsp ground mace
4 Tbsp unsalted butter, cold and cut into bits
Muffins:
2 cups all purpose flour
1/2 cup sugar
1 Tbsp baking powder
1/2 tsp ground mace
1/4 tsp salt
1/4 cup brown sugar
1 stick (8 oz.) unsalted butter, melted and cooled
2 eggs
3/4 cups milk
1/4 tsp vanilla extract

Directions:
  1. Preheat oven to 375 degrees F.
  2. Line a muffin tin with 12 cupcake liners.
  3. Place the muffin tin on a baking sheet.
  4. In a small bowl, combine the flour, brown sugar, and mace until blended. Set aside the streusel topping in the refrigerator until ready to use.
  5. In a large bowl, whisk together the flour, sugar, baking powder, mace, and salt. 
  6. Add the brown sugar and stir until no lumps.
  7. In a small bowl, whisk together the melted butter, milk, eggs, and vanilla extract until well combined. 
  8. Pour the dry ingredients over the dry ingredients. Whisk gently and quickly until combined. The batter will be lumpy.
  9. Fill each muffin tin 1/3 full with the batter. 
  10. Add a little streusel to the center of the batter.
  11. Fill the remaining muffin tins 2/3 full with batter.
  12. Sprinkle the remaining streusel over each muffin gently pressing the streusel into the batter.
  13. Bake the muffins for 20 minutes or until the tops are golden brown. A toothpick should come out clean when inserted in the middle of each muffin.
  14. Transfer the muffins to a wire rack and allow to cool for 5 minutes before serving.
Recipe adapted from Baking From my Home to Yours cookbook by Dorie Greenspan. 

A year ago I made...............Cheesy Basil Stuffed Chicken. Yum!
Did you already know...
-Mace is the lacy, threads covering of the nutmeg seed.
-It takes over 110 lbs. of nutmeg to produce 1 lb. of mace.
-Mace is sweeter and milder than nutmeg.

Monday, October 8, 2012

Brown Butter Funfetti Cookies

Happy Columbus Day! When I first saw these cookies, I knew I would make them. When I read that Julie from The Little Kitchen had made these several times. Then it was time to get in the kitchen.
These cookies are delicious! They did not last one day. I'm not sure if they even lasted an hour. I didn't even have a chance to share with my friends. Anything with sprinkles are a hit at my house. I always have sprinkles on hand. Next time, I will have to double the recipe. When my youngest daughter saw these photos, she exclaimed, "These cookies were really good!" I guess I can't say anything better but to make them. I will say that it is very rare that I cook with shortening that my oldest even made a comment but I wasn't going to change a thing about these cookies.
Brown Butter Funfetti Cookies
1/3 cup shortening
1/3 cup unsalted butter
3/4 cup sugar
1 egg
1 tsp vanilla extract
1 3/4 cups all purpose flour
1 tsp baking powder
1/2 tsp salt
3 Tbsp sprinkles

Directions:
  1. Preheat oven to 350 degrees F.
  2. Line a baking sheet with parchment paper and set aside.
  3. In a medium saucepan, melt the butter and allow to turn to a golden brown but be careful not to burn for about 5 minutes. The butter will have flakes. Set aside to cool.
  4. In a large bowl, cream the butter, shortening, and sugar until well incorporated.
  5. Add the egg and vanilla extract to the creamed butter. Mix well.
  6. In a small bowl, whisk the flour, baking powder, and salt. 
  7. Add the flour mixture to the creamed butter. Mix until just combined. 
  8. Gently, fold in the sprinkles.
  9. Scoop about 1 1/2 Tbsp of batter and roll the dough into a ball.
  10. Place the ball onto the parchment paper spaced about 2 Tbsp apart.
  11. Bake the cookies for 10 to 12 minutes. 
  12. Remove from the oven and allow to cool for about 1 minute before transferring the cookies to a wire rack. 
Received permission for recipe from The Little Kitchen.

A year ago I was making...............Stromboli  mummy style which I will be making again real soon.
Did you already know...
-In 1892, Francis Bellamy included his Pledge of Allegiance to the flag for the 400th celebration of Columbus Day.
-In 1942, some schools made the Pledge of Allegiance a compulsory requirement.
-In 1943, the Supreme Court ruled that it couldn't make an individual to cite the Pledge.

I will admit that I cite a different Pledge of Allegiance than my children but I hope you have a wonderful Columbus Day whether you Pledge Allegiance to the flag or not.

Happy Columbus Day!

Friday, October 5, 2012

Whipped Vanilla Dream Cupcakes

It is Friday! The foliage is beautiful. It hasn't snowed. What a great day! To celebrate, cupcakes are in order. Oh, Cupcakes! How wonderful they are on a Friday. Even if it was a Monday, they are still wonderful. They are easy to decorate. They are easy to share. Also, they are easy to hide.
The cupcakes are very light since you fold in whip cream. I prefer vanilla cupcakes over chocolate so these are a winner. I am really glad that I shared these cupcakes because I would have been tempted to have them for supper and breakfast.
Vanilla Dream Cupcakes
2 3/4 cups cake flour, sifted
1 Tbsp baking powder
1/2 tsp salt
1 cup milk (I used skim)
2 egg white
1 large egg
1/2 tsp vanilla extract
1 stick (8 Tbsp) unsalted butter, softened
1 1/2 cup sugar
1/2 cup heavy cream

Directions:
  1. Preheat oven to 350 degrees F.
  2. Line 2 muffin tins with cupcake liners.
  3. In a medium size bowl, sift the flour, baking powder, and salt.
  4. In another medium bowl, whisk together the milk, eggs, and vanilla extract.
  5. With a mixer, cream the butter and sugar until fluffy.
  6. Slowly, add about 1 cup of flour mixture and then 1/2 cup of milk mixture to the creamed butter. Beat until incorporated after each addition. Continue alternate adding the flour mixture and then the milk mixture until all of it is incorporated. 
  7. In a clean, stainless mixing bowl, beat the heavy cream until soft peaks form.
  8. Slowly, fold the whipped cream into the cake batter.
  9. Carefully fill each cupcake liner about 2/3 full with the batter.
  10. Cook the cupcakes for about 16 minutes or until the toothpick comes out clean with a few crumbs.
  11. Carefully remove the cupcake from the muffin tin and allow to cool on a wire rack. 
  12. Repeat with the second muffin tin.
Recipe adapted from Sweetapolita. Frosting found here.


Last year, I was making Peanut Butter Oatmeal Cookies.
Did you already know...
-Foliage is at its peak in Western and Southern Maine this week.
-Maple and Oak trees foliage become red and scarlet with the cooler days. Ash, Beech, Birch, and Elm trees foliage become yellow.
-After the leaves drop, trees produce a waxy substance to protect it from the elements.

Wednesday, October 3, 2012

Sauerbraten Roast

When I lived in Colorado, I was lucky to have some friends move out west from New York. We would normally go out to eat but on one occasion our friends invited us over to eat. Now, I will admit my cooking talents did not develop well in Colorado. I will still blame it on the altitude if asked. I could not cook meat. It was dry. It was burnt. I even had a vegetarian friend that could cook meat better than I could. It is strange that I was still able to bake very well in Colorado. Isn't cake more important than a chicken dinner?
Now, my friends did not have this problem. They could cook very well. My friend made us sauerbraten for supper. The roast was delicious. My friend was so generous he even provided me with the recipe. The recipe was from my friend's mother. I did not attempt this recipe when I lived in Colorado. No, I was afraid I would ruin such a wonderful recipe. I horded the recipe away. Since I have been making German meals lately, I had to make this meal again. Even the leftovers are great. Sauerbraten takes days to marinate and hours to cook but it really is worth the time.
Served with red cabbage, German potato salad, and bread
Sauerbraten
5 lb. bottom round roast
1 pint red wine vinegar 
1 large onion, sliced
1 carrot, sliced
1 celery stalk, sliced
4 whole cloves
4 peppercorns
2 bay leaves
salt and pepper
6 Tbsp butter
5 Tbsp flour
1/2 cup sugar
8 ginger snap cookies, crushed

Directions:
In a non metal bowl, add the red wine vinegar, onion, carrot, celery, cloves, peppercorn, and bay leaves.
Season the roast with salt and pepper.
Add the roast to the red wine vinegar and marinade for 4 days. Turn the roast each day. 
On the fourth day, remove the roast and set aside. Strain the marinade and reserve the liquid.
Heat a dutch oven over medium heat.
Brown the roast on each side. 
Add the strained marinade to the roast and bring to a boil.
Lower the heat and simmer the roast for about 3 1/2 hours. 
In a small pan, melt the butter.
Stir in the flour to the melted butter. Add the butter and cook until light brown.
Add the melted butter mixture to the roast.
Cover and cook for 1 hour.
Remove the roast from the pan.
Stir in the crushed ginger snap cookies until thick.
Let the roast sit for 15 minutes before slicing. 
Serve with the sauce.

Recipe so kindly provided with permission from Mama D'Angelo.
Serve the sauerbraten with German Red Cabbage and Apple Strudel.  
Last year on this day, I made............. Easy Burgers.
Did you already know....
-Sauerbraten translates sour roast.
-Sauerbraten was originally made with horsemeat.
-Sauerbraten recipes vary from regions in Germany.
-Some sauerbraten recipes used bread as a thickener to the sauce instead of gingersnap cookies or raisins.

Monday, October 1, 2012

German Pancakes

Recently, I saw photos of Oktoberfest online. I was thinking we should go, right? We should all head to Germany and just have a great time. We would enjoy great food. My husband would enjoy the great beer. I would have fun watching him. It would be a grand time. Well I figure why not enjoy the great food at home since we can't realistically make it there this year. How about next year? Lets make plans! 
If we are going to enjoy German food, we need to start in the morning. Why? Because you can't start drinking until you had breakfast unless you never went to bed then keep drinking while you eat breakfast. I made these pancakes and my husband (who is not a big pancake person) told me I could make these any morning. I did try the original version than I tried the same recipe but with Cheddar cheese. Oh, the cheese version was wonderful. My husband said the texture of these pancakes were like a crepe but better. It is easy to make both versions. These pancakes are fluffier than crepes but not as doughy as pancakes. I will be making these again soon especially since they are so easy. Maybe for dinner one night?
German Apple Pancakes
1 1/3 cup all purpose flour
2 apples, cored and sliced into pieces
6 eggs
1/4 cup, brown sugar
1/2 tsp cinnamon
1/4 cup sugar
4 Tbsp unsalted butter
1 1/2 cup milk

Directions:
  1. Spray a muffin tin with nonstick cooking spray.
  2. Sprinkle the tin and pan with sugar if making the apple pancakes. Set aside.
  3. Preheat the oven to 450 degrees F. 
  4. Toss the apples with the brown sugar and cinnamon.
  5. Heat a skillet over medium heat. 
  6. Melt 2 Tbsp butter and saute the apples for 10 minutes until caramelized.
  7. Remove the apples from the stove and allow to cool for 5 minutes.
  8. Divide the caramelized apples to the muffin tin.
  9. In a food processor, add the flour, salt, sugar, melted butter, eggs, and milk. Process the batter for 3 minutes.
  10. Pour the batter over the apples. (Reserve 1/2 of the batter for the cheese version if desired.)
  11. Place the pancakes in the oven and lower the heat to 400 degrees F.
  12. Bake the muffins for 15 to 20 minutes. 
  13. Remove the muffins and top with powder sugar, whip cream, or other desired toppings.
German Cheese pancake version:   (Must make this version)
1 1/3 cup all purpose flour
6 eggs
1/4 cup sugar
4 Tbsp unsalted butter
1 1/2 cup milk
1 cup cheddar cheese
  1. Spray a pie pan with nonstick cooking spray.
  2. Preheat the oven to 450 degrees F.  
  3.  In a food processor, add the flour, salt, sugar, melted butter, eggs, and milk. Process the batter for 3 minutes.
  4. Stir in the cheddar cheese to the batter.
  5. Place the pancakes in the oven and lower the heat to 400 degrees F.
  6. Bake the large pancake for 20 minutes.
  7. Serve warm with no topping or a little more cheese sprinkled on top.
Recipe adapted from Martha Stewart website.

Folds of goodness!
Did you already know...
-Pfannkuchen and eierkuchen means pancake in German.  
-Eierkuchen are normally served around lunch with applesauce. 
-The Dutch baby pancake is a version of the German pancake.