Saturday, October 29, 2011

Mummy Cake Pops

We try to have a Halloween party every year. The kids really enjoy the games. We have mummy races. Each adult has a roll of unused toilet paper. When time, the adults wrap their designated child with the paper into a mummy. The kids race down the yard and back. The first kid back wins. This year the winner was the first to bob for apples after. 
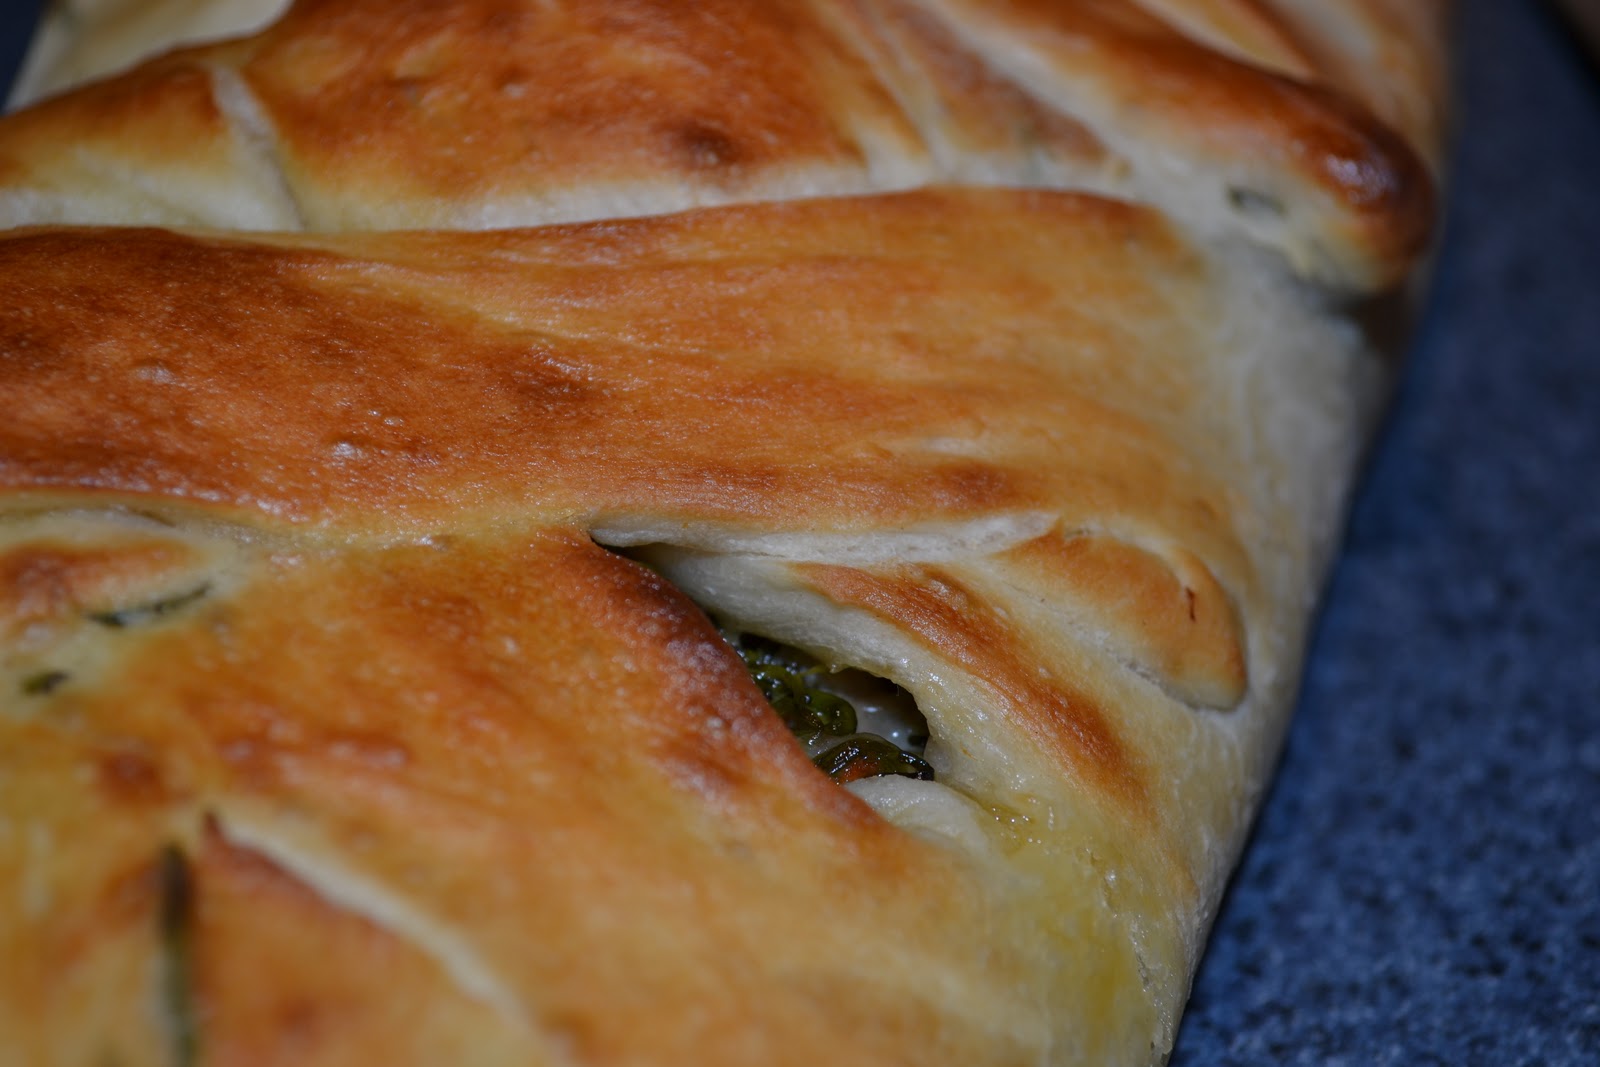
The other best part of the Halloween party is the food. This year I made mummy pops since it appears mummies were my theme. I have made the cake pops before and the kids really like them.
If you plan on making theses, I have several suggestions. First, I made sure the pops were in the freezer for a little while to harden. I took out only a few at a time out of the freezer. If you take them out, the first ones come out great but the next ones will start to slide down the stick. If this happens, you can refreeze but the top of the chocolate will be flat. I did make some flat top mummies but didn't take any photos. Another suggestion, I learned not to keep the pop in the chocolate for long or it will start to slide. I had to dip the pop quickly then work the pop over the cooler counter. The pop didn't work well over the steam. Enjoy!

Mummy Cake Pops
1 cake or 12 cupcakes
1 1/2 to 2 cups of frosting
1 package of candy melts
12 lollipop sticks
1 Styrofoam block/ other way to hold the cake pops to dry
candy eyes

Directions
  1. Crumble the cake and cupcakes in a bowl.
  2. Stir in the cup of frosting until well mixed.
  3. Roll the cake into 1 to 1 1/2 inch balls.
  4. Place the balls on a cookie sheet and place in the freezer.
  5. Add water to pot with a heat proof bowl on top of the pot to make a double boiler.
  6. Place the candy melts in the heat proof bowl and stir until melted.
  7. Take a few of the cake balls from the freezer.
  8. Dip the lollipop sticks into the melted candy and place into the cake balls.
  9. Dip the cake balls into the melted candy to coat. 
  10. Remove the cake balls and place through some Styrofoam to hold the pops.
  11. Once the cake pops harden a little, take a fork and dip in the melted candy.
  12. Dab or draw lines with the fork onto the cake pop to make the mummy wrapping lines.
  13. On the back of each candy eye, brush a little candy melt then stick the eye onto the cake pop.
  14. Stir the candy melts occasionally to prevent burning or hardening. 
Recipe adapted from Bakerella.
Did you already know.....................
-In November 1922, the Tomb of Tutankhamun was discovered by Howard Carter in the Valley of the Kings at Luxor.
-To the Egyptians, people were mummified to ensure safe passage to the afterlife. 
-It took about seventy days for the mummification process.
-The heart is never removed from the body.


Happy Halloween
My children are going to be: Alice in Wonderland, Jasmine, and a Ninja.
Are you dressing up or your little ones?

Wednesday, October 26, 2011

Vanilla Buttermilk Cupcakes

My mother-in-law has told me that her father's favorite cake was vanilla with chocolate frosting. So when my husband's maternal uncles came to visit from out of state, I thought these cupcakes would be the ideal dessert to serve. I am glad I made them.
This recipe is perfect if you have buttermilk you need to use. The cupcakes came out moist and delicious. I think it was a good choice for any party. The frosting is the fastest homemade frosting I have ever made.
Vanilla Buttermilk Cupcakes
Makes 30 cupcakes
4 whole eggs
2 egg yolks
1 tsp vanilla extract
1 1/4 cups buttermilk
3 cups cake flour
2 cups sugar
4 1/2 tsp baking powder
1 tsp salt
2 sticks unsalted butter, at room temperature

Directions:
  1. Preheat oven to 350 degrees. Line the cupcake pan with cupcake liners.
  2. In a mixing bowl, whisk, the eggs. Add the vanilla and ¼ cup of buttermilk to the eggs. Whisk well.
  3. In another bowl, whisk the flour, sugar, baking powder, and salt. Add the butter and 1 cup of buttermilk to the flour mixture. Whisk together until fluffy about 2 minutes.
  4. Slowly add the egg mixture to the flour mixture. Combine well.
  5. Fill the cupcake liners about slightly over ½ full.
  6. Bake in the oven for about 18-21 minutes. Test the cupcakes with a toothpick for doneness. Let cool before frosting.
  7. Makes 30 cupcakes
Chocolate Fudge Frosting
4 oz. unsweetened chocolate
2 sticks unsalted butter, at room temperature
3 cups powder sugar
3 Tbsp half and half milk
1 Tbsp vanilla extract

Directions:
  1. In a microwave safe bowl, melt the chocolate for about a minute in the microwave. Mix well and set aside to cool.
  2. In a food processor, pulse the butter and add the powder sugar.  Add the milk and vanilla. Pulse a few times.
  3. Refrigerate the cupcakes until ready to serve to set the frosting.
Recipe adapted from Sweetapolita.
Did you already know............
-Chocolate means bitter water in Aztec.
-The oldest and largest chocolate company in the U. S. is Hershey.
-Ancient Aztecs believed chocolate had magical powers like improve a person's strength.
-Fudge is a soft candy made from sugar, butter, and milk or cream.

Monday, October 24, 2011

Onion Dip

Since it is football season, we invited several friends over to watch the game. My husband loves chips and dips. He thinks it is a food group.
So, we were at the store purchasing the necessities for our guest like chips, beer, and soda when my husband asked about making an onion dip.  I said it sounded good except for chopping all the onions.On this day, my husband offered to chop up the onions for me. He informed me that he wouldn't cry since he was so tough. I didn't argue with him. If you are going to make this dip, find a tough man to chop the onions.
Tough men
I will not show you any photos of whether or not my husband cried. I will assure you that I didn't cry at all.  It is hard work. I have heard if you wear goggle you will not cry. My husband is too cool to wear goggles. He would rather cry.


Warning: even the tough will cry while making this dish.

I seem to always cry when I chop onions, While I'm crying, I say loudly, "Why me? Why?" Instead of feeling sad for me, the kids find this very amusing.
 

Onion Dip
2 Tbsp olive oil 
2 1/2 cups medium onions, diced
1/2 tsp  salt 
1 1/2 cups sour cream 
1 cup mayonnaise 
1/2 tsp garlic powder 
1/4 tsp ground white pepper 
1/2 tsp salt

Directions:
  1. Heat a skillet over medium heat and add oil.
  2. Add the onions and 1/4 tsp salt in the hot pan.
  3. Cook the onions until caramelized, about 18 minutes. Make sure to stir over the onions may burn.
  4. Remove from heat and allow the onions to cool.
  5. In the serving bowl, combine the sour cream, mayonnaise, garlic powder, salt, and pepper.
  6. Once the onions cool, add the onions to the sour cream bowl.
  7. Refrigerate until ready to serve.
Recipe adapted from Alton Brown.

My three tough guys


Did you already know…………
-White pepper and black pepper are from the same berry.
-White pepper is from a fully ripe berry.
-It is milder in taste than black pepper.
-If making a white sauce or dip, use white pepper instead of black so no specks are detected.

Saturday, October 22, 2011

Chicken Enchiladas

When I lived in Colorado, I would always order blue corn enchiladas. I thought the blue corn must be the reason why they are so good. (I still think it is true.) Since I couldn't find any blue corn tortillas, I settled for the flour ones.
Enchiladas are my favorite Mexican food. What is yours? My children's would be the taco. I prefer crunchy but the rest of the family prefers the soft taco. I guess (sometimes) majority rules.
Chicken Enchiladas
3/4 cup chopped roasted red bell peppers (I used the jar)
1 can (4.5 oz) chopped green chiles
1 cup light sour cream
1 1/2 cups cheddar cheese
1 tsp ground cumin
1 tsp garlic salt
1/2 tsp dried oregano
1 medium onion, chopped
1 tsp vegetable oil
3 boneless chicken breast
1 can (10 oz) enchilada sauce
6 flour tortillas

  1. Preheat oven to 350 degrees.
  2. Spray 13x9 inch baking dish with PAM cooking spray.
  3. Chop the roasted red bell peppers.
  4. In a bowl, add the peppers, chiles, 3/4 cup of sour cream, 1 cup of cheddar, cumin, garlic salt, and oregano.
  5. In a medium skillet, heat the vegetable oil over medium heat.
  6. Add the onion and chicken to the skillet. Cook for about 5 minutes.
  7. Add the chicken and onion to the pepper mixture. Combine well.
  8. Lay a tortilla flat and spread about 1 cup of the chicken mixture in the center of the tortilla.
  9. Fold in the sides and roll the tortilla up.
  10. Transfer the tortilla to the baking dish with the seam side down.
  11. Repeat with the remaining tortillas.
  12. Top the tortillas with the enchilada sauce.
  13. Spread the remaining 1/2 cup of cheese on top of the rolled enchiladas.
  14. Bake for 45 minutes.
  15. Broil on high for 2 minutes if the cheese isn't nice and golden brown.
  16. Let cool for about 5 minutes before serving.
  17. Serve with sour cream, cheddar, onions, etc.
Adapted from Pillsbury Halloween October 2007 cookbook.
Did you already know..........
-Enchiladas are street vendor food in Mexico.
-Enchiladas have been around since the Mayan times.
-Enchilada means in chile.
Oh no, Mr. Bill

Wednesday, October 19, 2011

Pumpkin Whoopie Pies

I will occasionally ask my youngest daughter to go downstairs and get her sibling. Instead, she will holler for them while she is next to me. Does anyone in your house do this? I want to make sure it isn't just mine. 
  I think she just likes to holler. One day, we were all downstairs and my youngest daughter started to holler for her dad. He would holler back, "yea." She wouldn't answer but she kept hollering for him. Since my husband was busy, he just kept hollering back up to her. After a few minutes of this exchange, the next time my daughter hollered for "Dad", my husband responded "There is no one here with that name." It was suddenly quiet since she didn't know how to respond back but my youngest son did. My son turns to his dad and said, "Hey, whoever you are, she wants you." Then he smiles at my husband and says, "Did you like that better?"
  Yum! Whoopie Pies! They remind me of a cupcake with the filling in the middle instead of on top.

Pumpkin Whoopie Pies
Whoopie Pie Cake
3 cups all-purpose flour
1 tsp salt
1 tsp baking powder
1 tsp baking soda
2 Tbsp ground cinnamon
1 Tbsp ground ginger
1 1/2 tsp ground cloves
2 cup dark brown sugar
1/2 cup vegetable oil
1/2 cup of apple sauce
3 cup pumpkin puree
2 eggs
1 tsp vanilla extract

Whoopie Pie Filling:
4 oz of cream cheese, room temperature
1 stick of unsalted butter, room temperature
1 cup powder sugar
1/4 cup pumpkin puree
1 tsp cinnamon
1/2 tsp nutmeg

Directions
  1. Preheat oven to 350 degree.
  2. Line a baking sheet with parchment paper.
  3. In a large bowl, whisk together flour, salt, baking powder, baking soda, cinnamon, ginger, and cloves.
  4. In another bowl, cream the brown sugar with the vegetable oil and applesauce.
  5. Add the pumpkin to the sugar mixture and beat.
  6. Add the eggs one at a time then the vanilla. Mix well.
  7. Slowly, add the flour mixture to the pumpkin mixture.
  8. Mix until incorporated.
  9. Spoon about 1/4 cup of batter onto the baking sheet. Try to make the sizes.
  10. Cook for about 15 minutes.**Prepare the filling while waiting**
  11. Let cool on cookie rack for five minutes then transfer to a wire rack.
  12. Prepare the next batch of cakes and place in the oven
**Whoopie Pie Filling:
Let cool completely about 30 minutes before frosting.

For the filling, combine the cream cheese, pumpkin, and the butter.
Add the powder sugar to the filling mixture.
Mix in the spices into the filling mixture until well incorporated. Refrigerate.

Whoopie Pie Cake recipe adapted from Bake at 350. Whoopie Pie Filling recipe adapted from Martha Stewart.
See the eyeball?
I highly recommend you to make these whoopie pies before someone hollers your name! My oldest daughter gave her best friend one and after each bite she would say, "I love your Mom." My husband doesn't like pumpkin (I guess he knows it is a vegetable) and he liked them.
The oldest daughter!
Did you already know.............
-The Maine State treat is the Maine Whoopie Pie.
-The Maine State dessert if the Blueberry Pie.
-The Whoopie Pie festival is held in Pennsylvania. 
-The Whoopie Pie has been argued to originated in Pennsylvania, Maine, or Massachusetts.

Monday, October 17, 2011

Cheddar Bay Biscuits

I live in Maine. We have local lobster restaurants everywhere. There are restaurants right on the water where the lobster boats will dock to deliver lobster and other local seafood. We do not have Red Lobster restaurants in Maine. The closes Red Lobster is in New York. The closes Red Lobster's Cheddar Bay Biscuits are at least five hours away. I don't think I'll convince my husband to head to New York for biscuits. Honey, dear, lets go for a ride today? A long ride? For some biscuits? Did I convince you? If not, I don't think he'll go for it. If you do not feel like driving so far for their delicious biscuits, try making this recipe.
When I was a teenager (a few years ago?), my sister took me to a local lobster house for my birthday dinner.The restaurant did serve good rolls.My sister doesn't eat lobster but she is sweet and took me anyways. She hasn't taken me since. I have some suggestions for you if you are eating lobster. If you are eating lobster, your companion should sit next to you. It is safer. You are the one wearing the lobster bib but the other person isn't safe from getting sprayed. Another suggest is if you are on a date, don't order lobster. It is not an attractive item to eat.

 Cheddar Bay Biscuits
2 1/2 cups Bisquick
4 Tbsp cold butter
1 cup cheddar cheese, shredded
3/4 cup buttermilk
1 tsp garlic powder

Butter Glaze
3 Tbsp butter
1/2 tsp garlic powder
1 tsp dried parsley

  1. Preheat your oven to 400 degrees. 
  2. Line a cookie sheet with parchment paper.
  3. In a bowl, cut the cold butter into the Bisquick with a pastry cutter. Don't over mix. The butter should be about the size of a pea.
  4. Add the cheddar cheese, buttermilk, and garlic powder.
  5. Mix with a spoon until combined. Don't over mix.
  6. Drop the dough by spoonful onto the cookie sheet.
  7. In a microwave safe bowl, microwave the butter until melted.
  8. Stir in the garlic powder and parsley into the butter.
  9. Brush the tops of the biscuits and set aside.
  10. Bake about 13 minutes or until golden brown.
  11. Brush the tops of the biscuits again with the butter glaze.
  12. Sprinkle the top with additional parsley.
Recipe adapted from The Girl Who Ate Everything.

Did you already know.............
-Red Lobster is known for their Cheddar Bay biscuits and serve about 1.1 million of the biscuits every day.
-New England cheddar cheese traditionally is white in color because it doesn't contain color additives.
-Cabot's naturally aged cheddar has no lactose.

Sunday, October 16, 2011

Pork Chops with Garlic and Herbs

 My oldest daughter's teacher asked the class if they were on a deserted island, what three items would they bring. My daughter said How to survive on a desert island guidebook, a cute carpenter, along with potatoes. What good choices especially how versatile potatoes are-now you thought I would have said carpenter but I surprised you. I told her I liked all of her choices except I would have pick pasta instead of potatoes since I could eat pasta everyday. This is not the case with my husband. He gets tired of pasta.


I like to make new dishes all the time but normally it just seems like we've been having a lot of chicken or beef lately.So, the other day I saw pork chops were on sale. Why not? I hardly make it and it would be a nice change. Everyone agreed but my oldest insist pork chops MUST be served with applesauce. I have made applesauce from scratch. All the work and cost, I prefer to buy it in the jar. So, my applesauce is not homemade this time. Also, it is hard to take a photo of applesauce on the plate. I guess I could have done it gourmet and served the pork chops on top of the applesauce. 
Pork Chops with Garlic and Herbs


4 boneless pork chops about 1 inch thick
2/3 cup dry white wine
2 Tbsp. olive oil
1/2 tsp. sugar
1/2 tsp. salt
1/2 tsp. ground pepper
1 Tbsp. sage
3 Tbsp. chopped fresh rosemary
4 garlic cloves, minced
1 Tbsp olive oil
2 tsp butter


Directions:
  1. In a oven safe 8 x 10 baking dish, mix the the wine, oil, sugar, salt, pepper, sage, rosemary, and garlic.
  2. Arrange the pork chops in the baking dish in a single layer.
  3. Cover and marinate in the refrigerator for 30 minutes to an hour. Make sure to turn the pork chops at least once while it is marinating.
  4. Heat the oven to 400 degrees.
  5. Cook the pork chops for 8-10 minutes per side. Make sure to turn the pork chops once while cooking.
  6. Let cool on the counter while you preheat a skillet.
  7. Add 1 Tbsp of olive oil to the pan with 2 tsp of butter.
  8. Fry the skillets for about 1-2 minutes per side for a crispy appearance.
  9. Let rest for a few minutes before serving.


Adapted from Annie's Eats. Originally from Williams Sonoma.


If you are in the mood for pork chops, I would recommend making this recipe. My pork chops were not dry and really tasty. I like rosemary and it was a nice accompaniment to the pork. I know it seems unusual to fry after cooking in the oven but my oldest suggested it so it added a little color. You can cook these on a grill which would probably do the same results. We will be making these again.


Did you already know.........
-One of the first animals to be domesticated were swines.
-Swines are the family name for hogs. The mother is called a sow. The father is called a boar and the babies are pigs.
-In 1539, the Spanish explorer brought the first swine to North America.

Friday, October 14, 2011

Sloppy Joes

Each week, I ask what everyone wants for supper. Normally, no one besides my son has any request. My son has asked for mussels, chicken wraps, and asparagus just to name a few items. Yes, he is only 6 years old. I tell my husband he has a sophisticated palate. I guess is my husband reply.
My husband would never request asparagus or any other vegetable to be served at dinner. The other night my husband did ask for sloppy joes with barbecue sauce. I guess my husband was afraid my son would ask for stuffed artichokes next or my oldest daughter would request hamburgers again.

Since I think my children (and especially my husband) need more vegetables in their diet, I try to add extra whenever I can. My husband likes this version of Sloppy Joes. We just don't bring up the fact there are extra vegetables. Enjoy and don't forget a side of vegetables to complete the meal!
Sloppy Joes by Sweet Morris
1 large carrot, chopped
1 onion, chopped
1/2 red pepper, chopped
3 cloves of garlic, minced
3 mushrooms, chopped (optional if you have them on hand)
1 Tbsp olive oil
1 1/2 lb. hamburger
1 Tbsp Worcestershire sauce
2 cups of tomato sauce

Sauce:
1 cup ketchup
1/2 cup BBQ (I used Jack Daniels original)
2 Tbsp red wine vinegar
2 Tbsp brown sugar
2 tsp chili powder
1/2 tsp dry mustard

Directions:
1.  Chop all your vegetables.
2.  Heat a deep skillet to medium heat and add the olive oil.
3.  Add the hamburger and brown. Break up the hamburger about 5 minutes.
4.  Season the brown hamburger with Worcestershire sauce with salt and pepper.
5.  Add the vegetables to the hamburger pan and cook about 5 minutes.
6.  In a bowl, mix all the sauce ingredients.
7.  Mix in the tomato sauce over the vegetables and stir.
8.  Add the sauce into the skillet.
9.  Cook the sloppy joes for about 10 minutes. You may want to cover to prevent splattering.
10. Stir the sloppy joes often.
11. Serve with bun of your choice with toppings like cheddar cheese, bacon, etc.
Recipe by Jen of Sweet Morris.
When I make sloppy joes, my oldest daughter sometimes plays Lunch Lady Land by Adam Sandler.
I think she knows the song by heart and she always sings sloppy joe, slop, sloppy joe while I'm cooking. I think any lunch lady would be proud to make these sloppy joes.

Did you already know...............................
-Adam Sandler was born in New York City and was raised in Manchester, NH.
-The Lunch Lady Land was released on the They're All Gonna Laugh at You! album in 1993.
-They’re All Gonna Laugh at You! was Adam Sandler's first comedy album. 
-The album was nominated for a Grammy and spent more than 100 weeks on the Billboard chart.
-The late comedian Chris Farley dresses as the Lunch Lady in the video. -To view the video:
Disclosure:  My great-grandmother was a lunch lady and I thought she was wonderful. Also, none of the lunch ladies I have known ever have acted or looked like Adam Sandler's version but it still is a fun video.

Wednesday, October 12, 2011

Black Forest Cherry Torte


My children like to help in the kitchen. They also like to help me take my pictures. So, today I continued with my Halloween menu. I took a Black Forest Cake and added spiders. Don't worry the spiders are fake. My children (except the oldest) wanted to be in the photos. So, I told them they should act scared. Here are the results:
Isn't he convincing?
I think we know who the actress will be!
It took me several days to make this cake. So, I will tell you the steps on how I made it.

Black Forest Cherry Torte (Schwarzwalder Kirschtorte)
Day One:  Make the chocolate cookie bottom
Day Two:  Make the cake and assemble
Day Three: It will taste better after sitting a day.
See the Chocolate Cookie Bottom? Yum
Day One:
Chocolate Cookie Bottom:
1 cup all-purpose flour
1/4 cup cocoa powder
1 tsp baking powder
1 tsp salt
6 Tbsp unsalted butter
1/4 cup sugar
1/2 tsp vanilla extract

Directions:
  1. Preheat the oven to 350 degrees F.
  2. Grease the bottom of a 9-inch spring-form pan with nonstick spray. Set aside.
  3. In a medium bowl, whisk the flour, cocoa powder, baking powder, and salt together. Set aside.
  4. In another bowl, beat the butter and sugar until fluffy.
  5. Add the vanilla to the butter and mix until combined.
  6. Add the flour mixture in batches to the butter mixture.
  7. The dough is thick so mix with a wooden spoon until the dough comes together.
  8. Press the dough evenly onto the bottom of the spring-form pan.
  9. Bake for 17 minutes.
  10. Set aside on a wire rack to cool.
  11. Wrap and store until tomorrow. If longer time is needed, freeze.
The Assembly
Day Two:
Devil's Food Cake:
Makes two 9-inch cakes or three 8-inch cakes
2 1/4 cups cake flour
2 tsp baking soda
1 tsp salt
1 cup salted butter
2 1/4 cups dark brown sugar
3 large eggs
3 ounces unsweetened chocolate,
1/2 cup buttermilk
1 1/4 cup boiling water
2 teaspoons vanilla extract

Directions:
  1. Preheat the oven to 350 degrees F. Grease and flour three 8 inch cake pans.
  2. Line the bottoms of the pans with parchment paper circles, and spray them with nonstick spray.
  3. In a large bowl, whisk  the flour, baking soda and salt together.
  4. In another bowl, cream the butter and sugar.
  5. Add the eggs, one at a time, and mix well.
  6. Melt the chocolate in a microwave for about 1 minute. Stir and if needed another ten seconds.
  7. Stir in the melted chocolate into the butter mixture.
  8. Add the flour mixture and the buttermilk to the butter mixture a little at a time until incorporated.
  9. Add the vanilla and boiling water. Mix well, but don’t overmix.
  10. The mixture will appear thin.
  11. Pour about 1 cup and 1/8 cup of batter into each greased pan. 
  12. Bake for 23 minutes or until a toothpick inserted in the center comes out clean.
  13. Place the pans on a wire rack, and let the cakes cool completely in the pans before removing.
  14. Let cool completely before removing from the pans.
  15. Assemble or wrap in plastic wrap then aluminum foil and freeze until ready to assemble.

Day 2 
Assembly:
1/4 cup of cherry preserves
1 14.5 ounce can of cherry pie filling
3 cups heavy cream
3/4 cup powder sugar
Chocolate Cookie Bottom
Devil’s Food Cake
Maraschino cherries
1 ounce semisweet chocolate, at room temperature


  1. Mix the cherry preserves and the cherry pie filling together. Set aside.
  2. If no juice is desired, pat dry the maraschino cherries on paper towels and set aside to dry.
  3. With a hand mixer, mix the heavy cream with the powder sugar to make whip cream.
  4. Place the chocolate cookie bottom on the bottom of your cake stand or plate.
  5. Spread 1/3 of the cherry mixture on the top of the cookie bottom.
  6. Spread a little less than 1 cup of the whip cream on top of the cherry mixture.
  7. Place one of the cakes on top of the whip cream.
  8. Spread 1/3 of the cherry mixture on the top of the cake.
  9. Spread about 1 cup of the whip cream on top of the cherry mixture.
  10. Place the second cake on top of the whip cream cake base.
  11. Spread the rest of the cherry mixture on the top of the cake.
  12. Spread the rest of the whip cream on the top and sides of the cake.
  13. Decorate the top of the cake with the maraschino cherries.
  14. Take the semisweet chocolate and with a vegetable peeler, shave the chocolate over the cake.
  15. Store the cake in the refrigerate until ready to use. It does taste better the next day.
Makes one 12- to 16-slice cake.
Black Forest Cherry Torte adapted from Ezra Pound Cake
Orginally adopted from Margit Stoll Dutton’s “The German Pastry Bakebook”,
Chocolate Cookie Bottom Adapted from Elisa Strauss’ “The Confetti Cakes Cookbook”
Devil's Food Cake: Adapted from Kathleen King’s “Tate’s Bake Shop Cookbook”
He helped decorate the cake.
He still isn't scared.
Did you already know.................  
Oktoberfest Facts:
-Oktoberfest began with a marriage. On October 12th, 1810, the festivities were to honor the Bavarian Crown Prince Ludwig's marriage to Princess Therese von Sachsen-Hildurghausen.
-At the time of the wedding, Bavaria was its own kingdom.
-Munich is located in the German state of Bavaria.
-The festivities now begin in the middle of September in Munich, Germany.
Germany

Sunday, October 9, 2011

Cheesy Basil Stuffed Chicken


Did I surprise you that I didn't post a Halloween meal? I guess I could call this ooey gooey chicken. Ooey gooey is a technical term. We even have a child's book with the title of Ooey Gooey. In the story, a pirate loses his gold tooth when he eats his ooey gooey pirate delight. Don't worry you will not lose a tooth if you make this dish. 

Remember the previous photo of my daughter (See Princess cake). The tooth fairy has been at our house a lot lately. When my oldest daughter lost her first tooth, she informed us that her tooth fairy brings only gold dollars. Over the years, the tooth fairy continues to bring gold dollars. My youngest daughter receives the Sacagawea gold coin dollars and my son receives the Presidential gold dollars so they would know which dollar belongs to which child.

It is very good. The chicken came out very moist and I could cut it with a fork. I served the dish with rice. 
Cheesy Basil Stuffed Chicken with roasted tomatoes and broccoli
1 cup mozzarella cheese, shredded
3 Tbsp fresh basil, chopped/torn
2 Tbsp milk (I used skim)
1/2 lemon
Salt and pepper
4 boneless, skinless chicken breasts
1/4 cup mayonnaise
1 cup plain bread crumbs
1 clove garlic, minced
2 Tbsp olive oil
1 pint cherry tomatoes
2 stalks of broccoli, roughly broken apart

Directions
1. Preheat oven to 425 degrees.
2. Spray a 9 x13 baking dish with a nonstick spray.
3. In a bowl, combine the cheese, 1 Tbsp basil, milk, salt, and pepper.
4. Squeeze the 1/2 lemon into the bowl mixture and mix. Set aside.
5. In another bowl, mix the bread crumbs with the garlic, olive oil, and 1Tbsp basil. Set aside.
6. Hold your chicken and slice down the side of it but stop about an inch from the other side.
7. Open up the chicken breast and fill with the cheese mixture.
8. Hold the chicken back together and secure with toothpicks. I used two per a chicken.
9. Place chicken breast in the baking dish.
10. Spread mayonnaise evenly over the top of each chicken.
11. Top the mayonnaise with the bread crumb mixture. Press lightly to adhere.
12. In another baking dish, toss tomatoes with some olive oil. Salt and pepper.
13. Tranfer the tomatoes around the chicken in the other baking dish.
      (Trying to save dirty dishes.)
14. In the now empty baking dish, place the broccoli.
15. Toss the broccoli with olive oil, salt, and pepper.
16. Place both the broccoli and chicken dishes in the oven. **See below note**
17. Bake for 15 minutes.
18. Place foil loosely over the chicken to prevent the bread crumbs from burning.
19. Cook for 10 more minutes or until chicken is cooked through.

**Now, prepare rice as directed on the stove top so it will finish at the same time as the chicken. Enjoy!
Recipe adapted from Let's Dish

Did you already know.................
-Sacagawea was from the Shoshone Indian tribe.
-In 1804, Sacagawea at age fifteen and six months pregnant when she assisted Lewis and Clark on their expedition west.
-Sacagawea's husband accompanied them during the expedition.
-Her son, Jean Baptiste, was born during the expedition.
-Lewis and Clark's expedition took a little over two years.

 Today, you can fly across the U.S. in six hours or drive in about six days.

Friday, October 7, 2011

Stromboli, Mummy style

I love Halloween. When I was in school, the school lunch menu always had scary titles for the month like worms and eyeballs (aka. spaghetti and meatballs). Did your school do that? The school lunch menu that my children have doesn't have any creative scary titles. I don't want them to be missing out so of course we have "scary" tasty meals for the month.
The Stromboli gooey filling
Another reason I think I like Halloween is that it was the month to watch scary movies and scare everyone around you. I know I inherited this from my Dad since he would always scare us. Remember I warned you,  I will scare you if you watch a scary movie with me. I think I am immune to being scared by a scary movie. I can normally predict who will live and who will have to exit the movie early. My husband has banned me from the room while he watches them. One time my Dad's siblings came to visit and they decided to watch a scary movie. My poor husband was scared several times from them plus I helped.
 The mummy wrappings
 To celebrate Halloween I have decided to make a scary Stromboli. I am normally good and try not to buy the little cookbooks found at the grocery store checkout but I can not resist the Halloween ones. So again this year, I broke down and bought the Easy Halloween by Pillsbury. This stromboli recipe was inspired by their Mummy Stromboli. You could use refrigerated pizza dough or crust but I made mine.

Do you like his face?
  
Stromboli, Mummy style  
1 Tbsp olive oil
1 lb. sweet Italian sausage
1 medium onion
3 clove of garlic
5-6 mushrooms
1 bunch of broccoli rabe
1/4 cup of red peppers
10 pepperoni
1 Pizza dough (see below for recipe)
8 oz. package of Italian cheese blend
3 slices of provolone
additional olive oil for brushing the dough

Directions
  1. Heat a skillet with the olive oil over medium heat.
  2. Place your dough on a flour surface and roll out. This should only take about a minute to do.
  3. Brown the sausage for several minutes.
  4. While the meat is browning, chop your vegetables. I chopped mine small except the broccoli rabe.
  5. Add the vegetables to the skillet.
  6. Chop the pepperoni and add it to the skillet.
  7. Stir the skillet mixture every few minutes for five to ten minutes until your sausage is cooked through.
  8. Add half the package of cheese to your skillet mixture and stir.
  9. (It will look gooey but its good because it will hide some of those vegetables.)
  10. Take your dough and roll out into a long rectangle about 7 x 11.
  11. Move the dough onto your cookie or pizza sheet.
  12. Take scissors and cut about 2 inches into the dough on the long sides of the rectangle. Keep doing this with about a 2 inch space between each cut. Repeat on other side. There needs to be a large space in the middle for the filling.You are basically cutting strips that will wrap around the top of the filling.
  13. Place half a slice of provolone down the middle of the dough. The cheese should not be on the sliced dough.
  14. Place the skillet mixture down the middle of the dough.
  15. Cover with the remaining cheese.
  16. Take a strip of the cut dough and pull over the skillet mixture. Alternate pulling the strips over the dough from both sides to make it look like a mummy.


Pizza Dough
Prep Time: 20 minutes
Total Prep Time: 1 hr 10 min

1 1/2 cups water, around 110 degrees F
1 envelope instant dry yeast
1/2 tsp sugar
3 1/2 to 4 cups bread flour, plus more for rolling
1 1/2 tsp kosher salt
2 Tbsp olive oil, plus a little additional
1 tsp oregano
A couple sprigs of rosemary

Directions
1.  Make sure your water if not too hot or too cold for the yeast. I do not use a thermometer but the inside
     of my wrist (like when you check the temperature inside a baby's bottle).
2.  Add the sugar to the water with the yeast. Stir and put aside. I like to do this just to check if the yeast is
     good.
3.  Grease the inside of a large bowl and set aside.
4.  Dust a clean area for rolling and leave some about 1/4 cup of extra flour on the side of the area.
5.  Mix the bread flour and salt in a bowl.
6.  Add the yeast water and the olive oil to the flour. Stir until it starts to clump together or becomes to hard to stir.
7.  Knead the dough together for about 3 minutes. Add the oregano and fresh rosemary and knead for 2 more minutes so the dough comes together and starts look smoother.
8.  Use the reserved flour on the side if the dough is sticky. If the dough becomes too dry, add only a little water.
9.  Add the dough to the greased bowl and flip it. This way both sides of the pizza dough is greased.
10.Cover the bowl with plastic wrap and wait an hour or two. I do spray the plastic wrap with a nonstick before covering the dough.
11.The dough should have doubled in size in one hour. I have let it sat for two hours and it was fine.
12. Punch down and use above.
Recipe adapted from Bobby Flay
http://www.foodnetwork.com/recipes/bobby-flay/pizza-dough-recipe/index.html


Did you already know........
-Stromboli are similar to a calzones.
-Stromboli are usually oblong in lenth. Calzone are usually a semi-circle.
-Stromboli originated in Pennsylvania and Calzones are from Italy.