It is summer. It is hot. So, I have been making hot porridge. Where is the logic? Well, my family have been trying these dishes without complaining. I guess when someone is cooking you breakfast with fresh fruit is always a plus. So, I made this porridge with amaranth. I have never cooked with amaranth but I really like the grain. It is smooth and fine. The recipe called for soaking the grain for 24 hours then straining it through a fine mesh strainer before cooking. I have cooked this recipe twice and both times I've soaked it. I hadn't research the grain but had just followed the instructions provided in the recipe. I'm unsure if the soaking is necessary. Other recipes do not state to soak the grain including the package of Bob's Red Mill. The appearance of the grain doesn't appear to change with the soaking and will not plump up. So, I guess it will be your choice to soak or not to soak. I will say that I love amaranth. It still has a slight crunch to it after cooking. Of course I added toasted almonds for even more of a crunch. Again, I really loved this recipe since I've made it a couple of times. Even if it is hot outside, you should try some amaranth porridge today.

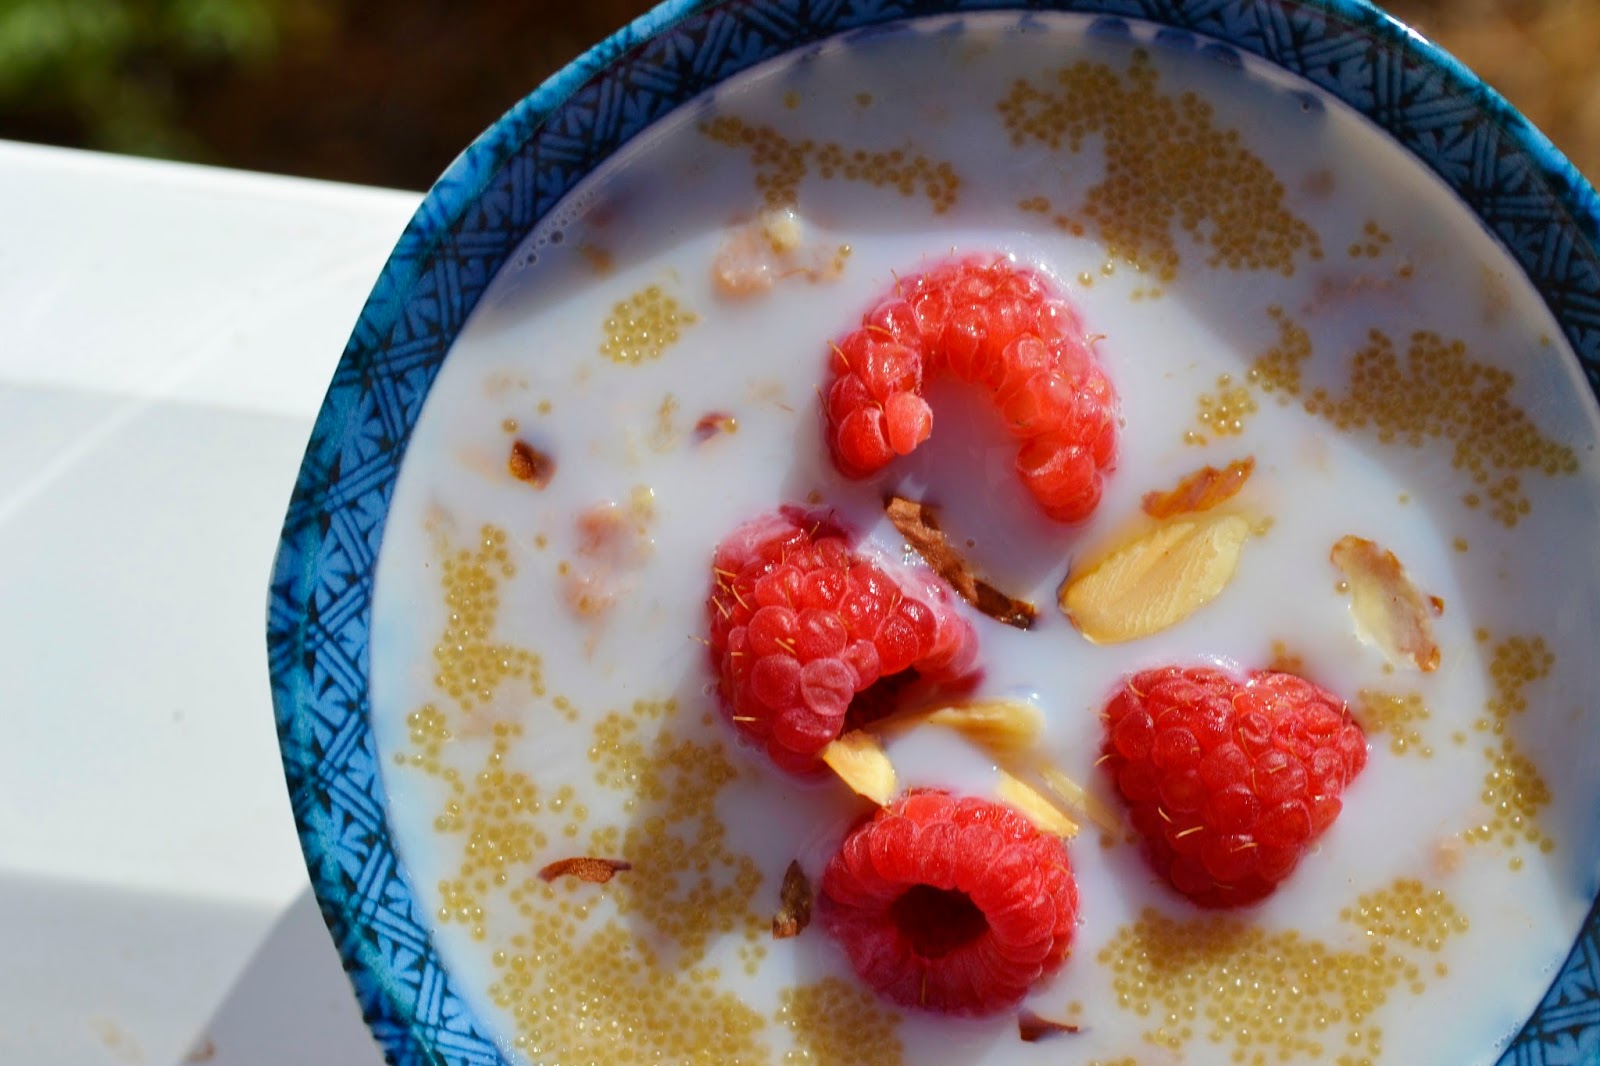
Amaranth Porridge with raspberries
1 tsp vegetable oil
1 Tbsp honey
1 tsp ground cinnamon
pinch of sea salt
2/3 cup amaranth
1 1/2 cup milk
Toppings: milk, toasted almonds, raspberries, etc.
Directions:
- In a medium saucepan, heat the oil and honey over medium heat.
- Add the cinnamon and stir. Cook for 30 seconds.
- Add the amaranth with the sea salt. Stir to coat.
- Add the milk and stir. Bring to a simmer.
- Reduce heat to low and cover. Stir often.
- Cook for at least 20 minutes or until the majority of the milk has been absorbed. The amaranth should be thick and creamy consistency with the grain being tender.
- Serve with additional milk and desired toppings.
Recipe adapted from The Green Life.
One year ago................................I made Khobz bread.
Two years ago..............................I made Skillet Lasagna.
Three years ago............................I made Cherry Cheese Danish.
Four years ago..............................I made Chocolate Nutella Cookies.
Did you already know..............
-Amaranth grain was the grain of the Aztecs.
-The Spanish Conquistadors banned amaranth since the Aztecs used the grain in the religious ceremonies.
-Amaranth grain is gluten free.
My oldest daughter told me she missed my blogs. I have missed blogging too but I just had this cold that I couldn't shake. I was tired. I didn't want to cook. My husband even made me go to the doctor. Then I had to take medicine which made me feel better than my youngest daughter gave me another cold. So, finally I feel great! Great enough to cook! My oldest daughter said I've been posting a lot of desserts so I decided to post about mushrooms!
When I lived in Colorado, I liked to eat at this restaurant called The Hungry Farmer. I would order there sauteed mushrooms for an appetizer. Well, I haven't been back to Colorado for over ten years. Also, the restaurant has closed. I did find an old menu online. Does the dish taste like I remember? I can't remember. I know this recipe did taste good. My husband liked it. I think these would be an awesome topping for steak. Are they low calories? No so it is a good thing that it was an appetizer.
Sauteed Mushrooms
1 Tbsp olive oil
2 Tbsp salted butter
8 oz. button white mushrooms
1 tsp garlic salt
1 Tbsp dry parsley
Directions:
- In a large skillet, heat the olive oil and butter over medium heat.
- Add the mushrooms, garlic salt, and parsley.
- Saute the mushrooms for about 5 minutes or until the mushrooms are cooked.
Recipe by Jen of Sweet Morris.
One year ago.........................I made Caesar Salad Dressing.
Two years ago.......................I made Hardtack.
Three years ago.....................I made PB Cup PB Cookies.
Four years ago.......................I made Feta Topped Chicken.
Did you already know................
-Mushrooms do not require sunlight to make energy since they have no chlorophyll.
-In the U.S., the white button mushroom is the most popular mushroom.
-During the reign of King Louis XIV, a commercial mushroom farm was created in a cave in France.
It is strange to go strawberry picking at the end of April. In Maine, we would go strawberry picking around 4th of July. Last year, we missed it since we hadn't realized it was so early. I'm glad we take them since the kids love strawberries. My youngest daughter tells me that there is something wrong with people who don't eat strawberries. I think she is kidding. When I saw this recipe, I thought the kids would really love it. It has a sponge cake, strawberries, and whip cream. When my oldest daughter visits, I'll have to make this for her. It really is good. Surprising, the cake is cooked with a meringue topping. It is a good cake for a dessert like this since the cake is very thin. I really would make this dessert again.
Strawberries & Cream Torte
1/4 cup unsalted butter, softened
1/2 cup sugar and 2 tsp sugar, divided
2 egg yolks
1/2 tsp vanilla extract
2 egg whites
1 cup white whole wheat flour
1 1/2 tsp baking powder
1/4 tsp salt
1/2 cup milk
2 cups heavy whipping cream
1 pint fresh strawberries, hulled and sliced
Directions:
- Preheat oven to 350 degrees F.
- Line two 8 inch baking pans with parchment paper.
- Spray the baking pans with nonstick baking spray and set aside.
- In a large bowl, cream butter and 1/2 cup sugar until flight and fluffy.
- Add the egg yolks and beat well.
- Beat the vanilla.
- In a large bowl, whisk the flour, baking powder, and salt.
- Add about 1/2 cup of the flour mixture.
- Alternate with some milk and then more flour mixture.
- Continue to alternate until all mixture is combined.
- Transfer the mixture evenly to the prepared pans.
- In a bowl, beat the egg whites until foamy.
- Add 1/2 tsp of sugar to the egg whites.
- Beat the egg whites until soft peaks form.
- Spread the egg whites meringue over the batter in the prepared pans.
- Bake the cake for 12 to 15 minutes or until a toothpick inserted in the middle comes out clean.
- Allow to cool.
- In a large bowl, combine the heavy cream until soft peaks form.
- Add 1 tsp sugar to the heavy cream. Combine until stiff peaks form.
- In a bowl, combine the majority of the strawberries with 1/2 tsp sugar.
- Carefully remove one cake with the meringue up and place on the serving plate.
- Spread some of the sweetened strawberries over the cake.
- Add the whip cream and spread evenly over the top.
- Top with the second layer of cake with the meringue facing up.
- Spread some of the sweetened strawberries over top.
- Add the remaining whip cream and spread evenly on top.
- Top with strawberries.
Recipe adapted from Taste of Home.
One year ago.........................I made Kentucky Hot Brown.
Two years ago.......................I made Chicken Enchiladas.
Three years ago......................I made Guacamole.
Four years ago.......................I made Coconut Cream Cheese Cookies.
Did you already know......................
-The German word for cake is torte.
-A torte is a layer cake.
-A torte tends to have a filling layer of whip cream, jams, fruit, mousse, or buttercream.
-A torte is made with less flour than a traditional cake and is shorter in structure.
Warning: this dessert is rich! It is delicious and wonderful. Sometimes you just want chocolate. Maybe you want chocolate because it is tastes so good? Maybe you want chocolate because you gave your daughter lots of loving care since she had a cold in which she shared? Maybe after having a cold it is a celebration that you can actually taste again?
Chocolate Tart
Pastry Crust:
2 cups whole wheat white flour
3 Tbsp sugar
1/4 tsp salt
3/4 cups unsalted butter, cold and cut into small pieces
1 egg yolk
2 Tbsp ice water
1 egg white
Filling:
1 cup heavy cream
1/2 cup milk
10 oz. dark chocolate, chopped
2 Tbsp sugar
1/4 tsp salt
2 eggs
1 egg white
Directions:
Pastry:
- In a food processor, combine the flour, sugar, and salt.
- Add the butter and pulse about 20 times.
- In a small cup, mix the egg yolk with the ice water in a small bowl.
- Slowly, pour the egg yolk mixture into the flour mixture while pulsing.
- Pulse until the dough comes together.
- Form the dough into a disk and wrap in plastic wrap.
- Refrigerate 30 minutes.
- Roll out the dough into a 12 inch circle on a lightly floured surface.
- Place the dough into a 9 inch tart pan with a removable bottom.
- Press the dough evenly into the pan and into the scalloped edges.
- Cut off any excess dough hanging over the edge with a knife.
- Refrigerate the dough for 15 minutes.
- Preheat the oven to 350 degrees F.
- Place the tart pan onto a cookie sheet.
- Line the tart with aluminum foil and add pie weights/dried beans to keep the sides down.
- Bake for 30 minutes. Remove the foil and weights.
- Using a pastry brush, coat the crust with a beaten egg white.
- Return the tart to the oven and bake for 8 minutes until golden color.
- Set aside to cool.
Tart:
- Lower the heat to 325 degrees F.
- In a medium pan, heat the heavy cream and milk over medium low temperature.
- Heat until the cream comes to a slight simmer around the edges.
- Remove from the heat and stir in the chocolate.
- Stir the chocolate until smooth and melted.
- Stir in the sugar and salt until incorporated.
- In a small bowl, beat the eggs.
- Stir the eggs into the chocolate mixture.
- Pour the filling into the tart shell.
- Bake for 15 minute or until the filling is set and glossy.
- If any bubbles or cracks form, remove from the oven since it is beginning to over bake (like mine).
- Allow to cool before serving.
Recipe adapted from Tyler Florence.
One year ago.....................Provence Chicken.
Two years ago...................Lemon Bars.
Three years ago.................Roasted Hazelnut Ice Cream.
Four years ago..................Store Top Chili Mac.
Did you already know.............
-In the US, there are about 1 billion cases of the common cold each year.
-On average, a 70 year old person probably had over 200 colds in their life time.
-Most colds last about seven to ten days.
Since I am trying to use up the white flour in the house, I decided to make some bread. I rarely make a sponge when I'm making bread but it really isn't hard. It just takes a little more planning. It came out good. Plus anytime I make bread, my family thinks it is fancy. Soon, I will be making bread with whole wheat flour and I just hope it doesn't come out dense.
Ciabatta Bread
Sponge:
1 package of active dry yeast
pinch of sugar
2 Tbsp warm water (110 degrees F)
1/3 cup warm water (110 degrees F)
1 cup bread flour
Dough:
1 package of active dry yeast
2 Tbsp warm milk (110 degrees F)
2/3 cups warm water (110 degrees F)
1 Tbsp olive oil
2 cups bread flour
2 tsp salt
Directions:
- In a cup, combine the 2 Tbsp of warm water with 1 package of yeast with a pinch of sugar. Allow to rest for 5 minutes.
- In a large freezer bag, add the water with the yeast.
- Add the 1/3 cup warm water with 1 cup of bread flour to the freezer bag. Mix well for a couple of minutes.
- Seal the bag and allow to set in a cool place for 12 to 24 hours to form a sponge.
- In a large bowl, combine 1 package of yeast with the warm milk. Allow to rest for 5 minutes.
- Add the sponge mixture to the large bowl with the 2/3 cup water, olive oil, and 2 cups bread flour.
- Mix until just combined then add the salt.
- Mix for 8 minutes and the mixture is smooth and elastic.
- Place the dough into an oiled bowl and cover with plastic wrap. Allow to rest for about 90 minutes.
- Turn the dough onto a floured surface and divide into half.
- Place each half onto a parchment lined baking sheet and form into oval loaves.
- Dust the top of the loaves with flour and dimple the surface with fingertips.
- Cover loaves with a dampened kitchen towel and allow to rise for 90 minutes.
- Preheat oven to 425 with a baking stone in the oven.
- Transfer one loaf with the parchment paper onto the baking stone.
- Bake the loaves one at a time on the baking stone for 20 minutes or until pale golden.
- Allow to cool on a wire rack.
Recipe adapted from Allrecipe.
One year ago.....................................I made Blueberry Oatmeal.
Two years ago...................................I made Creamy Polenta.
Three years ago.................................I made Lemon Cookies.
Four years ago..................................I made Bruschetta.
Did you already know.....................
-Ciabatta bread originates from Italy.
-Ciabatta means slipper since the shape of the bread resembles a slipper.
-Since the bread is very porous, the bread is chewy and light.
 Did you already know..............