Saturday, June 16, 2012

Icebox Dessert

It is hard to buy my husband a gift early. He seems to always be home when it arrives. It is just my luck. Well, my husband loves coffee. He drinks it all the time. It doesn't affect his sleep at all. Now, I drink half decaf sometimes. If I drink any past noon, I will not be sleeping any time soon. Which could be why I tend to do my blog late at night. So the day my husband received his new coffee maker, he made two cups. The machine takes k-cups and he thinks it is the coolest thing. The next day he had four cups. I have a feeling he really likes it.
Now, I haven't been feeling the best so the kids have been helping me in the kitchen. This is the best dessert for kids to make for Dad on Father's Day. I only instructed. I did not make it. My daughter loves it so we have made it several times. The first time I heard about this dessert was on Smitten Kitchen's website but the recipe is also on the box of the chocolate wafer cookies. I will say the first food blog I ever checked out was her website. I still check it out.
Oh, this is going to be good!
Icebox Dessert
2 cups heavy cream
2 Tbsp fine sugar
1 (9 oz.) package chocolate wafer cookies
1 oz. semi sweet chocolate square 
  1. In a large bowl, beat the cream with the sugar until soft peaks form.
  2. Take one cookie and spread the whipped cream on both sides.
  3. Add a cookie to the whipped cream cookie and continue to add cookies to each end to form a long train. 
  4. Take the remaining whipped cream and frost the top and down the sides of the cookie train to cover.
  5. Grate the chocolate over the whipped cream.
  6. Cover the dessert and refrigerate for at least several hours or overnight.
Recipe adapted from Smitten Kitchen.
Singing is allowed during assembly
Did you already know...
-It is estimated to be over 70 million father's in the U.S.
-In 1909, Sonora Dodd conceived the idea Father's Day to honor her widowed father who raised his six children.
- In 1966, President Lyndon Johnson designated Father's Day to be the 3rd Sunday in June.
-June was the month Sonora Dodd's father was born.

Tuesday, June 12, 2012

Macaroni Grill Bread

Did you realize that Father's Day is this Sunday? Are you doing anything special with your Father? Do you take him golfing or fishing? Do you buy him a gift? I am unable to see my Dad this Sunday. It is so sad. It's sad because he has decided to visit England for the next two weeks with my oldest daughter. Instead, I will spend Father's Day with my husband and his Dad. It will be fun.
One of the things my husband likes is homemade bread. He tends to have his favorite but he is willing to try other ones. I made this copy cat recipe and he loved it. The best thing about this recipe would be it yields two loaves. We had half a loaf left the next day so my daughter made BLT sandwiches after toasting a few slices. I will say it was the best BLT sandwich I have ever had. I have eaten at Macaroni Grill but it has been awhile so I can not say if it taste like the restaurants but it is so good.
Macaroni Grill Rosemary Bread
1 1/2 Tbsp active dry yeast
1 Tbsp sugar
1 1/2 cups warm water
4 cups all purpose flour
1 tsp salt
3 Tbsp dried rosemary, chopped
2 Tbsp butter, melted
coarse salt for sprinkling on top

  1. Directions:
  2. Line a baking sheet with parchment paper.
  3. In a large cup, combine the yeast, sugar, and water. Allow the yeast to proof for five minutes.
  4. In a large bowl, combine the salt, 1 Tbsp rosemary, and 3 cups of flour.
  5. Add the yeast to the flour mixture and mix. 
  6. Slowly, add the remaining flour to the mixture until the dough is slightly tacky and holds it shape. The dough should be soft and smooth.
  7. Transfer the dough to a lightly greased bowl and cover with greased plastic wrap. Allow the dough to rise for about 1 to 2 hours or until the dough has doubled in size.
  8. Punch down the dough and divide in half.
  9. Shape the loaves into two smooth, ovals and place one on each end of the baking sheet.
  10. Brush on the melted butter on top of each loaf.
  11. Sprinkle the tops of the loaves with the remaining rosemary.
  12. cover the loaves with lightly greased plastic wrap and allow to double in size again about 1 hour.
  13. Preheat oven to 425 degrees F.
  14. Sprinkle each loaf with the coarse salt.
  15. Bake the loaves for 18 minutes or until browned. the loaves need to be baked through. 
  16. Transfer the loaves to a wire rack to cool.
Recipe adapted from Mel's Kitchen Cafe.
Did you already know...
-Romano's Macaroni Grill Restaurants were founded by Philip Romano.
-The first restaurant was opened in 1988 in Leon Springs, Texas.
-There are over 200 restaurants world wide.

Monday, June 11, 2012

Peanut Butter Florentines

Have you ever had florentine cookies? They are lacy and crisp. They are good. They are fickle when it comes to humidity. Why? The once crisp cookies becomes soft. It does affect the taste. They are still good soft or crisp. If your cookie becomes soft, they can be added to your yogurt parfait.
Or you can make an ice cream sandwich.
Or top a cupcake.
This weeks pick for The Project Pastry Queen was picked by Missy of Creative Missy. Please check out what the other members made this week. The original recipe called Ruby-Flecked Florentines since they are flecked with cranberries and raisins. I was in the mood for a plain, lacy cookie. They did come out good. Humidity made some of them droop but it was alright.

Peanut Butter Florentines
2 cups sliced blanched almonds
1/2 cup unsalted butter
1 cup sugar
1/2 cup agave syrup
3/4 cup all purpose flour
1/4 cup peanut butter

Directions:
  1. Preheat oven to 350 degrees F. 
  2. Line a baking sheet with parchment paper.
  3. Process only 1/2 cup of almonds in a blender or food processor until fine.
  4. In a medium saucepan, melt the butter over low heat.
  5. One at a time, add the sugar, agave syrup, flour, and peanut butter. Stir after each addition.
  6. Stir in the grounded almonds with the sliced almonds.
  7. Roll 1 Tbsp of the dough into balls. The dough will be sticky.
  8. Space the balls of dough about 3 inches apart on the baking sheets.
  9. Bake the cookies for about 10 minutes or until golden brown.
  10. Allow the cookies to cool on the baking sheet for 10 minutes before gently transferring them to a wire rack.
Recipe adapted from The Pastry Queen cookbook.
Where is my ice cream cookie? What my brother ate it?
Did you already know...
-Florentine cookies did not originate in Florence Italy.
-Dried fruit and zest are traditional additions to this cookie.
-The well wrapped cookies can be frozen up to a month.

Friday, June 8, 2012

2 graduations and a funeral

It has been a crazy week. Our oldest son graduated on Monday. Also, I attended a distant relative's funeral earlier this week. Now, today is my oldest daughter's graduation. Will I cry? I hope not. (My husband almost did at our son's graduation.) I know we will cheer! Will I rest? No, I will be preparing for the graduation party. Since I needed more time this week (as you probably can tell with my blog postings), I prepared some quick meals. We couldn't order pizza every night, could we?
I love pasta so I really liked this quick meal. The most important thing is the kids liked it. If you love pasta and need a quick meal, I would recommend this dish. If you have a favorite quick meal you love, please send it my way. Can you send me some time too?
Skillet Lasagna
1 lb. ground beef
1 small onion, chopped 
2 cloves garlic, minced
1/2 small green bell pepper, chopped fine
1 1/2 cups uncooked campanelle, mafalda, or broken lasagna noodles
1 1/4 cups water
1/8 tsp dried oregano
1/8 tsp dried basil
1/8 tsp dried parsley
1/8 tsp dried thyme
1 (14 0z.) tomato pasta sauce
1/2 cups mozzarella cheese, shredded 

Directions:
  1. In a large skillet, brown the ground beef over medium heat for about 5 minutes. Drain the fat from the skillet.
  2. Add the onion, garlic, and bell pepper to the ground bee. Cook for 2 minutes. 
  3. Add the uncooked noodles, water, oregano, basil, parsley, thyme, and tomato sauce to the hamburger. Heat to a boil.
  4. Reduce heat to low and allow to simmer for uncover for about 10 minutes or until the noodles are tender.
  5. Sprinkle the cheese on top and serve.
Recipe adapted from Betty Crocker website.
Did you already know..
-In 1321, the University of Coimbra in Portugal required its graduates to wear gowns.
-Before the 1920s, the graduation gowns were grey in the U.S.
-In the 1950s, the graduates were permitted to wear gowns of their school colors.

Congratulations to my daughter! I love you.

Monday, June 4, 2012

Homemade Mascarpone

Do you bookmark recipes you want to try? I have a long list of bookmarked recipes. When I saw this recipe, I knew I would try it but just didn't know when until I saw this recipe. It called for 1 1/2 lbs of mascarpone. I wasn't sure how close it would be to the mascarpone I purchase in the store. Mascarpone currently cost $4 for 8 oz. I calculated it is cheaper to purchase heavy cream and make it myself. I used Oakhurst fresh heavy cream since the heavy cream can not be ultra-pasteurized. This recipe makes 1 1/2 cups of mascarpone. 
I did purchase a container of mascarpone so I could compare. The homemade version was not as smooth as the commercial version. Both versions tasted the same. I didn't notice any other differences besides price. In the future, I will make homemade mascarpone since it is normally used in a dish. 
Homemade Mascarpone
2 cups fresh pasteurized heavy cream*
1 Tbsp freshly squeezed lemon juice (about 1/2 lemon)

Directions:
  1. Drape 4 layers of cheesecloth over a medium empty bowl. The cheesecloth needs to hang into the bowl only halfway. Secure the cheesecloth by a large rubber band.
  2. In a large pan, heat the heavy cream over medium heat stir occasionally so the bottom doesn't scorch.
  3. Continue to simmer the cream until a candy thermometer reads 190 degrees F. 
  4. Stir in the lemon juice and continue to heat the mixture at 190 degrees F for 5 minutes while stirring constantly.
  5. After 5 minutes, the cream should be thick enough to coat the back of a spoon.
  6. Remove the mixture from the heat and allow the cream to cool to room temperature for about 30 to 45 minutes. The mixture will appear to be a little thicker than the original heavy cream.
  7. Pour the cream mixture into the cheese cloth so it can drain into the bowl.
  8. Cover the cream mixture with plastic wrap and place in the refrigerator for 12 hours. 
  9. Carefully lift the mascarpone cheese with the cheesecloth. Discard the liquid left in the bowl. 
  10. Transfer the cheese from the cheesecloth to an airtight container.
  11. Store the cheese in the refrigerator and use within a week.
Recipe adapted from The Pastry Affair.
*My husband is a milkman so I used fresh heavy cream which are sold to restaurants and not available in stores.
Did you already know...
-Mascarpone is a soft Italian cream cheese.
-Mascarpone can be used in savory and sweet dishes like Tiramisu.
-Some substitutes are ricotta cheese, creme fraiche, sour cream with some cream cheese, and cream cheese with a little butter but the taste will be different.

Sunday, June 3, 2012

Savory Lobster and Shrimp Cheesecake

Since I am a Mainer, I had to make this dish with lobster. I really didn't have a choice, did I? When I was looking through The Pastry Queen cookbook, I made several suggestions to my husband. I mentioned how I would substitute the crab and he was all for it. I am really curious on what the other Project Pastry Queen members think of my pick this week. 
I will admit I didn't know how it would come out. My husband said that he liked it very much. He said it was close to a quiche. My oldest daughter said she could taste the cream cheese and could understand why it is called a cheesecake. Two of my children liked it. My youngest daughter didn't want to try it. She says she doesn't like lobster. I asked her if she knew she lived in Maine but it didn't influence her decision. I think maybe when her oldest brother tries it then she might. She tells me that there is no way that is happening. 
 If you like seafood and cream cheese, I would say this is a dish for you! Did I sell you on it? Were you convinced you should try it? I did like it but I need to warn you that it is very rich. It did take me about 90 minutes before the dish was done. I would recommend this dish as an appetizer so you can share.
Savory Lobster and Shrimp Cheesecake
Crust
60 saltine crackers
3/4 cups unsalted butter, melted
1 tsp freshly ground white pepper

Mascarpone Filling
1 lb uncooked shrimp, fresh (Defrost if using frozen)
1/2 tsp salt
1/2 tsp cayenne pepper
1 Tbsp unsalted butter
12 oz cream cheese, at room temperature
1 1/2 lb mascarpone cheese
5 large eggs
1/2 cup all purpose flour
1/2 lb lobster meat, cleaned and coarsely chopped 
3 green onion tops, thinly sliced

Directions:
To make the crust:
  1. Grease a 10 inch springform pan with cooking spray or a 9 x 13 inch baking pan. Set aside.
  2. In a food processor, place the crackers and pulse until fine. (The crackers can be crushed in a plastic bag by a rolling pin.)
  3. Add the melted butter and pulse until combined.
  4. Add the pepper and salt and pulse for 20 seconds.
  5. Press the mixture evenly into the pan.
To make the filling:
  1. Preheat the oven to 350 degrees F.
  2. Peel and devein the shrimp, if necessary.
  3. Rub the shrimp evenly with salt and cayenne.
  4. In a saute pan, heat the butter over medium heat.
  5. Add the shrimp to the pan and cook the shrimp for 1 to 3 minutes, until the shrimp curl and turn pink.
  6. Transfer the shrimp into a small bowl and refrigerate until needed.
  7. In a large bowl, beat the cream cheese until fluffy with a mixer.
  8. Add the mascarpone cheese and beat on medium speed for 1 minute only so the mixture doesn't curdle.
  9. Add the eggs, one at a time, beating about 30 seconds on medium-high heat after each addition.
  10. Add the flour and beat on medium speed for 1 minute. The mixture should be creamy.
  11. Coarsely chop the cooled shrimp before adding the shrimp to the mixture.
  12. Add the lobster and green onions.
  13. Fold the mixture until the seafood and green onions are incorporated.
  14. Spread the cheese mixture evenly over the saltine crust.
  15. Bake the cheesecake for 60 minutes (or 30 minutes if using a 9 x 13 pan) or until the mixture is brown on top and firm. It should not jiggle when nudged.
  16. Allow the cheese cake to cool for at least 60 minutes (30 minutes in a 9x 13 pan). 
  17. Serve in wedges or squares. The dish can be served warm or at room temperature. 
Recipe adapted from The Pastry Queen.
Since it is raining out, I had a helper today.
Did you already know....
-Live lobster should be cooked the day they are purchased.
-Lobsters need salt water so they should not be stored in tap water.
-Cooked lobster should be used within 3 days.
-Soft shelled lobster is sweeter and more tender than hard shelled lobsters.

I did use homemade mascarpone for 1 lb of this dish. I will be posting the recipe tomorrow.

Thursday, May 31, 2012

PB & J Bars

Peanut butter and  jelly bar time! A great treat to make for the last days of school. My son was a little disappointed since he couldn't bring any of this dessert to school for snack. He has a friend who is allergic to peanuts so my son understood why he can only eat this treat at home. (My son always brushes his teeth right before leaving for the bus just in case there were traces of peanuts in his breakfast.) My son tried to eat these bars for breakfast one morning but I vetoed that attempt. We have a rule no sweets before 10 am unless it is a special occasion. School days do not make it a special occasion. I will never know if you eat these before 10 am. I know my sister doesn't have that rule at her house but she thinks chocolate is a food group.
These bars are just as gooey as a peanut butter and jelly sandwich. My kids really liked this dessert but not as much as my husband. My husband highly recommends this recipe. These bars have already been requested for me to make them again. Next time, I think I will try grape jam instead.
PB & J Bars
1 stick of unsalted butter, room temperature
1 1/2 cups all purpose flour
3/4 cups sugar
1 egg
1 1/4 cups smooth peanut butter
3/4 tsp salt
1/2 tsp baking powder
1/2 tsp vanilla
3/4 cup strawberry jam

Directions:
  1. Preheat oven to 350 degrees F.
  2. Spray a 9 x 13 pan with cooking spray.
  3. In a large bowl, beat the butter and sugar until fluffy about 2 minutes.
  4. Add the eggs and peanut butter. Mix until combined.
  5. In a medium bowl, whisk together the flour, salt, and baking powder. 
  6. Add the flour mixture to the butter mixture. Beat until combined and then add the vanilla.
  7. Transfer two-thirds of the mixture to the 9 x 13 pan. Spread evenly across the bottom of the pan.
  8. Top the bottom layer of peanut-butter mixture with 3/4 cup of jam.
  9. Crumble the remaining peanut-butter mixture over the jam. 
  10. Spoon the remaining 1/4 cup of jam over the top of the bars.
  11. Bake the bars for 30 minutes and rotate the pan.
  12. Cook the bars for about 15 to 30 minutes. If the bars are becoming too dark then loosely cover the bars with foil.
  13. Allow the bars to cool and then run a knife around the edge before refrigerating for 1 hour. 
Recipe adapted from Martha Stewart's Cookies.
Did you already know... 
-In the U.S., over 3 million people have reported having an allergy to peanuts and other nuts.
-About 20 percentage of people with a peanut allergy may outgrow it.
-A peanut allergy can be fatal.
-Many schools have implemented a peanut free lunch table or classroom.

Tuesday, May 29, 2012

Feta Topped Chicken

Sometimes it is crazy here. Since I like for us to eat dinner as a family, sometimes I need to make something quick. I saw this chicken recipe and I thought maybe the cooking time was off. If the time was correct, then maybe the chicken would be dried out. I will say I liked how the chicken turned out.
The best thing about this recipe is how easy you can adapt it to your preferences. For an example, my husband does not like tomatoes. I topped his chicken with only the cheese. My oldest daughter likes olives so next time hers will be Greek style. My youngest children did not like the cheese but did like the tomato. I liked the original recipe. I prefer to buy the feta cheese in a block and then crumble it. If you need a quick recipe, this is the one I would recommend.
Feta Topped Chicken
4 chicken breast, boneless and skinless
2 Tbsp balsamic vinaigrette dressing
1/2 tsp oregano
1/2 tsp rosemary
1/4 tsp thyme
1/8 tsp pepper
1 large roma tomato, cut into 8 slices
1/4 cup feta cheese, crumbled

Directions:
  1. Preheat oven to broil.
  2. Slice your chicken breast in half like butterfly style.
  3. Brush each side of the chicken breasts with the balsamic vinaigrette.
  4. Sprinkle the chicken with the oregano, rosemary, thyme, and pepper.
  5. Place the chicken in an oven proof dish. (I used a Pyrex casserole dish.)
  6. Broil the chicken about 4 inches from the top of the oven for 5 minutes.
  7. Turn the chicken over and allow the chicken to cook for 5 more minutes.
  8. Remove the chicken from the oven and top each piece of chicken with a tomato slice.
  9. Sprinkle some feta cheese on each piece of chicken.
  10. Broil the chicken for another 3 minutes or until the center of  the chicken internal temperature reaches 170 degrees F.
Recipe adapted from Betty Crocker website.
Did you already know...
-Feta is a brined cheese normally made from sheep or goat's milk.
-The word feta means slice in Greek.
-It is believed the cyclopes in Homer’s Odyssey made feta cheese in his cave.

Monday, May 28, 2012

Mahogany Cake

Have you ever watched the Food Network Challenge cakes? After the contestants complete these elaborate cakes, they have to move it to the judging table. They have to be so careful not to break their creation. I would have failed the contest. When I made this cake, it came out perfect. Then I decided to move the cake to the cake stand. It cracked. I tried to fill in the crack with additional icing but it didn't disguise it. This Project Pastry Queen recipe was picked by Amanda of Homekeeping Adventures. Please check out the other members posting of the recipe at The Project Pastry Queen and for the icing recipe.
 The cake is really good. My oldest daughter said it tastes similar to the KFC chocolate cake. I did not add any espresso. My children are crazy already! I just added chocolate chips.
Cracked in transport
Cake
1 cup unsalted butter, room temperature
1 1/2 cups sugar
3 eggs
1/2 cup boiling water
1/2 cup unsweetened cocoa powder
1 cup sour cream
1 1/2 tsp vanilla extract
2 cups sifted cake flour
1 tsp baking powder
1/3 tsp baking soda
1/2 tsp salt
4 oz. chocolate chips

Directions: 
  1. Preheat oven to 350 degrees F.
  2. Grease the Bundt pan with cooking spray.
  3. Dust with cocoa powder and tap the excess powder from the pan.
  4. Cream the butter and sugar in a large bowl for about 2 minutes or fluffy.
  5. Add the eggs one at a time and beat for 20 seconds after adding each egg.
  6. In a medium bowl, combine the boiling water with the cocoa powder. Stir until smooth.
  7. Stir in the sour cream and vanilla.
  8. In another medium bowl, combine the flour with the baking powder, baking soda, and salt.
  9. Alternating, add the flour mixture and cocoa powder to the butter mixture. Beat until incorporated.
  10. Fold in the chocolate chips.
  11. Spoon the batter into the Bundt pan.
  12. Bake for 40 to 45 minutes or until a toothpick inserted in the middle comes out clean.
  13. Allow the cake to cool for 5 minutes and invert onto a rack.
  14. Allow the cake to cool for 20 minutes before icing.
Recipe adapted from The Pastry Queen cookbook.
Did you already know...
-The Food Network Challenge cakes is a show about professional chefs competing for a $10,000 prize in front of a live audience.
-The contestants are assigned different themes they have to compete within 8 hours.
-The cakes have a minimum height requirement.

Friday, May 25, 2012

Stuffed Burgers

Now I wanted to post an inside out burger. I wanted to show you photos of what a burger looks like with the cheese and bacon stuffed in the middle of the burger. Since my goal was not to scare you, I decided not to show you a photo of it. It isn't Halloween yet.
When I make inside out burgers, it is normally just cheese but my oldest daughter talked me into added bacon. When I am forming the patty, I add cheese or bacon to the center of the meat. Then I just cook the burger. When you take a bite, you have the wonder melted cheese in the middle. Also, I top the burger with cheese since I do not ever have the cheese overload syndrome. My husband does and that is why we can't order pizza with extra cheese.
Magic sauce
1 cup mayonnaise
1/4 cup ketchup
1 tsp Dijon mustard
2 Tbsp pickles, diced finely
1/4 tsp garlic powder
pinch of salt

Directions:
  1. In a bowl, combine all the ingredients and mix well.
  2. Adjust seasonings as necessary.
Recipe adapted from the Sandwich King.
Did you already know...
-In 1967, the Big Mac was sold at McDonald's in Uniontown, PA.
-The first Big Mac was sold for 45 cents.
-Not only did Jim Delligatti invent the Big Mac, he also help found the Ronald McDonald house charities.

Thursday, May 24, 2012

Pickles

I think I just might be doing a decent job in raising my son. He recently said to me that he was going to take over the world. I looked at him strangely. So, he replied, "I already know your answer-no."
My son loves pickles. If we are eating out, he will kindly offer to eat everyone's pickles. So, I figured I would try this recipe since it was a quick pickle. My son says these are not pickles but spicy cucumbers. I do not like cucumbers but I liked these "pickles". Now, I will admit I was hesitant to purchase dill. Once, I attempted to grow a garden outside my kitchen window. The only thing that grew was dill. I could smell dill all summer long. I was brave and decided I would go ahead and do it. I know I will never grow dill again. Why couldn't it have been lilacs? Why?
Pickles
2 cups champagne vinegar
1/2 cup water
1/4 cup sugar
1 Tbsp ground mustard
1 Tbsp salt
3 cloves garlic, lightly smashed
1 bay leaf
1 English cucumber, cut into 1/8 inch slices
1 Tbsp fresh dill, chopped

Directions:
  1. In a saucepan, add the vinegar, water, sugar, mustard, salt, garlic, and bay leaf.
  2. Bring the mixture to a simmer until the sugar dissolves. 
  3. Add the cucumbers and dill to a heat proof container like a Mason jar.
  4. Pour the hot pickling liquid into the container.
  5. Allow the pickles to sit at least 1 hour or overnight.
Recipe adapted from Sandwich King.
Did you already know...
-Pickles were on Christopher Columbus's ships to help prevent scurvy.
-This week is International Pickle Week.
-Americans prefer dill pickles over sweet.

How about you? Do you like sweet or dill better?

Tuesday, May 22, 2012

Olive Garden Salad

If you ask my youngest daughter what her favorite restaurant is, she will reply the Olive Garden. Sometimes when I make an Italian meal, she will pretend to be the waitress. I will tell her the menu and she will take everyone's order. She even carries around a pen and paper. The only person to give her a hard time is my husband. He will tell her he doesn't want what is on the menu and ask for crazy items. She will inform him that she is going to go talk to the chef about this. At first, he will reply that he doesn't care. When she starts to walk away, he calls her back and tells her he is afraid of the chef. 
 I have made this salad dressing a lot of times. It is suppose to be a copy cat recipe for the Olive Garden Salad dressing. I think it actually taste better and my family likes it a lot. When I first made this recipe, I misread the amount for the parsley. It should have been 1/2 tsp but I added a lot more. I like the looks of the dressing with the additional parsley so I have kept it.
Copy Cat Olive Garden Salad Dressing
3/4 cup mayonnaise
1/3 cup white vinegar
1 tsp vegetable oil
2 Tbsp agave syrup
4 Tbsp Parmesan cheese
1 clove garlic, minced
1/2 tsp Italian seasoning

1/4 cup parsley flakes
1 Tbsp lemon juice

1/4 tsp of salt
pinch of pepper

Directions:
  1. Add all the ingredients in a bowl or a mason jar.
  2. Mix the ingredients well until all incorporated.
  3. Serve the dressing over salad.
Recipe adapted from Jamie Cooks It Up!.

Our salad included Romaine lettuce, cup of baby spinach leaves, plum tomatoes, croutons, and mushrooms.
Did you already know...
-Parsley belongs to the same family as dill, celery, and carrots.
-Italian parsley is flat leaf parsley.
-Parsley is rich in Vitamin A, C, and K.
-Parsley is a natural breath freshener.

Monday, May 21, 2012

Baguette Bread

Oh, I love baguette bread. Since I made lasagna this weekend, I figured I would make up some bread to go with it. I actually made the dough the night before and refrigerated it until I was ready for the second rise.
The crust was crisp with a soft inside. This bread accompanied the lasagna nicely. The left over bread we placed in the freezer to make some croutons at another date. Next time, I'm going to knead some herbs into the dough before baking.
The Almost No Knead Baguette
3 cups lukewarm water
5 cups all purpose flour
3 cups white whole wheat flour
1 Tbsp salt
1 Tbsp instant yeast

Directions:
  1. Spray a large bowl with cooking spray and set aside.
  2. In another large bowl, add the water and yeast. Allow to rest for 5 minutes to make sure the yeast proofs.
  3. Add the flour and salt to the yeast water and stir to combine. 
  4. Mix the dough until no dry spots remain and the dough is fairly soft.
  5. Knead the dough by hand for a few minutes. The dough will be sticky.
  6. Add the dough to the greased large bowl and flip.
  7. Cover with plastic wrap and refrigerate overnight.
  8. Divide the dough in half and shape into a slightly flatten oval. 
  9. Fold the dough lengthwise in half. 
  10. Seal the edges of the dough with the heel of your hand.
  11. Flatten the dough slightly and fold in half lengthwise. Seal the dough with the heel of your hand.
  12. With the seam side down, gently roll the dough into desired size.
  13. Place the dough seam down on a lightly greased of a baking sheet or a baguette pan.
  14. Roll out the other half of the dough.
  15. Cover the dough and allow the dough to rise for about 1 1/2 hours.
  16. When ready to bake, heat the oven to 450 degrees F.
  17. Slash three or four times onto the baguette diagonal.
  18. Spritz the dough with warm water and bake for about 25 minutes or deep golden brown. 
  19. Remove the bread from the oven and allow to cool.
Recipe adapted from King Arthur website.
Did you know...
-The bakers of Vienna invented the steam ovens and were the first to begin to bake hard crusty breads.
-In France around 1920, a law went into affect that did not allow bakers to begin work before 4 am. The bakers needed a bread for their customers. Since the baguette baked faster, the baguette bread became popular with bakeries.

Sunday, May 20, 2012

Texas Pralines

When I tasted these candies, I knew I've had them before. They were creamy and delicious. This recipe was picked by Shawnda from Confections of a foodie bride for The Project Pastry Queen. I will say I love The Pastry Queen Cookbook but the cookbook doesn't always have pictures. My oldest daughter helped me drop the candy onto the waxed paper. I said to her, "Do you think this is how they are suppose to look?" She wasn't sure so I went and goggled images of Pralines. I had done it correctly and then I saw some chocolate covered Pralines. I took a few of the candies when they had cooled slightly and formed them into squares. Then I just dipped them into melted chocolate. These candies are great without the chocolate but the chocolate make them oh so much better.
 I have been giving these candies away to anyone who has been over to visit. My Dad just stopped by and I offered him one. After some, coaxing he said he would try one but only one. I saw him take two more. I offered him one of the chocolate covered ones and he preferred them without the chocolate. My husband who is not a fan of nuts liked them a lot. The majority liked them with the chocolate. Besides adding chocolate to a few of the candies, I substituted the corn syrup with agave syrup. (My grocery store sells agave syrup in the baking aisle. I purchased my pecans from the whole food bins in the grocery store since it is cheaper then purchasing them in the prepackaged bags.)
Texas Pralines
1 cup buttermilk
1 tsp baking soda
3 cups sugar
2 Tbsp agave syrup
1/4 cup unsalted butter
2 Tbsp vanilla extract
 2 1/2 cups whole pecans, toasted
(chocolate, melted if desired)

Directions:
  1. In a 4 quart pot, combine the buttermilk, baking soda, sugar, agave syrup, and butter.
  2. Cook slowly over medium heat. Stir occasionally.
  3. Cook until the mixture reaches between 234 and 240 degrees F.
  4. Remove the pot from the heat.
  5. Add the vanilla and pecans.
  6. Using a mixer, beat the candy for about 3 minutes or until the candy starts to lose its shine and starts to become creamy.
  7. Drop the candy by the tablespoon onto wax paper.
  8. Allow the candies to cool thoroughly before wrapping them individually in plastic wrap or dipping in chocolate.
Recipe adapted from The Pastry Queen.
 Did you already know...
- French Pralines have almonds in them.
-The French settles in Louisiana substituted the almonds with pecans.
-The American Pralines are softer than the European versions.

Friday, May 18, 2012

Taco Seasoning

Do you prefer crunchy tacos or soft tacos? Growing up, we had tacos often. My parents always bought the crunchy shells. Since my husband does not like the crunchy shells, I normally serve soft tacos. The kids just love tacos and they don't care if their shells are crunchy or soft. The best thing about tacos is my oldest daughter will volunteer to make them. It is a food we do not order out but make at home often. (Pizza however is a different story.)
I use to buy the taco seasoning and use half. The packet seemed high in sodium. I have purchased the lower sodium packets and they taste fine. Then last year I saw a blog about making your own taco seasoning. I thought it was the coolest idea and have not purchased the packets again. I make up a batch of the homemade seasoning and store it in my spice cabinet. I prefer the taste and none of the kids have made any comment about noticing a difference. I guess tacos are tacos. It is also a great way to use your spices. I did change it a little since I prefer chili powder to cumin but adapt it to your taste.
Taco Seasoning
5 Tbsp. chili powder
3 Tbsp. paprika
2 Tbsp. ground cumin
1 Tbsp. onion powder
1 Tbsp garlic powder
1/2 tsp cayenne pepper

1/8 tsp ground pepper

Directions:
  1. Mix the spices together and store in an air tight container until ready to use.
  2. When ready to use, brown the hamburger or chicken.
  3. Add 3 Tbsp of taco seasoning with 1 cup of water.
  4. Allow the meat to simmer for about 10 minutes.
  5. Add salt and pepper to taste.
  6. Serve with soft or crunchy shells.
Recipe adapted from Annie's Eats and Use Real Butter.

Did you already know...
-Taco Bell is named after the founder Glen Bell.
-In 1962, Mr. Bell opened the first Taco Bell in Downey, California.
-In 1978, Pepsi purchased Taco Bell.

Tuesday, May 15, 2012

Lemon Tassies

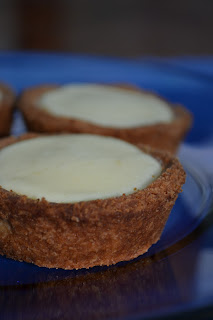
I hope everyone had a nice weekend. We saw my husband's Mom and my Mom this past weekend. We are fortunate because we do see both Moms frequently. I wanted to make my Mom and my husband's Mom a special treat. I knew they liked lemon desserts so I decided to make Lemon Tassies cookies.
Sometimes when I make a lemon dessert, they are too sweet or too sour. I think these were the right combination. The other nice thing about these cookies are they transport easily. I even stacked them and it didn't affect the filling. Next time, I may use the left over egg whites to make meringue to top the cookies. This recipe will make about 12 medium size cookies or 24 mini cookies. I actually made 18 cookies.
Lemon Tassies
Crust:
2 cups all purpose flour
10 Tbsp cold unsalted butter, cut into cubes
1/4 cup and 2 Tbsp sugar
2 egg yolks
1/2 tsp vanilla extract
2 tsp lemon zest, finely grated
1/2 tsp salt
cooking spray
Filling (recipe below)

Directions:
  1. Preheat oven to 350 degrees F.
  2. Coat 1 muffin tins with cooking spray.
  3. In a food processor, process the flour and butter until fine crumbs.
  4. Add the sugar, egg yolks, vanilla, lemon zest, and salt.
  5. Process until just combined and sandy in texture. Do not over process.
  6. With the dough, form 12 balls.
  7. Place each ball into the muffin tin and press the dough into the tin to make a cup.
  8. Bake the crusts for about 8 minutes and then rotate the pan.
  9. Bake the crust for another 8 minutes or until lightly browned all over.
  10. Remove the crusts from the muffin tins and allow to cool onto a wire rack.
Filling:
8 oz. cream cheese, room temperature
1/2 cup sugar
1 egg
3 Tbsp lemon zest, finely grated
1 Tbsp fresh lemon juice
1/2 tsp vanilla extract

Directions:
  1. Beat the cream cheese, sugar, egg, lemon zest, lemon juice, and vanilla extract together until smooth.
  2. Fill each cooled crust with the cream cheese filling.
  3. Place the cookies onto a cookie sheet.
  4. Bake the cookies for 6 minutes and rotate the pan.
  5. Bake the cookies for another 6 minutes or until the edges of the filling begin to color.
  6. Transfer the cookies onto a wire rack to cool completely.
Recipe adapted from Martha Stewart's Cookies.
Did you already know....
-Tassies are little cups with a filling.
-Tassies should be bite size.
-Other fillings for a tassie are pecan, peanut butter, caramel, etc.