Monday, March 17, 2014

Green Velvet Cake

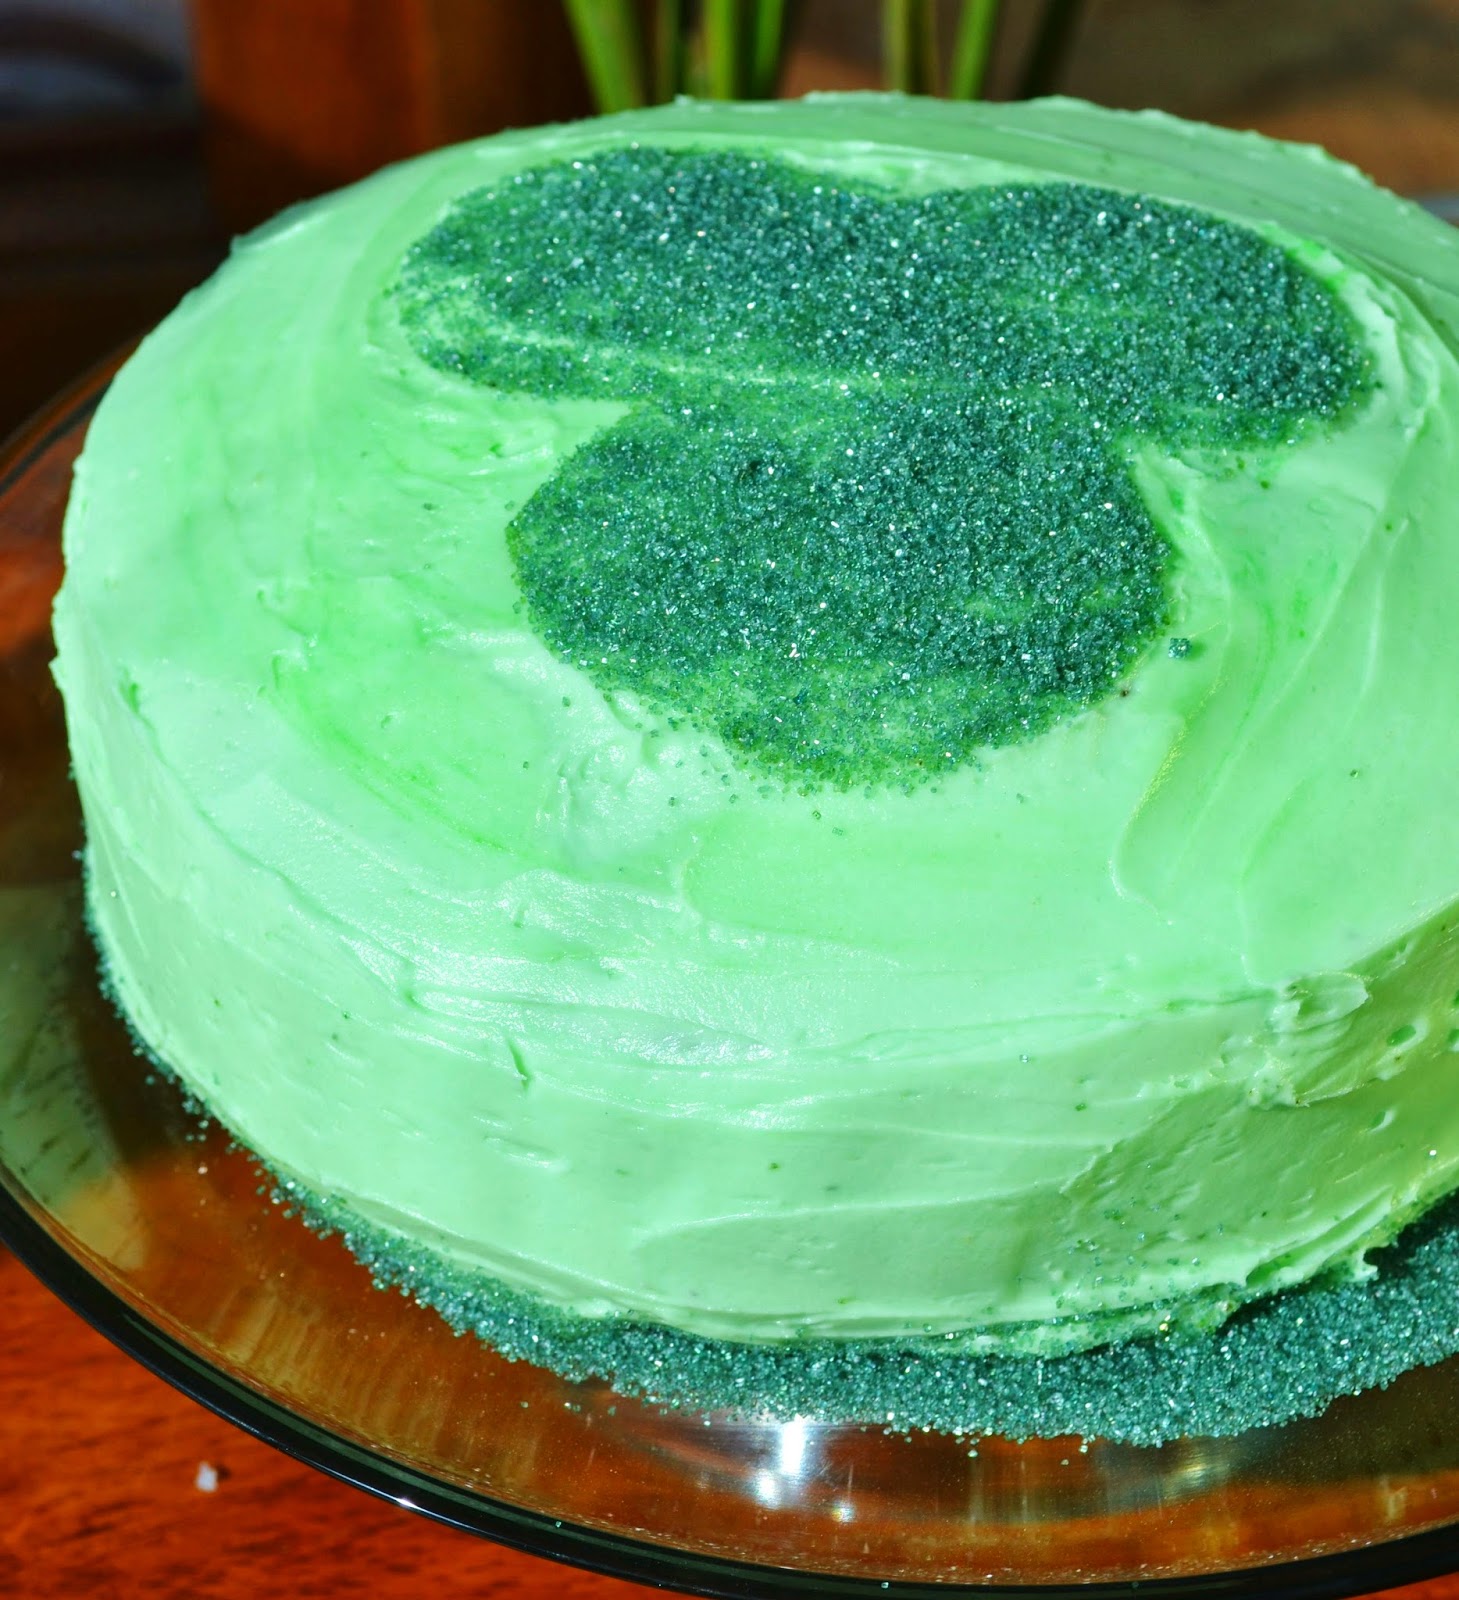
Happy Saint Patrick's Day! Are you wearing green? Are you having a special Irish or Irish/American meal today? Maybe corn beef and cabbage? My husband did not have corn beef and cabbage on Saint Patrick's Day as a kid even though he grew up in an Irish household. Since I grew up eating it, we have it around Saint Patrick's Day. When I suggested making a green velvet cake too, my husband thought it was a great idea. This recipe was the cake my Nana would make. I know this recipe is over thirty years old. I did adapt it a little by replacing some of the shortening with butter plus I made it green instead of red. I'm going to provide the original recipe that I received. My sister wants this cake for her birthday but only blue.
Green Velvet Cake
4 oz. food coloring
2 1/2 Tbsp. cocoa
1/2 cup shortening
1 1/2 cup sugar
2 eggs 
1 cup buttermilk
2 1/2 cup all purpose flour, shifted
1/2 tsp salt
1 Tbsp. vanilla extract
1 Tbsp. distilled vinegar
1 tsp baking soda

Directions:
Preheat the oven to 350 degrees F.
Line two 8 inch cake pans with parchment paper and then coat with nonstick cooking spray. Set aside.
In a small bowl, combine the food coloring and with the coca powder. Set aside.
In a large bowl, cream the shortening, sugar, and eggs.
Add the food coloring and cocoa mixture. Mix.
In a small bowl, combine the shifted flour with the salt. Set aside.
Add some of the buttermilk while alternating with the flour mixture.
In a small bowl, combine the vanilla, vinegar, and baking soda.
Fold the vanilla mixture into the cake mixture.
Pour the cake batter evenly between the two cake pans.
Bake the cake for 35 minutes.
Allow to cool for 5 minutes in the pan before removing the cakes onto a wire rack to cool.
Recipe from my Nana.

One year ago, I made..................................Creamed Spinach.
Two years ago, I made...............................Brownies
Did you already know..............................
-In 1762, New York City hosted the first Saint Patrick's Day parade.
-Due to pork being expensive, the Irish immigrants adapted their Irish bacon for an affordable corn beef since it was cured and cooked the same way.
-There are over 34 million Americans that claim Irish ancestry.
Happy Saint Patrick's Day!

Friday, March 14, 2014

Mint Chocolate Pudding

How many of you grew up on instant pudding? I'm raising my hand too! I still buy it but I no longer have to make it since the kids willingly make it. The first time I had homemade pudding there was a fine film on top. I thought it was the grosses thing. Pudding should be silky like the ones you buy in the stores. There is no film. So, I normally will cover my homemade pudding with the plastic touching the top to prevent the film from forming. I've made this pudding recipe before and it is wonderful. It is a nice indulgent without being pretentious. Since this time of year, I think of green and mint. I noticed I tend to always making something with mint around this time of year. So, I had to make my pudding with a faint hint of mint since my husband has asked for me to tone the mint flavor down a little. Lately, I guess I have been going a little over board.
Mint Chocolate Pudding
1/2 cup sugar
1/4 cup cornstarch
2 Tbsp unsweetened cocoa powder
1/8 tsp salt
3 cups whole milk
3/4 cups semi sweet chocolate chips
1/4 tsp mint extract
1/2 tsp vanilla extract

Directions:
  1. In a medium saucepan, whisk the sugar, cornstarch, cocoa powder, and salt.
  2. Slowly, whisk in the milk until smooth.
  3. Heat the mixture over medium heat for about 15 minutes or until the mixture begins to thicken. Lower heat if the mixture begins to bubble.
  4. Once the mixture begins to thicken, stir in the chocolate chips.
  5. Lower the heat and allow the chocolate chips to melt for about 2 minutes.
  6. Remove from heat.
  7. Stir in the mint and vanilla extract.
  8. Spoon the pudding into individuals cups or a large bowl and store in the refrigerator for 2 hours. 
Recipe adapted from Smitten Kitchen.

One year ago........................I made Mint cheesecake pie.
Two years ago......................I made Irish Mint Chocolate Ice Cream.
Did you already know..........
-Pudding has been around since ancient times but tended to be made with sausage.
-In the 17th century, English would boil their savory and sweet puddings in a bag.
-With the use of custard powder and cornstarch, instant puddings could be made.

Wednesday, March 12, 2014

Creamed Spinach Soup

My daughter keeps asking me to make creamed spinach. First, she asked for creamed spinach soup. She even found a recipe I should try making. Then she asked for creamed spinach like I did last year. My husband thought she was crazy. To ask to eat something green is a sign of craziness. To please my daughter, I made creamed spinach soup. I really liked it. My son loved it. My husband thinks the craziness must have been inherited from the children's maternal side.
Creamed Spinach Soup
1 lb. fresh spinach
4 cups chicken broth
1 scallion, minced
1 Tbsp butter
1 Tbsp olive oil
2 Tbsp flour
4 oz. cream cheese, softened
2 cups half and half
salt and pepper to taste

Directions:
  1. In a large pot, place the spinach, chicken broth, and scallion. 
  2. Bring the spinach to a boil over medium high heat.
  3. Reduce the heat to medium low.
  4. In a small saucepan, melt the butter in the olive oil over medium heat.
  5. Whisk in the flour until smooth. Cook for 1 minute.
  6. Add the cream cheese and whisk. Cook for 1 minute.
  7. Stir in the half and half. Mix until incorporated.
  8. Add the cream cheese mixture to the spinach pot.
  9. Stir and allow to simmer for 10 minutes.
  10. Season to taste with salt and pepper. 
Recipe inspired by Allrecipes.

One year ago...........................I made Lasagna French Bread Pizza.
Two years ago.........................I made Bourbon Cookies.
Did you already know...........
-Spinach originated from the Middle East.
-Spinach was the first commercial sold frozen vegetable.
-In 1929, spinach became very popular to kids with the debut of Popeye.

Monday, March 10, 2014

Mint Flourless Brownies

For my son's birthday, my son wanted brownies instead of cake. As you can tell on this blog, I don't make a lot of homemade brownies. I looked through different recipes and decided to make this one. There is a taste scale I use to find out if my husband liked them. First, I ask if he liked them. If he says yes, he then tells me how many of them he ate. My husband said he ate three of them. He would have eaten more if I had omitted the mint. Three bars translated the brownies are good.
Mint Flourless Chocolate Brownies
2 cups mini semi sweet chocolate chips
3/4 cup butter, cut into cubes
3 Tbsp water
3/4 cup sugar
3 large eggs
1 tsp vanilla extract
1/4 cup heavy cream 
1/2 cup Andes mints, chopped

Directions:
  1. Preheat oven to 300 degrees F.
  2. Line a 9x9 baking dish with parchment paper. 
  3. Spray the dish with nonstick cooking spray.
  4. In a medium saucepan, melt the semi sweet chocolate chips, butter, water, and 1/2 cup sugar over medium heat. Stir constantly until the chocolate has melted. 
  5. Remove from heat and set aside.
  6. In a medium bowl, whisk together the eggs and 1/4 cup sugar until thick.
  7. Stir in the vanilla extract.
  8. Fold half of the egg mixture into the chocolate mixture until incorporated.
  9. Fold in the remaining egg mixture until thoroughly incorporated.
  10. Pour the batter into the baking dish.
  11. Bake for 35 minutes or until the center has risen and the edges have become firm. 
  12. Allow the brownie to cool completely on a wire rack.
  13. Cover the brownies and refrigerate for 4 hours.
  14. In a small microwave safe bowl, heat the heavy cream for 30 seconds.
  15. Add the Andes mints to the heavy cream. Let stand for 2 minutes or until the chocolate has melted.
  16. Spread the melted mint ganache over the chilled brownies.
  17. Refrigerate for 30 minutes before removing from the baking dish.
Recipe adapted from Toll House Nestle Cookies Cookbook. 

One year ago...........................I made Lasagna Roll Ups.
Two years ago.........................I made Fried Meatball Sandwich


Did you already know.............
-There are over 30 varieties of mint.
-Mint is named after the Greek river nymph Minthe. 
-Minthe was turned into a plant by Hades jealous wife.

Friday, March 7, 2014

Chicken Pot Pie

My Mom use to make chicken pot pie often. My sister makes it for supper for her girls a lot. I'm unsure why I don't. It could be my husbands adverse fear of peas. We once had a family member make it for us and she had omitted the peas. I figured I would do the same and make my husband happy. However, I figured I would do most of the prep the day before to make it easy on me. The day before I made this chicken for supper. Since I normally roast vegetables with the chicken, I went ahead and used the same type of vegetables. I just chopped additional vegetables in preparation of making this dish. I also made the pie crust and stored it in the refrigerator. The chicken had lots of flavor which added a nice touch to the dish. My husband loved this dish. The pie crust had flavor. The kids ate it up. Anytime I have leftover chicken/turkey, I may just be making this dish again.
Chicken Pot Pie
3 celery stalks, finely diced
3 medium carrots, peeled and finely diced
1 large yellow onion, finely diced
2 Tbsp olive oil
2 Tbsp butter
2 cups cooked chicken, chopped into bite sized pieces
1/2 cup all purpose flour
2 cups chicken broth
1 cup milk
2 tsp ground thyme
1 tsp salt
1/2 tsp pepper
1 (8") pie crust


Directions:
  1. Preheat oven to 400 degrees F.
  2. In a large pot, melt the butter in the olive oil over medium heat.
  3. Add the onion, carrots, and celery. Saute for 2 minutes.
  4. Stir in the chicken.
  5. Sprinkle the flour over the chicken and vegetables. Gently, mix to combine.
  6. Add the chicken broth and stir.
  7. Add the milk and stir. Cook for 5 minutes.
  8. Season with thyme, salt, and pepper. 
  9. Pour the mixture into a deep dish pie pan or casserole dish.
  10. Roll out the pie crust so it will be slightly larger than the casserole dish.
  11. Place the pie crust over the chicken mixture. Cut slits on top of the pie crust.
  12. Bake the pot pie for 30 minutes or until golden brown.
  13. Allow the pot pie to cool for 10 minutes before serving.
Recipe adapted from The Pioneer Woman Cooks Cookbook.

One year ago..............................I made PB Nutella Oatmeal.
Two years ago............................I made Agent P Sandwich.
Did you already know..................
-Chicken pot pie consists of chicken, gravy, and vegetables.
-Meat pies have been around since Roman times.
-Early pot pies were cooked on open hearths. 

Wednesday, March 5, 2014

Blueberry and lemon Breakfast Rolls

I heard a bird singing the other day so I'm sure spring will arrive soon. I am very hopefully even if the ground is still buried with lots of snow. I even warned the kids that they had better enjoy the snow because soon it will be mud season. Yes, we have mud season here in Maine. It is what happens when the snow disappears. In anticipation for the arrival of Spring, I made blueberry and lemon cinnamon rolls. They came out pretty good. My daughter loved them. My son really loved the icing. 
Blueberry and Lemon Breakfast Rolls
Rolls
2 medium russet potatoes, peeled and cubed
3 (1/4 oz.) packages of instant yeast
3/4 cup sugar
1 cup unsalted butter, melted
3 eggs
2 tsp salt
5 cups all purpose flour
4 cups bread flour

Filling
3 cups frozen blueberries
3 cups sugar
2 Tbsp lemon zest
1/4 cup all purpose flour
1 cup unsalted butter, melted

Icing
2 1/2 cups powdered sugar
1/4 cup lemon juice
1 tsp lemon zest

Directions:
Rolls:
  1. In a large pot, boil the potatoes in water until tender about 10 minutes.
  2. Remove 3 cups of the potato water and set aside.
  3. Drain the potatoes and mash. Place in a large bowl and set aside.
  4. Allow the potato water to cool to 110 degrees F.
  5. Add the yeast and 1 tsp of sugar to the cooled potato water. 
  6. Allow the yeast to sit for 5 minutes to proof.
  7. Add the yeast to the large bowl with the potatoes.
  8. Add 3/4 cup sugar, the melted butter, eggs, and salt. Whisk the mixture together.
  9. Add 3 cups of all purpose flour to the potato bowl and stir until incorporated.
  10. Add 4 cups of the bread flour and mix until incorporated. 
  11. Add the remaining all purpose flour and mix until the dough is no longer very sticky. (More flour may be needed.)
  12. Cover with greased plastic wrap and leave in a warm place until the dough doubles in size about 1 hour.
  13. Punch down the dough and recover. 
  14. Place in the refrigerator overnight.
To make the filling:
  1. In a medium bowl, gently combine the blueberries with the sugar, lemon zest, and flour. Set aside. 
  2. Grease 2 9x13 inch disposable pans with butter and nonstick cooking spray. Set aside. 
  3. Remove half of the dough from the bowl and place onto a floured surface.
  4. Roll the dough into 1/4 inch thick rectangle.
  5. Spread the melted butter over the dough.
  6. Sprinkle the blueberry filling over the top of the dough.
  7. Starting on 1 of the long side of the dough, carefully roll the dough tightly to the other side to form one long cylinder.
  8. With a sharp serrated knife, cut the roll into 2 inch slices.
  9. Place the slices with the cut side down into the greased pan. Leave about an inch apart between each slice. 
  10. Allow the rolls to rise for an hour in a warm place until puffy.
  11. Preheat oven to 375 degrees F.
  12. bake the rolls for 20 minutes or until light brown.
  13. Remove the rolls from the oven. Set aside.
To make the icing:
  1. In a small bowl, combine the powdered sugar, lemon juice, and lemon zest. 
  2. Spread the icing on top of the rolls while warm.
  3. Serve immediately or once cooled. 
Recipe adapted from The Pastry Queen Cookbook.

One year ago..............................I made Chicken Cutlets.
Two years ago............................I made Tiramisu.
Did you already know..................
-The Spring Equinox is also called the Vernal Equinox.
-At Spring, the Earth's axis is tilted towards the sun.
-The Number of hours of light and darkness occurs before the Spring Equinox.

Monday, March 3, 2014

Jambalaya

I know I live in Maine and there is an abundant of seafood but I normally don't serve it in meals. My husband and son love seafood. If we are eating at a restaurant and there is fried Maine shrimp, my husband will order it every time. He says Maine shrimp is more tender. We even have clam and lobster festivals in Maine. So, I figured I would make some jambalaya with Maine shrimp. I was surprised we had a hard time finding my husband's desired shrimp so I cheated and went with cocktail shrimp. I really liked this dish since it is a one pot meal with heat. It was very popular at my house.
Jambalaya
1 tbsp olive oil
1 large onion, chopped
3 cloves of garlic, minced
1 large green bell pepper, chopped
3 celery stalks, diced
8 oz. sausage, cut into cubes
5 oz. chicken breast, cut into bite sizes
2 bay leaves
2 tsp cayenne pepper
1 (28 oz.) diced tomatoes
2 (8 oz.) tomato sauce
1 cup water
3/4 cup rice, uncooked
1 cup cooked small shrimp
salt and pepper to taste

Directions:
  1. In a large pot, heat the olive oil over medium heat.
  2. Add the onion, garlic, bell pepper, and celery. Saute for 5 minutes.
  3. Add the sausage, chicken, bay leaves, and cayenne pepper. Cook for 5 minutes while stirring often.
  4. Stir in the diced tomatoes, tomato sauce, and water.
  5. Allow to simmer for 5 minutes.
  6. Stir in the rice. Allow to boil.
  7. Lower the heat and simmer covered for 20 minutes or rice is cooked.
  8. Stir in the shrimp and allow to cook for 5 minutes.
  9. Remove the bay leaves before serving. Season with salt and pepper.
Receipt adapted from Epicurious.


One year ago...................................I made Macaroni and Cheese.
Two years ago.................................I made Butterscotch Fondue.
Did you already know....................
-In 2014, the shrimp fishing was banned in Maine.
-The last ban on shrimp fishing in Maine occurred over 35 years ago.
-As shrimp mature, male shrimp change their sex to females.

Friday, February 28, 2014

Beignets

Ever since my daughter tried beignets, she keeps asking me to make them. It makes me feel good that my daughter just assumes I can make them especially since I may make fried foods once a year. Just for her, I figured I would do it. If you have never had a beignet, it taste like a combination of fried dough and a doughnut. It is so light and delicious. This recipe makes a lot. We filled four large storage bags and still had some left over. I'm not even including the ones we ate in the amount of beignets I made. My daughter is happy. My neighbors are happy. Ben-Yay!
Beignets
1 1/2 cups warm water (about 110 degrees)
1/2 cup sugar
1 (1/4 oz.) package of active dry yeast
2 eggs, slightly beaten
1 tsp salt
1 cup evaporated milk
4 cups bread flour
1/4 cup shortening
3 cups all purpose flour
oil for frying
powdered sugar for dusting the tops

Directions:
  1. In a medium bowl, combine the water, sugar, and yeast. Set aside for 10 minutes.
  2. In a large bowl, beat the eggs, salt, and evaporated milk together.
  3. Add the yeast mixture to the egg mixture. Mix well.
  4. Add one cup of bread flour at a time. Allow to mix for 1 minute before adding the next cup.
  5. Add the shortening and mix for a couple of minutes.
  6. Add one cup of all purpose flour at a time until the dough begins to pull away from the side. The dough should not be sticky or more flour is needed.
  7. Knead the dough for 8 minutes.
  8. Spray a large bowl with nonstick cooking spray.
  9. Place the dough into the bowl and cover with a greased plastic wrap.
  10. Allow the dough to rise for at least 2 hours.
  11. Preheat oil to 350 degrees F. in a deep fryer or large pan. 
  12. Line a large plate with several sheets of paper towels.
  13. Place a cup of powdered sugar in a sifter and set aside.
  14. On a lightly floured surface, roll out the dough to 1/4 inch thickness.
  15. Cut the dough into 1 inch squares.
  16. Carefully place the dough into the heated oil.
  17. Cook the dough for about 1 minute or until golden brown before flipping it over to allow the other side to cook until a golden brown color.
  18. Remove the beignet from the oil and place onto the paper towel lined plate.
  19. Lightly dust the beignet with powdered sugar.
  20. Serve warm.
Recipe adapted from Paula Deen.

One year ago........................................I made PB Nutella Oatmeal.
Two years ago......................................I made Agent P Sandwich.
Did you already know..............................
-Beignets are very popular in New Orleans especially the French Quarter.
-In 18th century, the French immigrants brought beignets to Louisiana.
-A beignet is a square doughnut with no hole in the middle of it which has been sprinkled with powdered sugar.

Wednesday, February 26, 2014

Cajun Biscuits

Have you ever been to Louisiana? Maybe you've been to Mardi Gras? Maybe you are heading to Mardi Gras which begins next week? I will admit I've never been to Mardi Gras but it sounds so wild. I have been to New Orleans and walked down Bourbon Street. I enjoy Cajun food so I figured I would make some biscuits with a little heat. I did forget to tell my husband so he was pleasantly surprised.
Cajun Biscuits
2 cups all purpose flour
1 Tbsp baking powder
1/4 tsp baking soda
1/4 tsp salt
1 tsp paprika
1 tsp cayenne pepper
1/2 tsp black pepper
1/2 tsp garlic powder
4 Tbsp unsalted butter
1 cup sour cream
1/4 cup milk

Directions:
  1. Preheat the oven to 425 degrees F.
  2. Line a baking sheet with parchment paper. 
  3. In a medium bowl, combine the flour, baking powder, baking soda, salt, paprika, cayenne pepper, black pepper, and garlic powder.
  4. Cut in the butter until it resembles course meal.
  5. Mix in the sour cream and milk until just incorporated.
  6. Roll out the dough about 1 inch thickness onto a lightly floured surface.
  7. Cut out the biscuits into 2 inch circles.
  8. Space the biscuits about 2 inches apart onto the baking sheet.
  9. Bake the biscuits for 10 minutes or until golden brown.
  10. Serve immediately.
Recipe by Jen of Sweet Morris.

One year ago...........................I made Macaroni and Cheese.
Two years ago.........................I made Butterscotch Fondue.
Did you already know..............
-The capital of Louisiana is Baton Rouge.
-In Louisiana, the largest city is New Orleans. 
-Louisiana is divided into parishes and not counties.

Monday, February 24, 2014

Soup Bread Bowls

When I think of bread bowls, I always have images of Boston and San Francisco. I think of a hearty chowder in Boston or the wonderful sourdough bread in San Francisco. My husband told me that he thinks of Maine since he notices it at the local restaurants. When my oldest daughter came home to visit, her boyfriend asked for some lobster chowder. I figured I would make it in bread bowls. My youngest son thought this was the most awesomest thing ever. He could eat his soup and then the bowl. He loved it. 
Bread Bowls
5 cups all purpose flour
1/3 cup white whole wheat flour
1/4 cup dry milk
1 (1/4 oz.) package of instant yeast
2 tsp salt
2 Tbsp vegetable oil
1 1/2 cup warm water

Directions:
  1. In a large bowl, combine 3 cups all purpose flour with the white whole wheat flour, dry milk, yeast, salt, vegetable oil, and the warm water.
  2. Add 1/2 cup of all purpose flour until the dough is no longer too sticky.
  3. Knead the dough for 8 minutes until the dough is smooth.
  4. Allow the dough to rise for 45 minutes.
  5. Divide the dough into 5 balls.
  6. Place the dough onto a parchment lines baking sheet.
  7. Cover the dough with greased plastic wrap.
  8. Place in the refrigerator overnight.
  9. Remove the dough from the refrigerator and allow to sit at room temperature for 2 hours.
  10. Uncover and allow to sit for 30 minutes.
  11. Preheat oven to 425 degrees F.
  12. Gently make several slashes on top of the bread.
  13. Bake the bread for 22 minutes or until the bread sounds hollow on the bottom if tapped.
  14. Allow the bread to cool before hollowing out the center for the soup. 
Recipe adapted from King Arthur Flour

One year ago....................................I made NY Style Cheesecake.
Two years ago..................................I made Stove Top Mac-n-Cheese.
Did you already know........................
-In 1630, Boston was founded by the English Puritans. 
-In 1636, Harvard University was founded.
-In 1716, the first lighthouse was built in Boston.

Friday, February 21, 2014

Brazilian Banana Cake

My husband decided he was going to eat healthier this year. This means we have tons and tons of bananas. Yes, he should be eating them. So when I was looking for another recipe to celebrate the Olympics, I decided to go with Brazil. Brazil will be hosting the summer Olympics in two years. It was a great way to use some of these bananas up. This dessert taste a lot like banana bread. My children even ask me for a piece of the banana bread instead of cake. It is top with bananas and cinnamon sugar. When I removed this cake from the oven, the top was puffed up which went back down once cooled. I made two individual serving cakes to test the recipe before cooking the larger one. I didn't have to change anything. It was a big hit in this house. Now, what to do with the rest of the bananas I have?
Brazilian Banana Cake
3 Tbsp butter, softened
2 cups sugar
3 egg yolks
3 cups all purpose flour
1 Tbsp baking powder
1 cup milk
4 very ripe bananas, smashed
3 egg whites

Topping:
2 bananas, sliced
2 Tbsp sugar
1 tsp ground cinnamon

Directions:
  1. Preheat oven to 325 degrees F.
  2. Grease a 9x13 baking pan.
  3. In a large bowl, cream the butter with the sugar.
  4. Mix in the egg yolks.
  5. Add the flour with the baking powder.
  6. Add the milk and mix until incorporated.
  7. Add the smashed ripe bananas to the batter.
  8. In another bowl, whisk the egg whites until a soft peak form. 
  9. Fold in the egg whites into the batter.
  10. Evenly spread the batter in the greased baking pan.
  11. On top of the batter, spread the sliced bananas in a single layer.
  12. In a small bowl, combine the sugar and the ground cinnamon.
  13. Sprinkle the cinnamon sugar over the sliced bananas.
  14. Bake the cake for 30 minutes or until a toothpick inserted in the middle of the cake comes out clean.
Recipe adapted from Allrecipes

One year ago......................I made No Knead Bread.
Two years ago....................I made Blackened Chicken.
Did you already know........
-The 2016 Summer Olympics will be held at Rio de Janeiro.
-Rio de Janeiro is the second largest city of Brazil.
-Rio de Janeiro means River of January in Portuguese.

Wednesday, February 19, 2014

Vatrushka

I have seen this cheese bread shown often during the Olympics. I figured I would have to make it since I love cheese. I actually thought it would be similar to our cheese bread. No, it is not like our gooey Italian cheese bread. My husband was very surprised and said it's sweet. It is actually sweet like a danish but not as sweet as the danishes found in the store. I've seen recipes that call for yeast but I decided to go with this version. Some recipes have raisins in them. Others have the bread topped with sprinkles and powdered sugar. It would be an easy addition to serve at a meal.
Vatrushka Russian Cheese Bread
1/2 cup milk
1/4 cup vegetable oil
1/2 cup sugar
1 egg
2 1/2 cups flour
1/2 tsp salt
1/2 tsp baking soda
1/2 tsp vinegar

1 egg yolk whisked for the top

Cheese filling:
1/3 cup ricotta cheese
1/2 cup sugar
1 Tbsp sour cream
1 egg
pinch of salt

Directions:
  1. Preheat oven to 350 degrees F. 
  2.  In a large bowl, combine the milk, vegetable oil, sugar, and egg.
  3. Add the flour and salt. Mix to combine.
  4. In a small cup, combine the baking soda and vinegar.
  5. Immediately add the baking soda mixture to the flour mixture. Mix until a form of dough forms.
  6. Divide the dough into 8 balls.
  7. Place the balls of dough onto a baking sheet lined with parchment paper.
  8. With the bottom of a floured cup, press the cup into the ball of dough to form a well. 
  9. Lightly brush the edges of the dough with the egg yolk.
  10. In a medium bowl, combine the ricotta cheese, sugar, sour cream, egg, and salt. Mix to incorporate. 
  11. Add the cheese mixture into the center of the dough. Do not overfill.
  12. Bake the dough for about 18 minutes or until golden brown.
Recipe adapted from hep-i-book'a.

One year ago................................I made Macerated Strawberries.
Two years ago..............................I made Mexican Chocolate Cake.
Did you already know.................
-Vatrushka often have raisins and other dried fruit in them.
-Vatrushka is popular in Eastern Europe.
-Vatrushka derives it's name from 'vatra' which means fire.