Saturday, April 19, 2014

Disappearing Bunnies Cupcakes

My sister makes cupcakes for her girl's classroom. No wonder my sister is very popular at her girl's school. A few children have even put in request for the next type of cupcakes my sister should make. The best part about my sister making cupcakes for her girl's class is that she always brings a few over for us. Aren't these cupcakes so cute. My daughter could not wait to have one.
Disappearing Bunnies 
Cupcakes
Frosting
Food coloring
Oreo cookies, crushed
miniature marshmallows
candy melts


Directions:
  1. Dye 3/4 of the cupcakes green and the remaining frosting brown.
  2. Set a few cupcakes aside.
  3. The remaining cupcakes pipe the green frosting onto the cupcakes using a 233 tip.Set aside.
  4. Roll the remaining cupcakes in the crushed Oreo cookies.
  5. In the center of the Oreo cupcakes, insert a miniature marshmallow for the bunny tail.
  6. On a piece of parchment paper, draw the outline of the bunny's foot like a figure 8.
  7. Melt the candy melts and pipe the melted candy melts in the outline of the bunny's foot. 
  8. Once the candy has set, stick the candy melt feet onto the Oreo cupcake one on each side of the marshmallow to space out the feet. If needed, stick a little frosting on the bottom so the candy melt feet stick.
  9. On top of each candy melt feet, pipe one large circle on the side closest to the marshmallow. On the other side of the candy melt feet, pipe 2 smaller circles to make the paw pads.
Recipe adapted from Hello, Cupcake! cookbook by Karen Tack and Alan Richardson.  

One year ago.......................................I made Fried Cheese Sticks.
Two years ago.....................................I made Burritos.
Did you already know........................
-Baby rabbits are called kit.
-A rabbit's front teeth never stop growing.
-Never pick up a bunny by it's ears.

Happy Easter!

Wednesday, April 16, 2014

Pastry Cream

I probably watch Food Network more than any other channel. I was watching Barefoot Contessa make this divine looking Strawberry Tart. Since I really didn't want to make a tart, I comprised and filled strawberries. I wanted to try the cream before making something more elaborate. Normally, I have an easy time taking photos of my son. Not this time, he just wanted to eat all the filled strawberries. He also made lots of faces. He looked angry. He crossed his eyes at me. He looked scared. He ate the filled strawberries bottom first. I am really surprised he didn't make a mess. Most of the photos were not even in focus. It is hard to take a photo if one is laughing. He does make me laugh often.
Pastry Cream
5 egg yolks
3/4 cup sugar
3 Tbsp arrowroot 
1 1/2 cup  milk
1/2 tsp vanilla
1 Tbsp butter
1 Tbsp heavy cream

Directions:
  1. In a large bowl, beat the egg yolks and sugar for 4 minutes in a mixer on medium high speed.
  2. Add the arrowroot and mix well.
  3. In a medium pan, heat the milk until steaming. Stir constantly.
  4. Slowly, pour a Tbsp of heated milk into the mixer while the mixer is mixing.
  5. Gently, pour a little more of the heated milk into the mixer to temper the mixture.
  6. In a steady stream, add the remaining amount of the milk into the egg mixture. 
  7. Add the egg mixture into the medium pan and heat over low heat for 7 minutes. Stir constantly.
  8. Once the mixture begins to become a thick pudding, whisk the mixture for 2 minutes.
  9. Remove from heat.
  10. Stir in the vanilla, butter, and heavy cream. 
  11. Transfer the pastry cream into a bowl.
  12. Cover with plastic wrap. Press down so the plastic wrap is touching the top of the pastry cream.
  13. Refrigerate the pastry cream until cooled completely.
Recipe adapted from Ina Garten.

One year ago.............................I made Steak Sandwich.
Two years ago...........................I made Banana Split Cake.
Did you already know........................
-Pastry cream is a rich custard.
-Custards have been around since the Middle Ages. 
-Pastry cream is the filling for eclairs and Boston Cream Pie.

Monday, April 14, 2014

Lemon Cream Cookies

The chorus of the peepers has announced it is Spring. My oldest daughter has told us it has been Spring in California for awhile. She also told her coworkers that the snow doesn't melt until May. It really isn't that bad. Almost all the snow is gone. To celebrate Spring, I made some lemon cookies. I have been trying using decorating tips more which made the cookies look fancy.
Lemon Cream Cookie
2 sticks (16 oz.) unsalted butter, softened
1 cup powdered sugar
1 tsp vanilla extract
2 tsp lemon zest
1 egg
2 cups flour
1/4 tsp salt
1/2 tsp baking soda

Direction: 
  1. Preheat the oven to 350 degrees F.
  2. Line a baking sheet with parchment paper and set aside.
  3. In a large bowl, cream the butter and powdered sugar.
  4. Add the lemon zest, vanilla extract, and the egg. Mix until incorporated.
  5. Gently, fold in the flour, salt, and baking soda. Mix until incorporated.
  6. Using the star tip, fill a pastry bag with the batter. 
  7. Pipe the batter into a circular pattern onto the baking sheet. Space about 3 inches apart.
  8. Bake the cookies for 10 minutes or until the edges are golden brown.
  9. Remove from the oven and allow to rest for five minutes before transferring to a wire rack to cool completely before filling.
Recipe by Jen of Sweet Morris. 

Lemon Cream Filling:
1/2 stick (4 oz.) unsalted butter, softened
1/4 cup margarine/vegetable spread (I used I can't believe its not butter)
2 cups powdered sugar
1 tsp lemon zest
1 tsp vanilla extract
1 Tbsp heavy cream

Directions:
  1. In a medium bowl, cream the butter and spread.
  2. Add the powdered sugar and zest. Mix well.
  3. Add the vanilla and heavy cream. Mix until well incorporated. 
One year ago................................I made Mixed Berry Lemonade.
Two years ago..............................I made Peanut Butter Cupcakes.
Did you already know.................................
-Peepers are small frogs.
-The frogs are nocturnal creatures.
-During the winter, peepers can still survive after the majority of their bodies have froze.

Wednesday, April 9, 2014

Creamy Polenta

The first time I had polenta I was attending a wedding. I thought it was pretty good. Someone told me that it was grits. Now, I've had grits and I would rather pass. My Dad is Southern and tried to get us to eat grits often. Several years ago, my Aunt made grits for my husband and he wasn't impressed. When I decided to make this dish, I figured it was probably a good idea not to tell my husband that it was like grits. My husband said when he saw me making this dish he was wondering how he was going to get out of eating it. He was glad he didn't since he loved it. My husband told me several times that I could make this dish again. My son and I loved it.
Creamy Polenta with mushrooms
8 cups half and half
1 Tbsp salt
1 cup coarse polenta
4 Tbsp butter
1/2 cup freshly grated Parigiano Reggiano cheese

Directions
  1. In a large pot, heat the half and half for 5 minutes over medium high heat.
  2. Whisk in the salt.
  3. Slowly, whisk in the polenta. Continue to whisk for 8 minutes.
  4. With a wooden spoon, continue to stir for 5 minutes.
  5. Turn the heat to medium and continue to stir until the mixture evenly bubbles.
  6. Cover and turn the heat to low. Stir every 15 minutes. Allow to cook for 2 hours.
  7. Once the liquid has reduced down, stir in the butter and cheese.
Recipe adapted from Foodnetwork.

Cremini mushrooms
1 Tbsp olive oil
1 Tbsp butter
2 shallots, minced
1 cup cremini mushrooms
2 tsp thyme
1/4 tsp salt
1/4 cup white wine

Directions:
  1. In a large skillet, heat the olive oil over medium heat.
  2. Add the butter and the shallots. Cook for about 5 minutes and stir often.
  3. Add the cremini mushrooms. Stir  often.
  4. Stir in the thyme and salt. Cook for 1 minute.
  5. Add the white wine and cook for 1 minute.
  6. Serve over the polenta and then top with roasted chicken. 
One year ago........................................I made Lemon Cookies.
Two years ago......................................I made Margaritas.
Did you already know..............................
-Polenta is made with a coarse ground yellow cornmeal.
-Polenta is a native Italian dish. 
-Cooled polenta maybe sliced and then fried.

Monday, April 7, 2014

White Cake

This weekend we went to see Captain America. Before we went, my daughter asked us if we knew Captain America's name. Sadly, I failed her little quiz. Many of you are sadly shaking your head in disbelief. Of course, my husband told us Captain Steve Rogers. Since we had just watched the movie, my son wanted a cake that looked like Captain America's shield. Well, I decided to try to make a blue, red, and white checkered board pattern inside the cake. I took the cake out of the oven and allowed it to cool on a wire rack. Then I wasn't thinking and decided to cut out the circles on the wire rack. I learned a big mistake. I don't know why I didn't catch it but the cake pressed through the cake and made some nice checkered patterns on the cake itself. I had to push half the cake back through the cake. Even with my mistakes, even with the cake not looking as great as I hoped, my son still wanted me to bring it to the party. He really is a great son. The kids still wanted the cake. They didn't care. My sisters told me it tasted good. My husband didn't even get a piece. I had no cake leftover to take a photo of the inside. I think I'm going to attempt it again at a later date.
My sister made the poster for the party!
White Cake
1 cup of unsalted butter, softened
1/2 cup vegetable shortening
3 cups sugar
5 eggs
3 cups all purpose flour
2 tsp baking powder
1/2 tsp salt
1/2 cup milk
1 cup buttermilk
2 tsp vanilla extract

Directions:
  1. Preheat oven to 350 degrees F.
  2. Coat three 9 inch round cake pans with nonstick baking spray and flour. 
  3. In a large bowl, cream the butter and shortening.
  4. Slowly, add one cup of sugar at a time. Mix until incorporated.
  5. Add one egg at a time and incorporate well before adding the next egg.
  6. In a medium bowl, whisk together the flour, baking powder, and salt.
  7. In a large cup, combine the milk, buttermilk, and vanilla. 
  8. Add 1 cup of the flour mixture followed by 1 cup of the milk mixture into the butter mixture.
  9. Continue to alternate adding another cup of flour mixture then the milk and followed by the remaining flour mixture. Gently incorporate all the ingredients together.
  10. Evenly, separate the batter between the three prepared cake pans. 
  11. Bake the cakes for about 30 minutes or until a toothpick inserted in the center comes out clean.
  12. Allow to cool for 5 minutes before transporting onto a wire rack to cool completely.
Recipe adapted from Add a pinch

One year ago............................................I made Yogurt Pancakes.
Two years ago..........................................I made Tortilla Soup.
Did you already know..........................................
-In 1941, Captain America made his first appearance.
-Captain America has no superhero abilities but the serum gave him peak human abilities.
-Captain America's shield is made of fictitious Vibranium and weighs 12 pounds.

Friday, April 4, 2014

Egg Cupcakes

My sister brought me over a carton of eggs. These aren't ordinary eggs. These eggs are cupcakes. Aren't they so cute! My sister made them for her daughter's class for April Fool's Day and she made us a carton too. My husband couldn't wait to crack into them. So, he handed me the carton with the expiration date facing me. I didn't realize he was trying to trick me. I told him that if the eggs were old then he should just throw them out. He told me that I should take them and I said alright. Before I could throw them away, he told me that my sister had brought the eggs over to me. Since I had already talked to my sister, I knew they were cupcakes. He wasn't going to trick me. My husband had thought I would open them and ask why my sister would give me broken hard boiled eggs. I know my sister doesn't like hard boiled eggs and she would not have boiled the eggs just to bring them to me. He has been trying all week to try to trick me. I guess it must mean that it's April Fool's week? Month? Don't worry I've already gotten him once on April Fool's Day and he is just trying to get me back. I will have to think up of a couple more tricks to play on him now.
Egg Cupcakes
12 miniature white frosted vanilla cupcakes
2 cups white candy melts
1/4 cup lemon curd
2 drops of yellow food dye

Directions: 
  1. In the microwave, melt the white candy melt. Stir often.
  2. Pour the melted candy melts into plastic Easter eggs. Fill some eggs with a lot of candy melts so it looks like a whole egg and some lightly coated for some cracked eggs.
  3. Refrigerate the plastic eggs until the candy melts harde.
  4. Carefully, squeeze the sides of the eggs to remove the candy melt egg molds.
  5. Top the egg molds on top of the cupcakes. 
Recipe adapted from What's New Cupcake? cookbook by Karen Tack and Alan Richardson. 

One year ago.............................................I made Chocolate Chocolate Chip Cookies.
Two years ago...........................................I made Chocolate and Peanut Butter Ribbon Dessert.
Did you already know..........................
-Eggs should be used within three weeks of purchase.
-After cooking, hard boiled eggs should be eaten within a week. (Candy ones won't even last that long.)
-Frozen, shelled eggs should be used within a year.

Tuesday, April 1, 2014

Hamburger Cookies

Hamburger Cookies? This recipe my kids have been asking me to make for a couple of weeks for April Fools. They had a lot of fun making these cookies. My daughter came up with the idea to use the sprinkles for the ketchup and mustard. They were so impressed with their creation that they brought them to school for snack. Normally, I like them to eat healthy snacks. If I was a kid, I would have wanted to bring this cookie into class too. 
My friend had made these cookies for me over twenty years ago. I had never seen anything like them and thought they were neat then. I wish she lived near me since I would have returned the favor.

Hamburger Cookies
12 vanilla wafers
1 cup vanilla wafer cookies, crushed
1/2 cup powdered sugar
1/4 tsp salt
3/4 cup mini semi sweet chocolate chips
1/3 cup milk
1/2 cup sweetened flaked coconut
1/4 tsp water
3 drops green food coloring
1 Tbsp yellow sprinkles
1 Tbsp red sprinkles
1 tsp melted butter
1 Tbsp sesame seeds, lightly toasted

Directions:
  1. Pair the vanilla wafers and set aside.
  2. In a medium bowl, combine the crushed cookies, sugar, and salt. Set aside.
  3. In a microwave safe bowl, microwave the chocolate chips with the milk for 45 seconds. Stir and continue to heat the chocolate in 15 seconds intervals until smooth.
  4. Add the chocolate mixture to the crushed cookie mixture. Stir well.
  5. Form balls with each of the chocolate crushed cookie mixture. Flatten the balls slightly to form patties.
  6. Turn one of the vanilla wafer cookies upside down and top with the chocolate pattie.
  7. In a small plastic bag, add the coconut, water, and food coloring. Mix until evenly coated.
  8. Add a little of the colored coconut and top the chocolate pattie.
  9. Top the colored coconut with a little of the yellow and red sprinkles.
  10. Top the sprinkles with a vanilla wafer.
  11. Brush the top of the vanilla wafer with the melted butter and sprinkle a few sesame seeds on top. 
Recipe adapted from the Toll House Bake the Very Best Nestle Cookies Book.  

One year ago......................................I made Candy Eggs.
Two years ago....................................I made Spaghetti and Meatball cupcakes.
Did you already know.........................Some very public pranks are:
-In 1957, BBC broadcasted a prank film about Swiss farmers harvesting spaghetti. BBC received many request for the spaghetti plant.
-In 1985, Sports Illustrated published a fictitious story about rookie pitcher named Sidd Finch who could throw 168 miles per hour fastballs who soon would play for the Mits. Many networks sent reporters to learn more about Sidd Finch.
-In 1996, Taco Bell announced they had purchased the Liberty Bell and renamed it Taco Liberty Bell. Many citizens were upset. The White House Press Secretary Mike McCurry was asked about this purchase and jokingly responded how the federal government sold the Lincoln Memorial and renamed it Lincoln-Mercury Memorial.

Monday, March 31, 2014

Vanilla Wafer Cookies

When I made these cookies, it was late so the recipe seemed a little off to me. I decided to bake one cookie as a test. When it came out of the oven, my daughter rushed over to try one until she saw I had make only one cookie. She had to go tell her Dad that I made only one cookie like I was crazy. So, my husband and son came over to witness my lone cookie on the baking sheet. I told them my dilemma about the recipe. Then I realized I forgot to add the vanilla. They all decided then that I was crazy since I was making vanilla wafer cookies. We split the lone cookie. My husband is so sweet and told me that my lone cookie tasted pretty good even with missing the key ingredient. I added the vanilla to the remaining dough and then made the rest of the cookies. They were pretty popular with my kids and husband. Do they taste like the box vanilla wafers? No but they are still pretty good.
Vanilla Wafer Cookies
1 cup all purpose flour, sifted
1/2 cup sugar
1/2 tsp baking powder
1/4 tsp salt
2 Tbsp vanilla extract
4 Tbsp unsalted butter, melted
2 egg yolks

Directions:
  1. Preheat oven to 350 degrees F.
  2. Line a baking sheet with parchment paper and set aside.
  3. In a large bowl, whisk together the baking powder, salt, and sugar.
  4. Whisk in the vanilla and melted butter. Whisk until smooth.
  5. Add the egg yolks and whisk until incorporated.
  6. Add the flour and combine until just incorporated. Dough will be stiff.
  7. Spoon a round tsp of dough onto the baking sheet.
  8. Flatten each ball of dough slightly.
  9. Bake the cookies for 6 minutes and rotate the baking sheet.
  10. Bake the cookies for another 6 minutes or until the edges are golden brown.
Recipe adapted from Instructables.

Two years ago.....................................I made Chicken Spaghetti.
Did you already know..........................
-In 1968, Nabisco introduced Nilla Wafers.
-Nilla Wafers use synthetic vanilla.
-The Nilla Wafer line includes reduced fat, mini, and pie crust.

Friday, March 28, 2014

Macadamia Nut Pie

I love macadamia nuts. Sometimes it is a good thing some things are expensive like these nuts. I would eat them more than once a year. If I bake with macadamia nuts, I usually add them to cookies. When I first saw this Parade recipe, I knew I would eventually make this pie. This pie is similar to a pecan pie but with macadamia nuts. It is a pretty easy pie to make and oh, so delicious. I really had to share this pie since it is so rich and tempting. I will admit I added additional nuts to the original recipe since I scooped out too many macadamia nuts from the bulk bin. I felt a little awkward putting them back so I just took them all. Would you have put some back? Maybe for a snack later?
Macadamia Nut Pie
1 cup dark corn syrup
2/3 cup sugar
3 eggs, lightly beaten
8 oz. macadamia nuts
1/4 cup butter, melted
1 (9 inch) unbaked pie crust

Directions:
  1. Preheat the oven to 350 degrees F.
  2. Roll out the pie crust and line the bottom of the pie pan.
  3. In a large bowl, mix together the corn syrup, sugar, and eggs.
  4. Fold in the macadamia nuts and melted butter.
  5. Pour the mixture into the unbaked pie crust.
  6. Bake the pie for 50 minutes or until the filling is set. If the crust begins to brown, then cover the edges with foil.
Recipe adapted from Parade.  

One year ago....................................I made Hot Cross Buns.
Two years ago..................................I made Peanut Butter Ice Cream.
Did you already know.........................
-Macadamia nuts are difficult to shell since they have the hardest shell of all the nuts.
-Do not feed macadamia nuts to dogs since it could cause severe lethargy and other symptoms.
-Botanist Ferdinand von Mueller gave the nut its scientific name macadamia after his friend John Macadam.

Wednesday, March 26, 2014

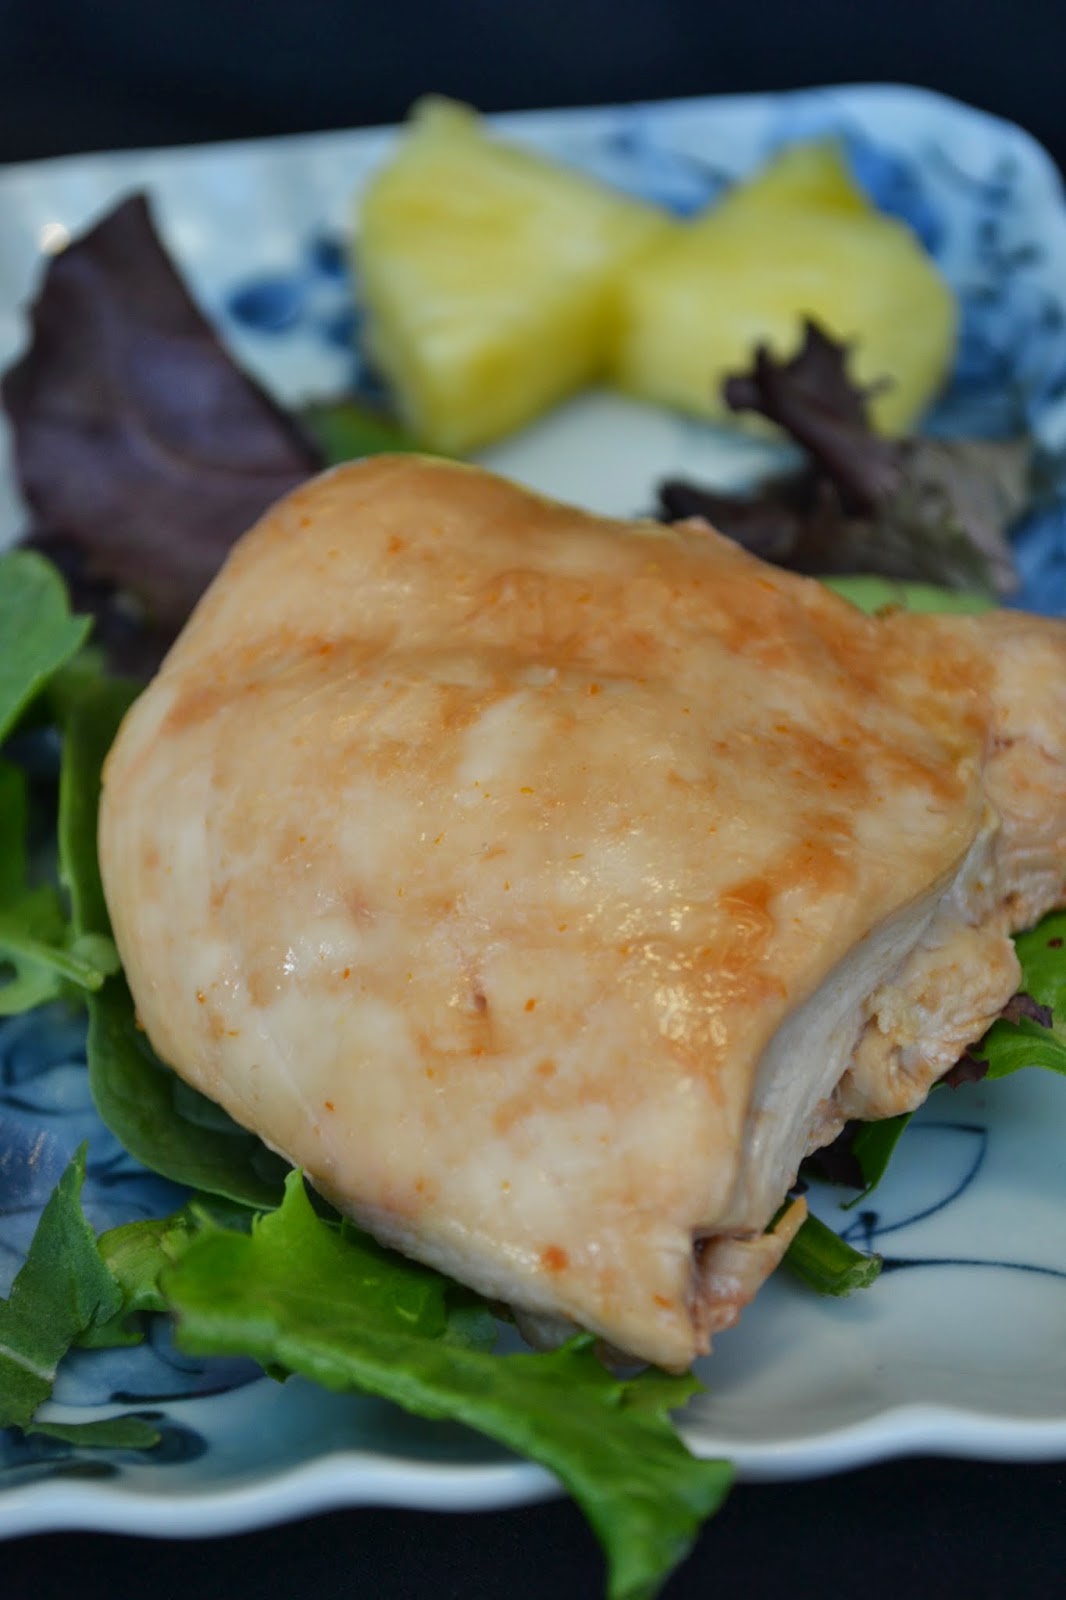
Huli Huli Chicken

Since we decided to leave our grill outside, it is currently decorated with snow. Yes, we could unbury it but then we would have to spend some time outside grilling. I'm not volunteering and I know my husband will not then it leaves the oven. I do have an inside grill pan but it does smoke a lot. The chicken did turn out pretty tender. It does have a nice mild flavor. I thought it would be similar to a teriyaki sauce but this version didn't remind me of teriyaki. We will have to try making this on the grill when we find our grill again.
Huli Huli Chicken
1/2 cup pineapple juice
1/3 cup white wine
1/2 cup chicken broth
1/4 cup soy sauce
1/4 cup ketchup
1/4 tsp ginger
1/8 tsp Worcestershire sauce 
2 lbs chicken

Directions:
  1. In a large zip lock plastic bag, combine the pineapple juice, white wine, chicken broth, soy sauce, ketchup, ginger, and Worcestershire sauce. 
  2. Add the chicken and marinate for 30 minutes in the refrigerator. 
  3. Preheat the oven to 350 degrees.
  4. Remove the chicken from the plastic bag and place in a baking dish. Reserve the marinade.
  5. Cover the dish and bake for 15 minutes. Discard the marinade.
  6. Brush the chicken with some of the reserved marinade and cook the chicken for another 15 minutes or until cooked through.
Recipe adapted from Polynesia. com

One year ago.................................I made Sugar Cookies with Sprinkles.
Two years ago...............................I made Hazelnut filling.
Did you already know...........................
-The Hawaiian word huli means turn.
-In 1955, Huli Huli sauce was created by Ernest Morgado as his version of teriyaki sauce.
-The original sauce is a trade secret since it is available commercially.

Monday, March 24, 2014

Coconut Pudding

Because it is suppose to be Spring.....................
Because there is snow still on the ground...........
Because it is my sister's birthday........................
Because my sister was born in Hawaii...............
Because Hawaii sounds good right now.............
I decided to try making some Hawaiian recipes like Haupia which is Coconut Pudding.  Haupia is suppose to set and should be able to cut into squares. I guess I should have let mine set just a little longer before removing from the container but it didn't matter since it still tasted good. My Mom remembered having it before and likes this dessert. I think if I was going to make it again then I may just try using cornstarch instead of the arrowroot which may make the difference. It is suppose to be the consistence of jello maybe next time. It is creamy and smooth with a nice hint of coconut.
Haupia aka coconut pudding
6 Tbsp sugar
6 Tbsp arrowroot
2 cup coconut milk
1 cup whole milk
1/4 tsp vanilla

Directions:
  1. In a small bowl, combine the sugar with the arrowroot. Set aside.
  2. In a saucepan, add 1 cup of coconut milk, sugar, and arrowroot. 
  3. Heat the mixture over low heat until thicken about 8 minutes.
  4. Add the other 1 cup coconut milk and the whole milk.
  5. Continue to heat the mixture until the mixture is thick about another 8 minutes.
  6. Pour the mixture into an 8 inch pan until firm.
Recipe adapted from About. com

One year ago.........................................I made Peanut Butter Frosting.
Two years ago.......................................I made Sloppy Joes.
Did you already know............................
-Haupia is very popular at Luau.
-Haupia was originally made with arrowroot.
-Besides being served in squares, haupia can be a filling in cakes and pies.

Friday, March 21, 2014

Maple and Brown Sugar Cinnamon Rolls

In Maine, the fourth Sunday of March is typically Maple Sunday. So, we will be bringing the children to one of the many sugarhouses to see how maple syrup is made. My husband's favorite is when he tries the maple syrup over ice cream. I think this year we will be joining my sister since it happens to fall on her birthday!
Maple and Brown Sugar Cinnamon Rolls
Rolls
2 medium russet potatoes, peeled and cubed
3 (1/4 oz.) packages of instant yeast
3/4 cup sugar
1 cup unsalted butter, melted
3 eggs
2 tsp salt
5 cups all purpose flour
4 cups bread flour

Filling
1/2 cup maple syrup
3 cups brown sugar
1 Tbsp cinnamon
1/4 tsp salt
1/4 cup all purpose flour
1 cup unsalted butter, melted

Icing
2 1/2 cups powdered sugar, sifted
1/4 cup maple syrup
1 tsp milk

Directions:
Rolls:

  1. In a large pot, boil the potatoes in water until tender about 10 minutes.
  2. Remove 3 cups of the potato water and set aside.
  3. Drain the potatoes and mash. Place in a large bowl and set aside.
  4. Allow the potato water to cool to 110 degrees F.
  5. Add the yeast and 1 tsp of sugar to the cooled potato water. 
  6. Allow the yeast to sit for 5 minutes to proof.
  7. Add the yeast to the large bowl with the potatoes.
  8. Add 3/4 cup sugar, the melted butter, eggs, and salt. Whisk the mixture together.
  9. Add 3 cups of all purpose flour to the potato bowl and stir until incorporated.
  10. Add 4 cups of the bread flour and mix until incorporated. 
  11. Add the remaining all purpose flour and mix until the dough is no longer very sticky. (More flour may be needed.)
  12. Cover with greased plastic wrap and leave in a warm place until the dough doubles in size about 1 hour.
  13. Punch down the dough and recover. 
  14. Place in the refrigerator overnight.
To make the filling:

  1. In a medium bowl, gently combine the maple syrup, brown sugar, cinnamon, salt, and flour. Set aside. 
  2. Grease 2 9x13 inch disposable pans with butter and nonstick cooking spray. Set aside. 
  3. Remove half of the dough from the bowl and place onto a floured surface.
  4. Roll the dough into 1/4 inch thick rectangle.
  5. Spread the melted butter over the dough.
  6. Sprinkle the maple filling over the top of the dough.
  7. Starting on 1 of the long side of the dough, carefully roll the dough tightly to the other side to form one long cylinder.
  8. With a sharp serrated knife, cut the roll into 2 inch slices.
  9. Place the slices with the cut side down into the greased pan. Leave about an inch apart between each slice. 
  10. Allow the rolls to rise for an hour in a warm place until puffy.
  11. Preheat oven to 375 degrees F.
  12. bake the rolls for 20 minutes or until light brown.
  13. Remove the rolls from the oven. Set aside.
To make the icing:

  1. In a small bowl, combine the powdered sugar, maple syrup, and milk. 
  2. Spread the icing on top of the rolls while warm.
  3. Serve immediately or once cooled. 
Recipe adapted from The Pastry Queen Cookbook.

One year ago.....................................I made PB Oreo Brownie Cupcakes.
Two years ago...................................I made Milk Chocolate Cookies
Did you already know....................
-In one season, a maple tree can produce 40 quarts of sap which will make only one quart of syrup. 
-The modern maple syrup producers use tubing that transports the sap to the sugarhouse.
-Here is a website of some of the sugarhouses participating in Maple Sunday.

Wednesday, March 19, 2014

Gnocchi with roasted vegetables

I will admit my husband did not try this dish. There are way to many vegetables for him. He decided the leftovers sounded good. However, my kids loved it. My daughter and I tried a similar dish at CRT a few months ago. I figured I would try to replicate the dish. The original dish did not have asparagus but I figured I would add some. My daughter said it was her favorite vegetable of all. My son liked the summer squash the best. I liked the servings of vegetables my children were eating. Now, how to get my husband to eat more vegetables is the hard part.
Gnocchi with roasted vegetables
1 eggplant
2 summer squash
1 zucchini
1/2 red pepper
1 bunch of asparagus
8 oz. button mushrooms
1/2 large red onion
1 Tbsp olive oil
salt and pepper for taste
2 cups arugula
1 package of gnocchi 
2 Tbsp aged balsamic vinegar
1/8 cup shaved Parmesan cheese

Directions:
  1. Preheat oven to 450 degrees F.
  2. Chop the vegetables into bite size pieces.
  3. Arrange the vegetables onto a baking sheet.
  4. Toss the vegetables with 1 Tbsp olive oil and spread into a single layer.
  5. Season with salt and pepper. 
  6. Roast the vegetables for 15 minutes.
  7. Stir the vegetables and bake for another 15 minutes or until desired tenderness.  
  8. In a large skillet, heat 1 Tbsp olive oil over medium heat.
  9. Add the gnocchi and cook until golden brown. 
  10. In a large bowl, combine the gnocchi and roasted vegetables.
  11. Drizzle the balsamic vinegar over the gnocchi and vegetables. Lightly toss.
  12. Top with the shaved Parmesan cheese.
Inpired by the Cinderella's Royal Table dish.

One year ago...............................I made Chocolate Chip Oreo and PB cups Cookies.
Two years ago.............................I made Rice Pilaf.
Did you already know....................
-In 1971, the Cinderella Castle's restaurant was called King Stefan's Banquet Hall.
-In 1997, the restaurant's name was changed to Cinderella's Royal Table.
-There are over 40 coats of arms displayed in the restaurant.